Overview | |
|---|---|
Our comprehensive solution for reading breast imaging exams strives to reduce head movements, eye movements, and dictation while optimizing perception of changes over time. The system offers AI tools that automatically facilitate reporting of breast assessments and recommendations based on clinical history, reported findings, and the type of exam(s) reported. Mammogram and ultrasound exams can be combined for reporting purposes. |
Inflight Tab | |
|---|---|
Always use Auto-assignment. When exams are assigned to you, the current exam and relevant priors begin caching to the local hard drive of your computer as soon as you log into the system. Viewing is much faster when the current and relevant comparison exams are pre-cached. Your organization can define the comparison relevancy exam rules. | |
 | |
| |
 | |
Enter Preset name. | |
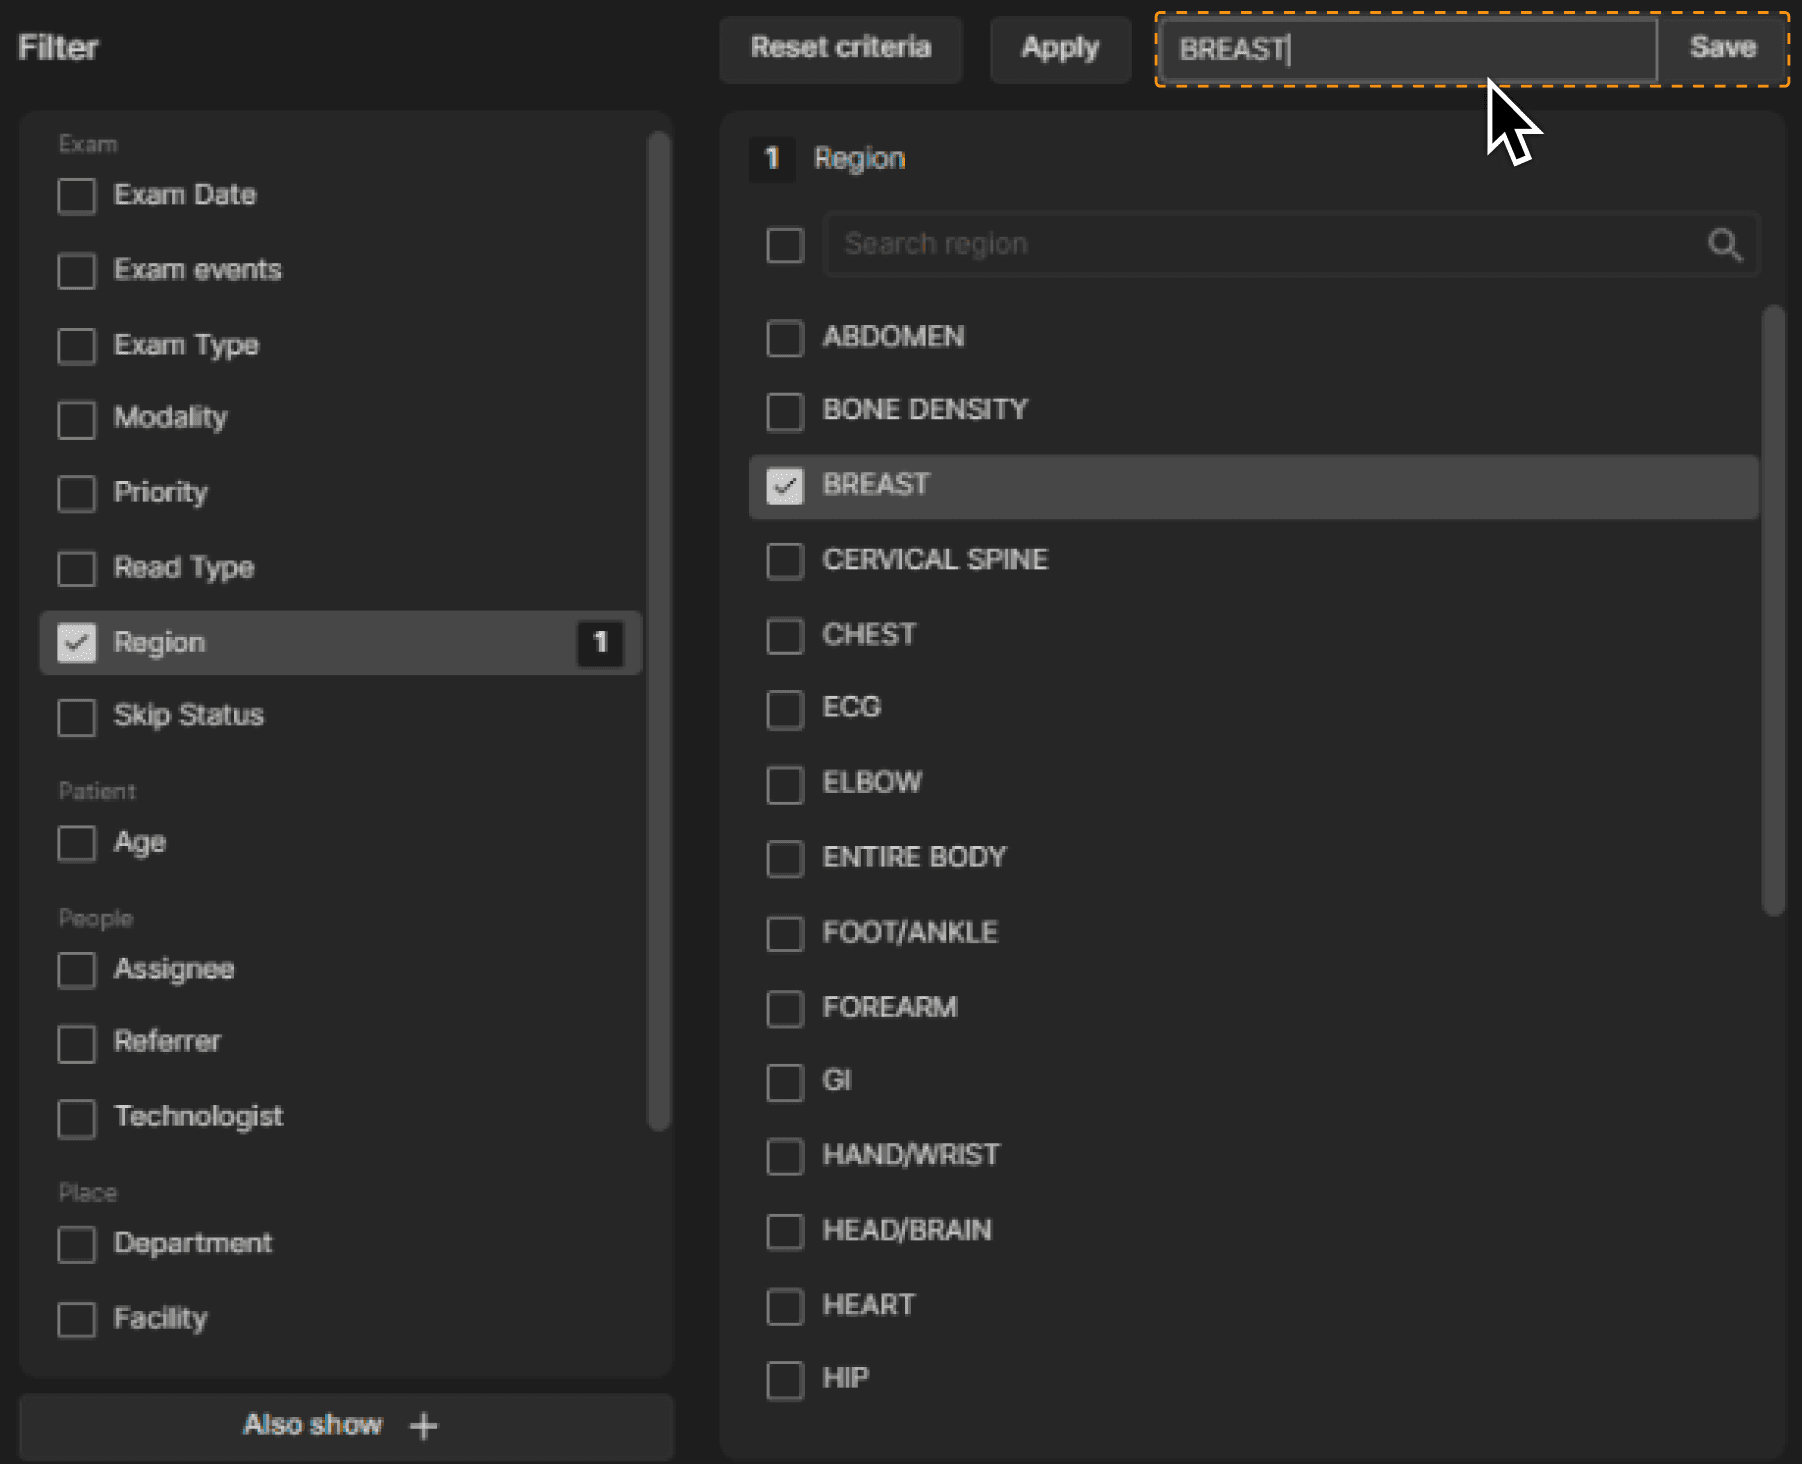 | |
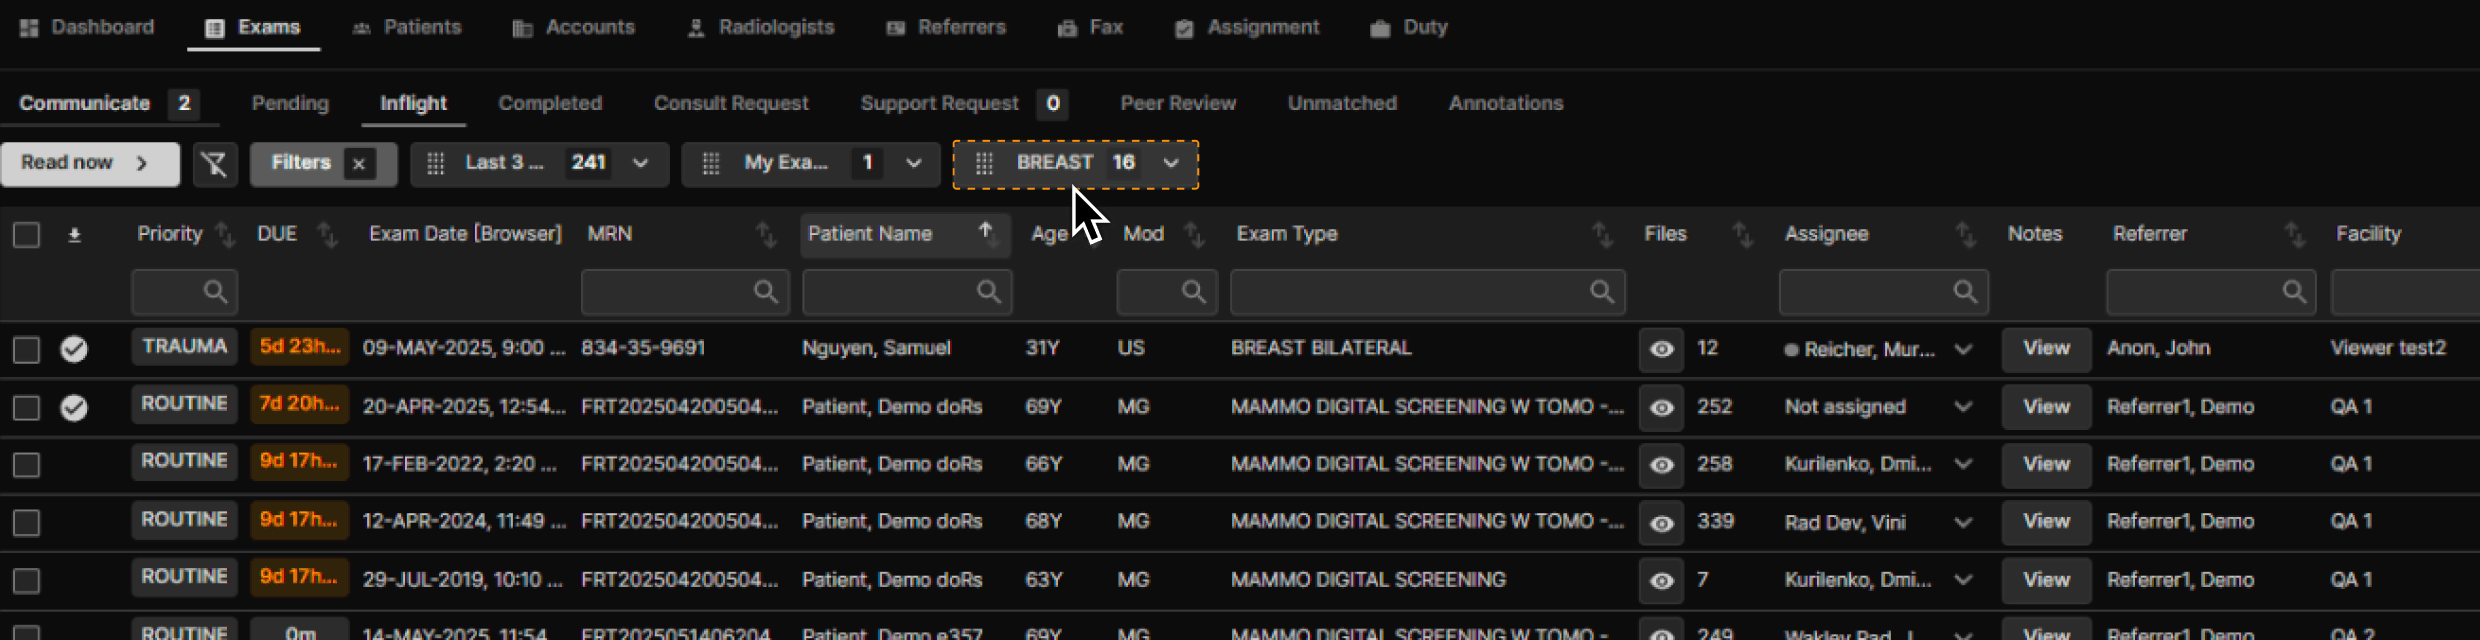
The Preset appears alongside other Presets near the top of the screen. | |
 | |
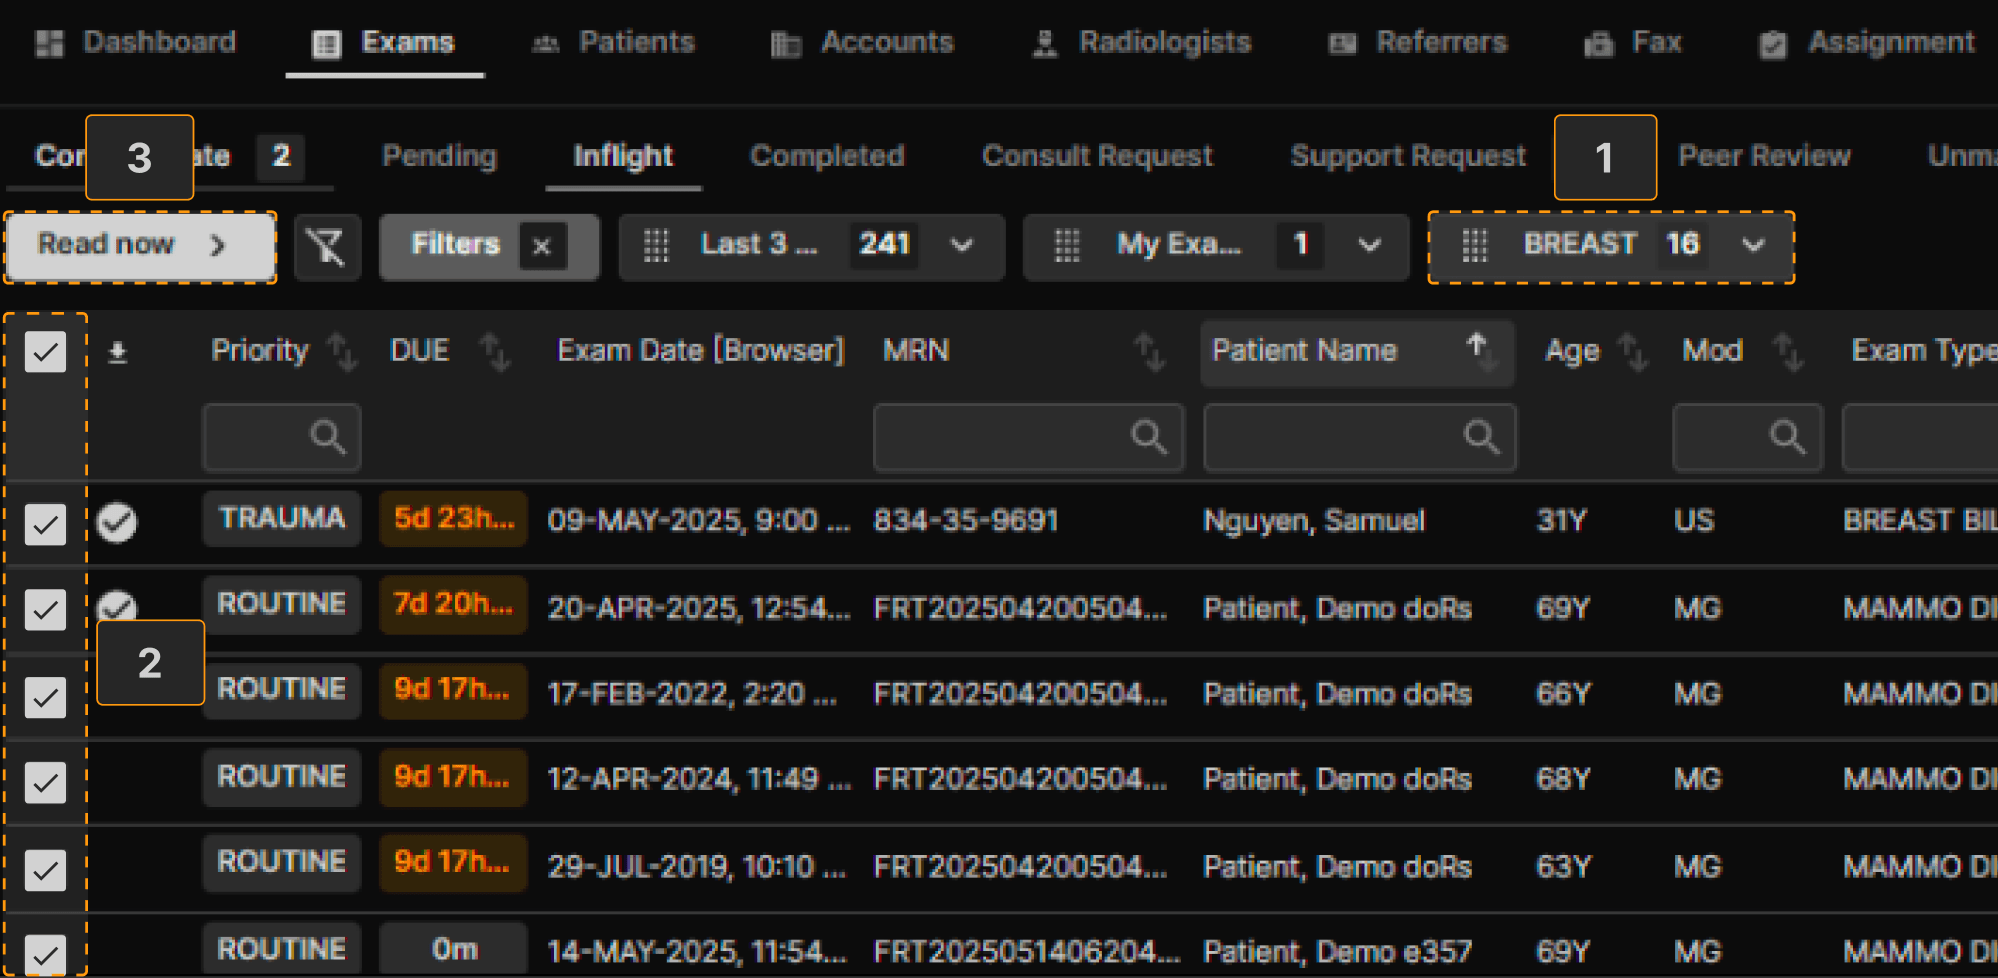
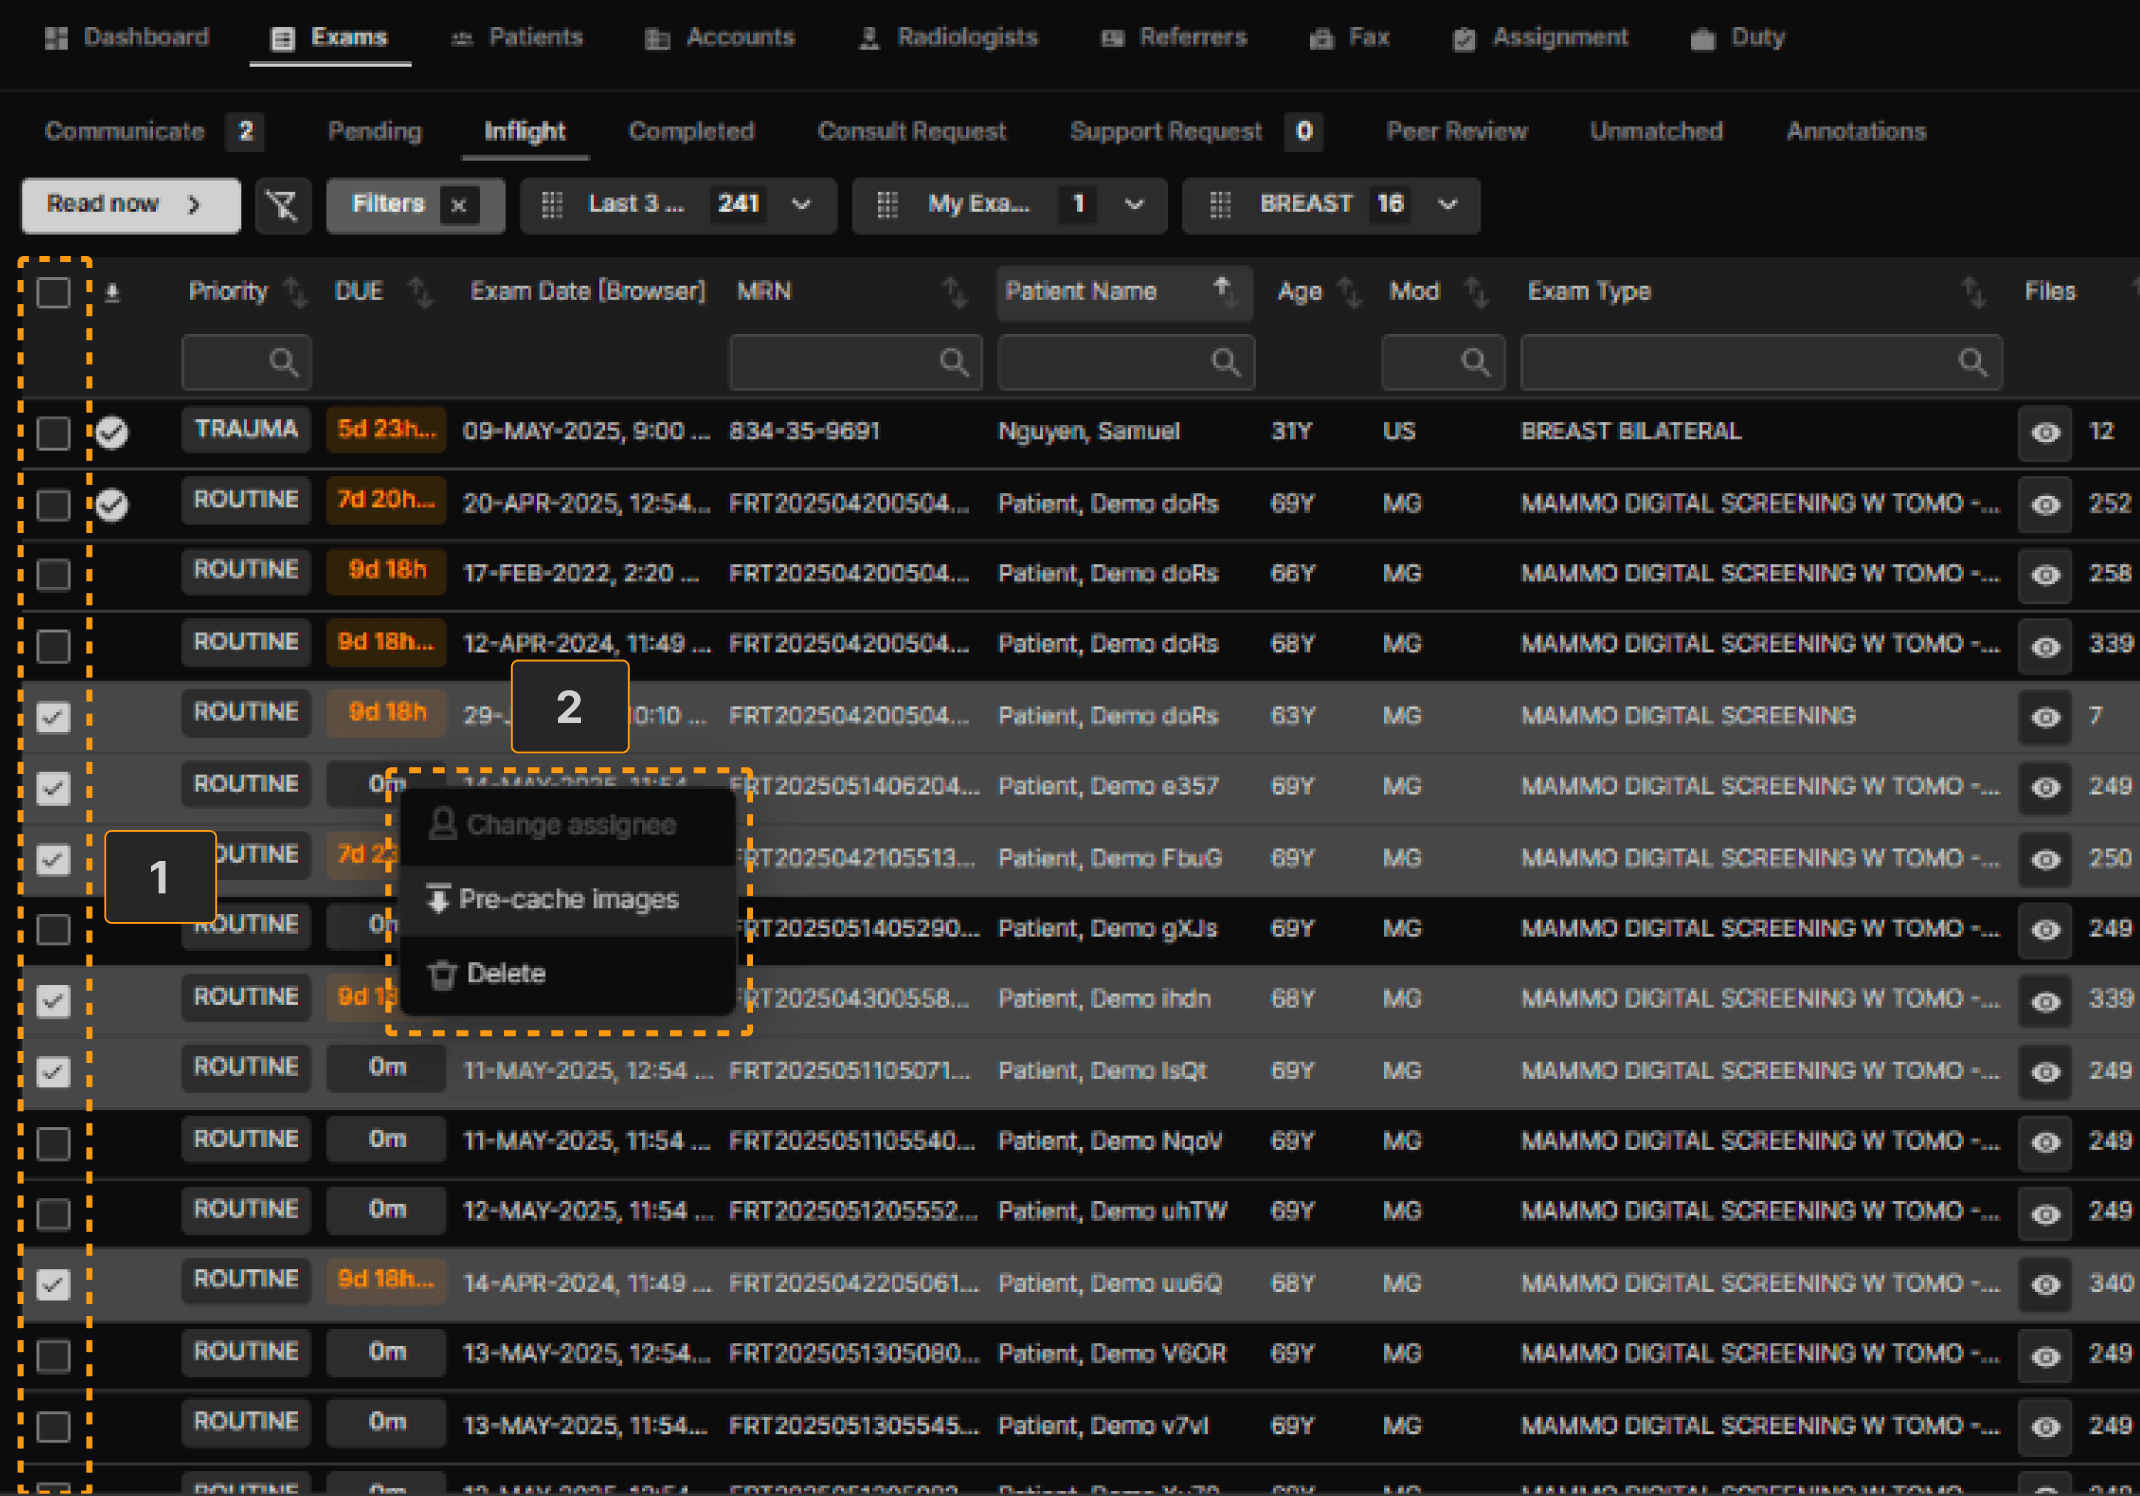
If exams have not been auto-assigned, there are several options for manual assignment: | |
Easiest:
Note: If the first exam was not pre-cached, it may take several seconds to display. All other selected exams and relevant comparisons will start precaching and the exams will be assigned to you. | |
 | |
Other Option:
| |
 |
The Reporting Screen | |
|---|---|
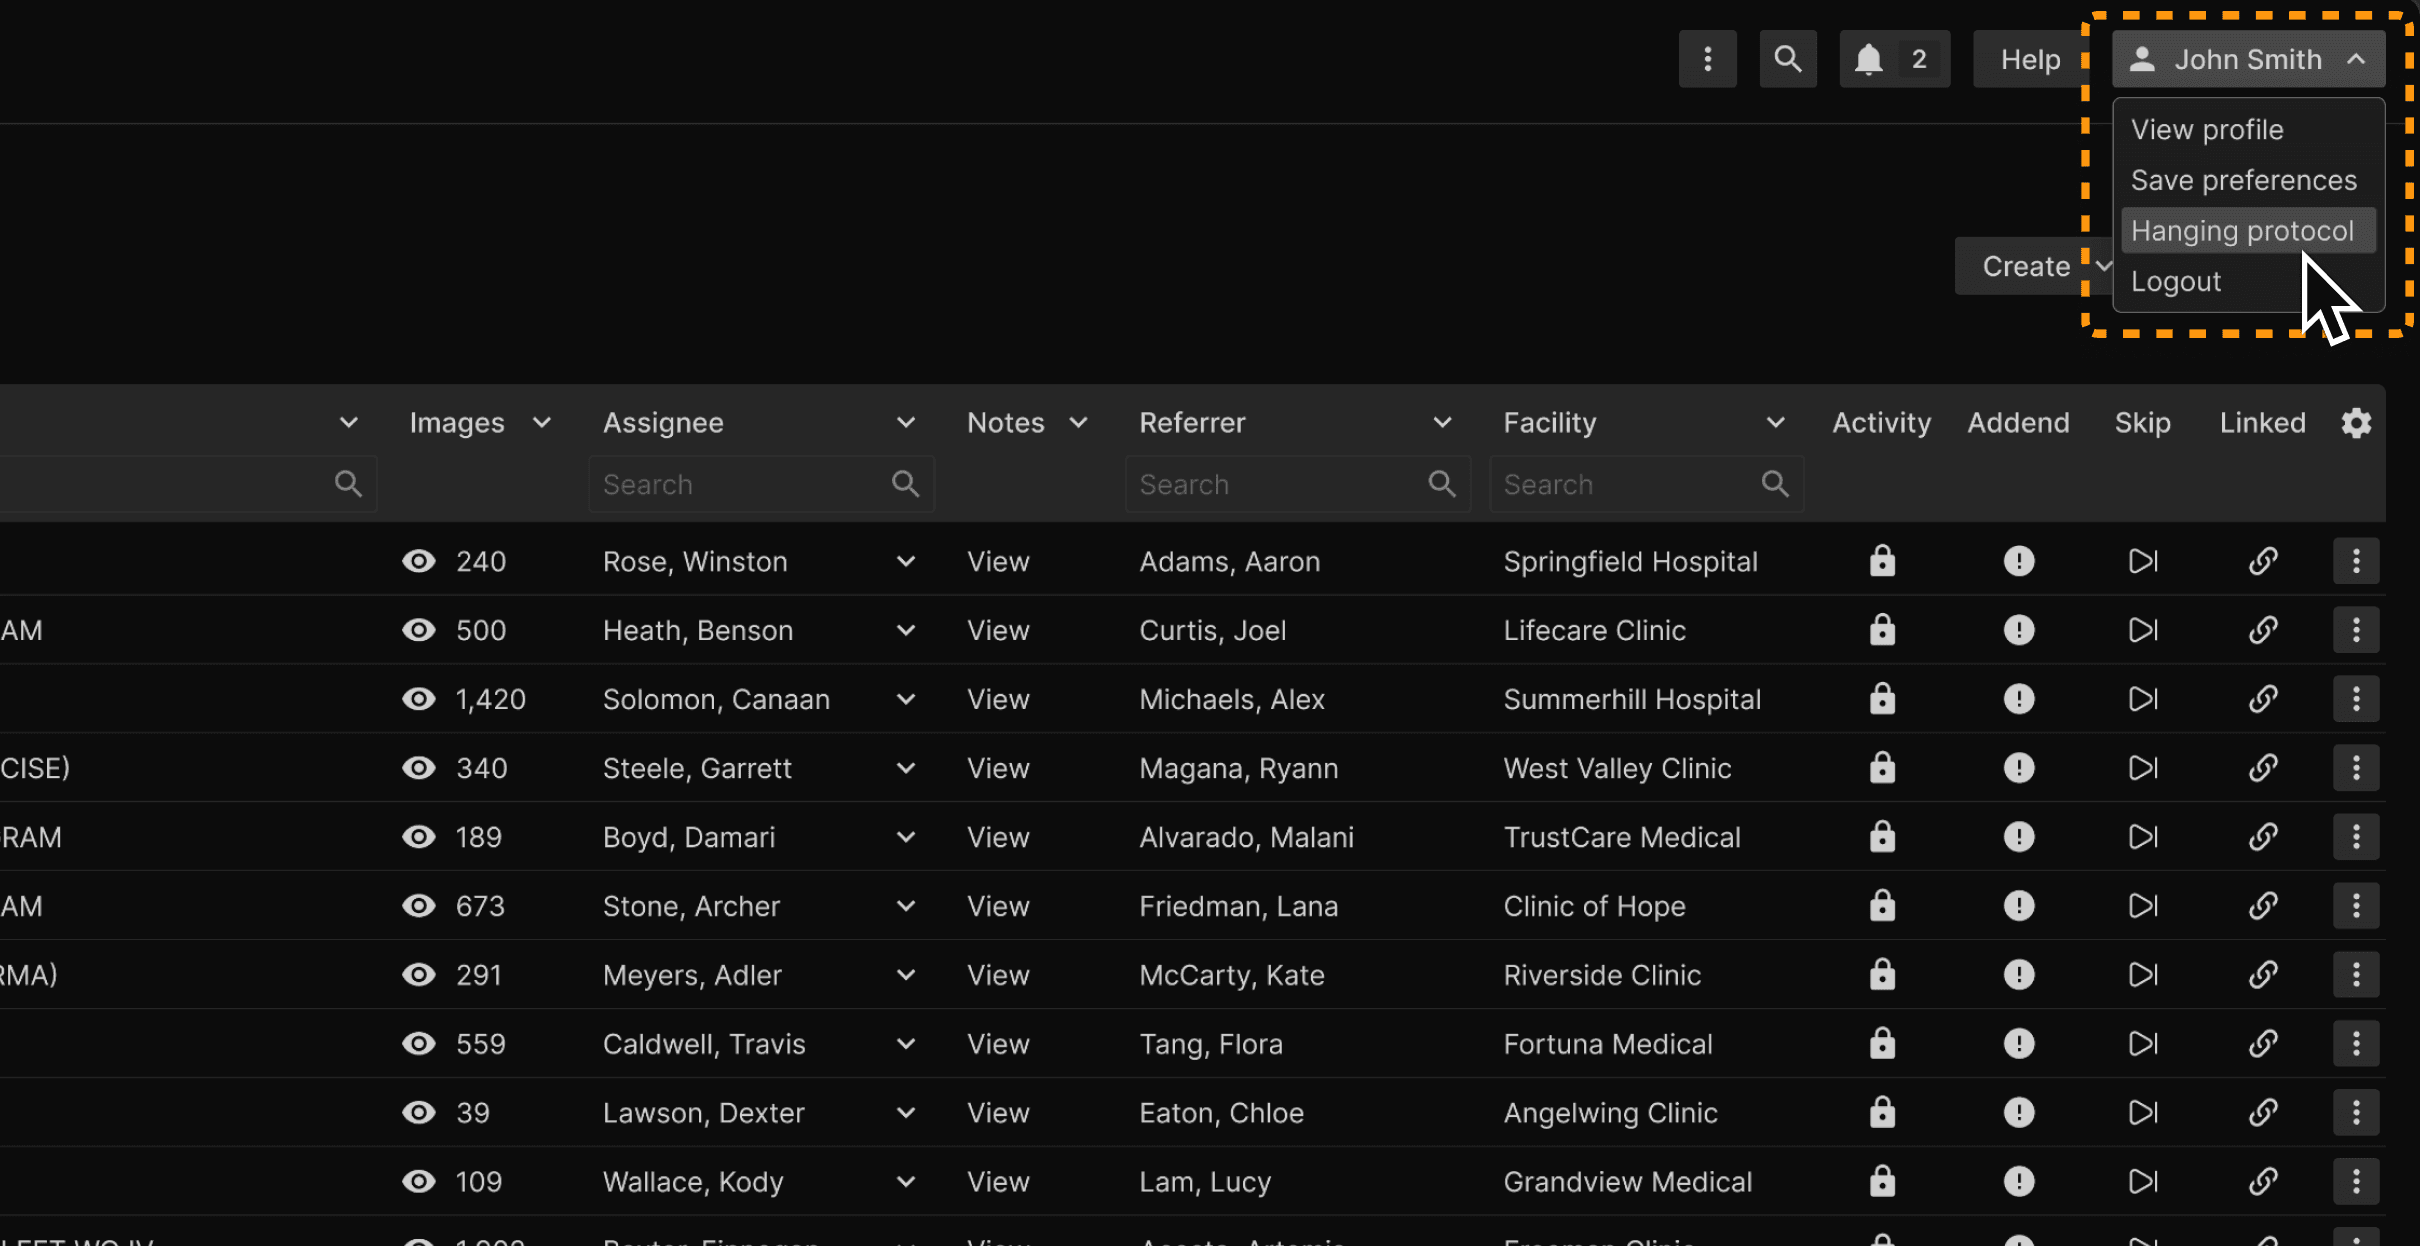
The top row of the Reporting Screen is called the Top Ribbon. It displays information about the current exam, Notifications, HELP, and your Name (with a dropdown menu of addition options) | |
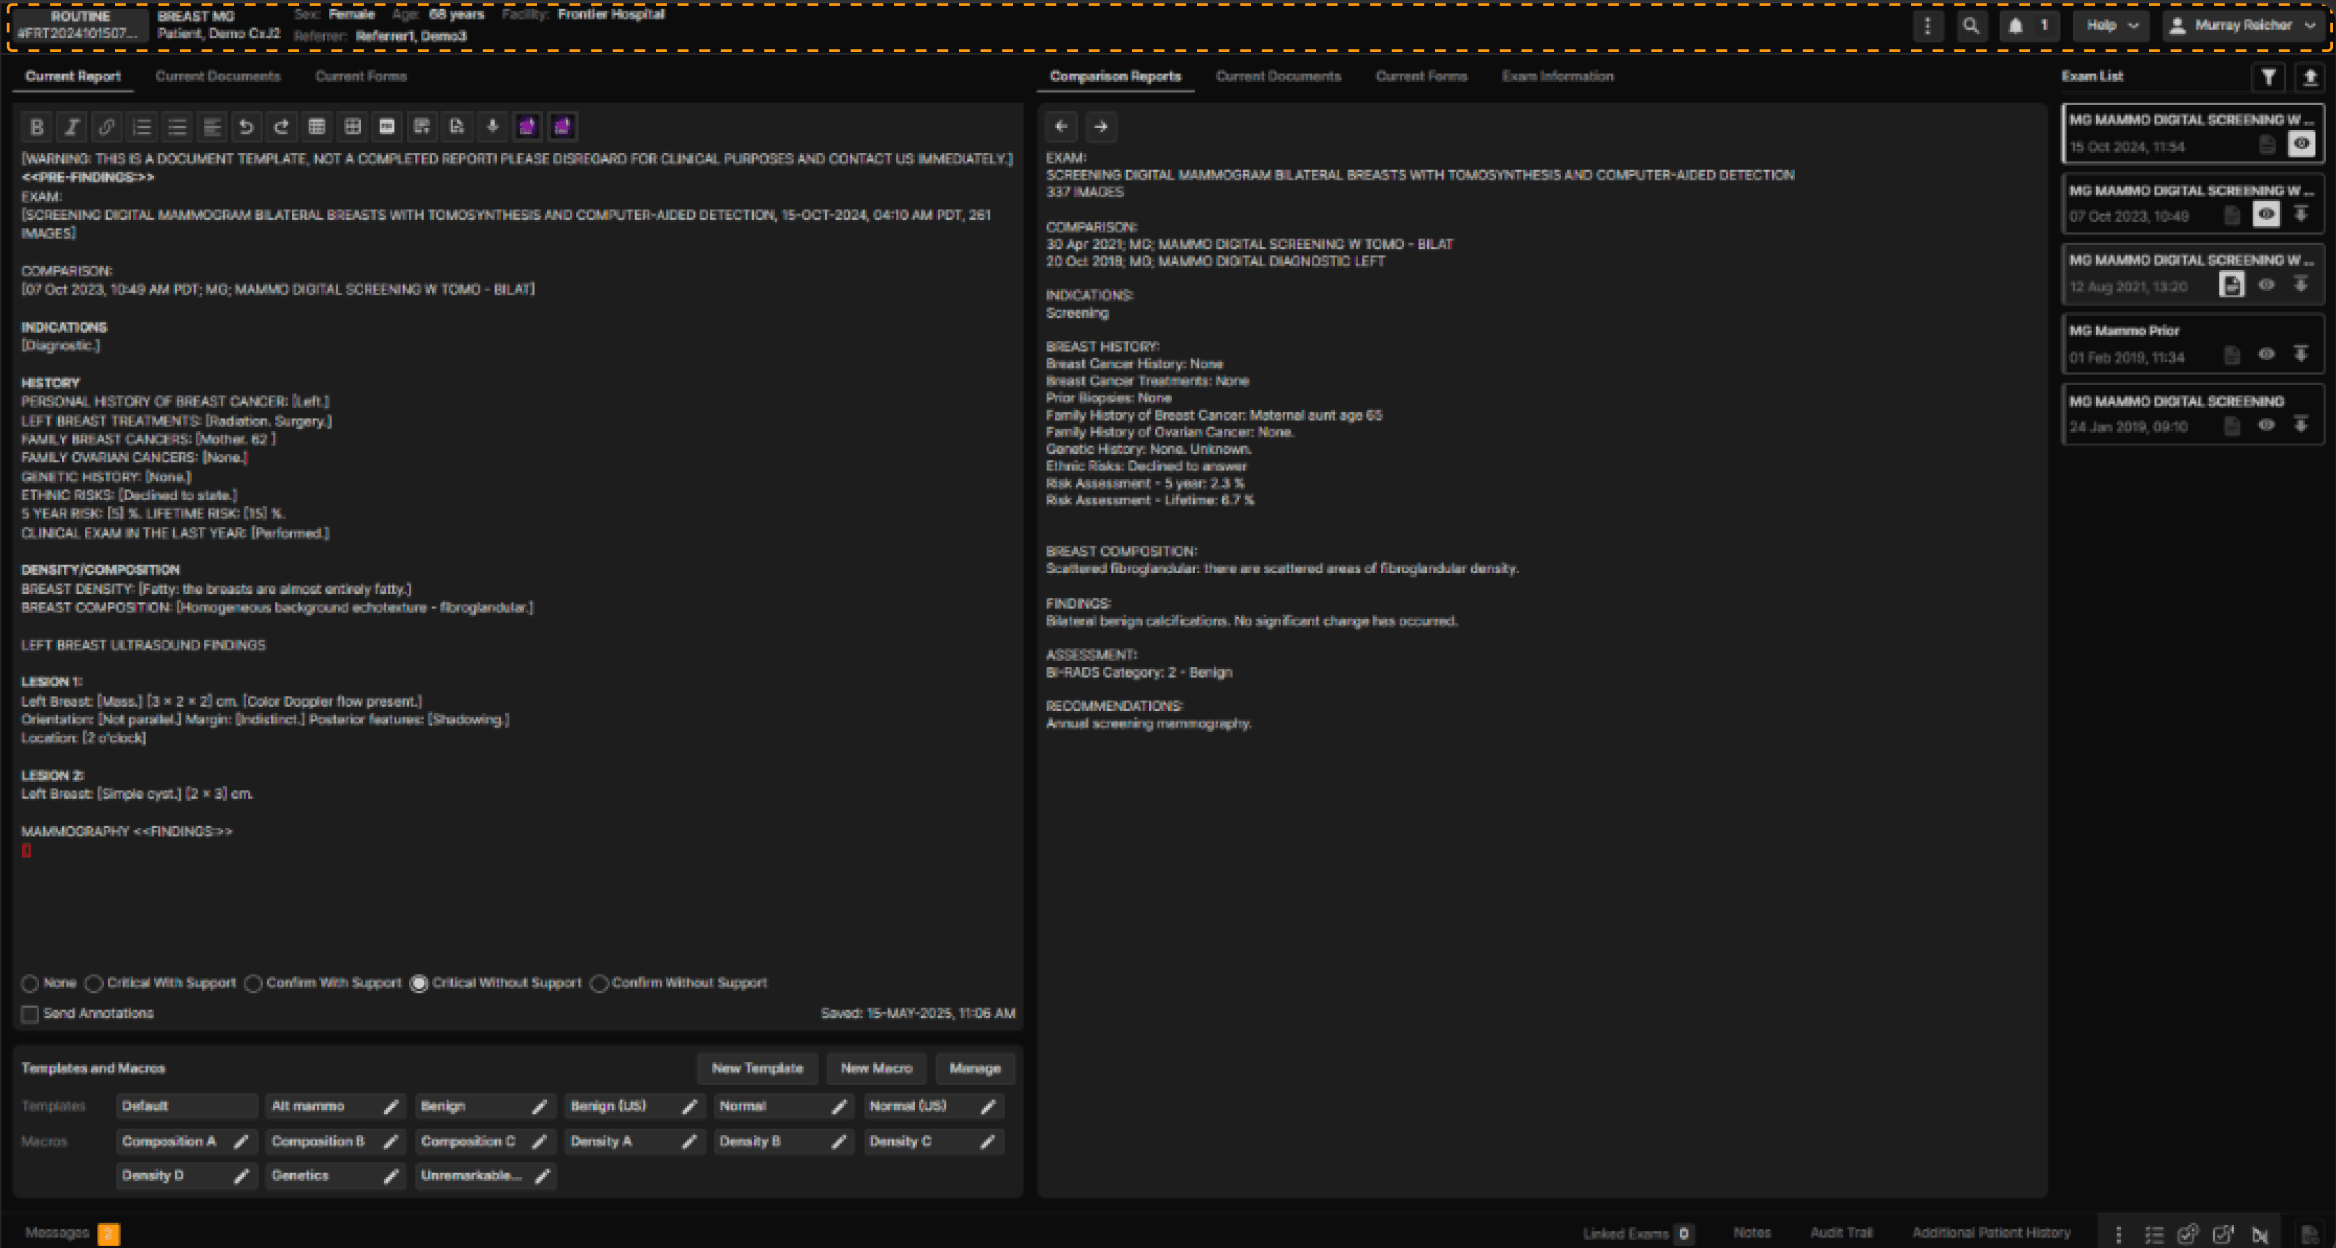 | |
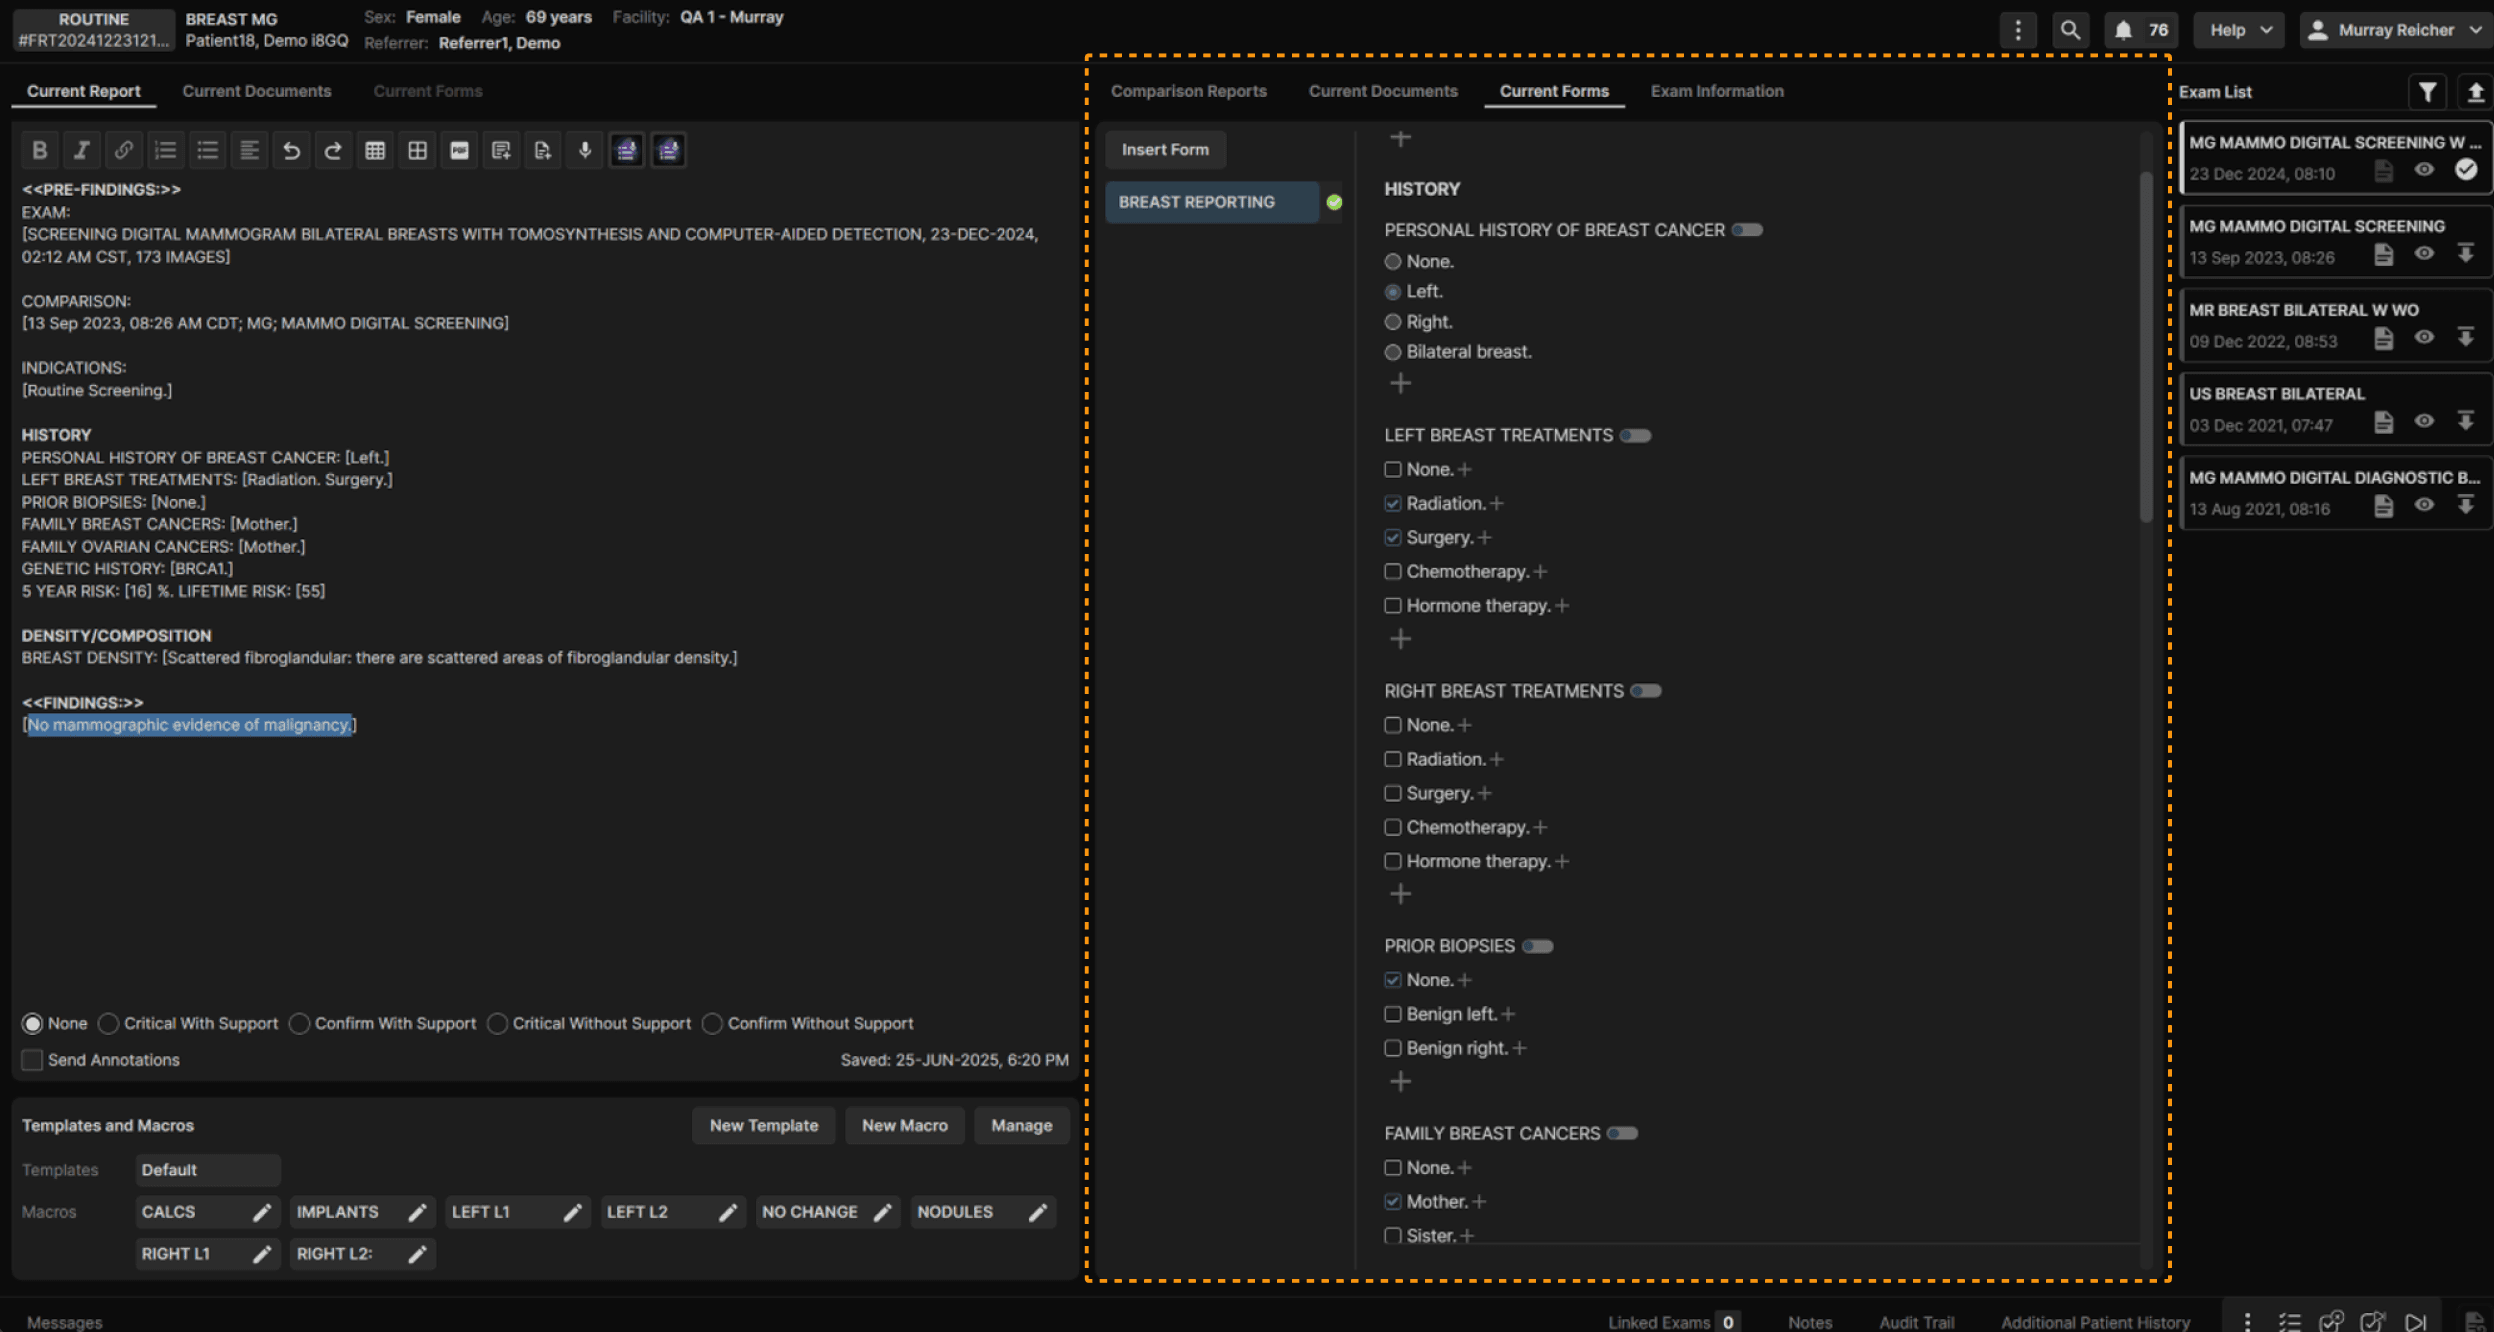
The Reporting Screen contains:
| |
 | |
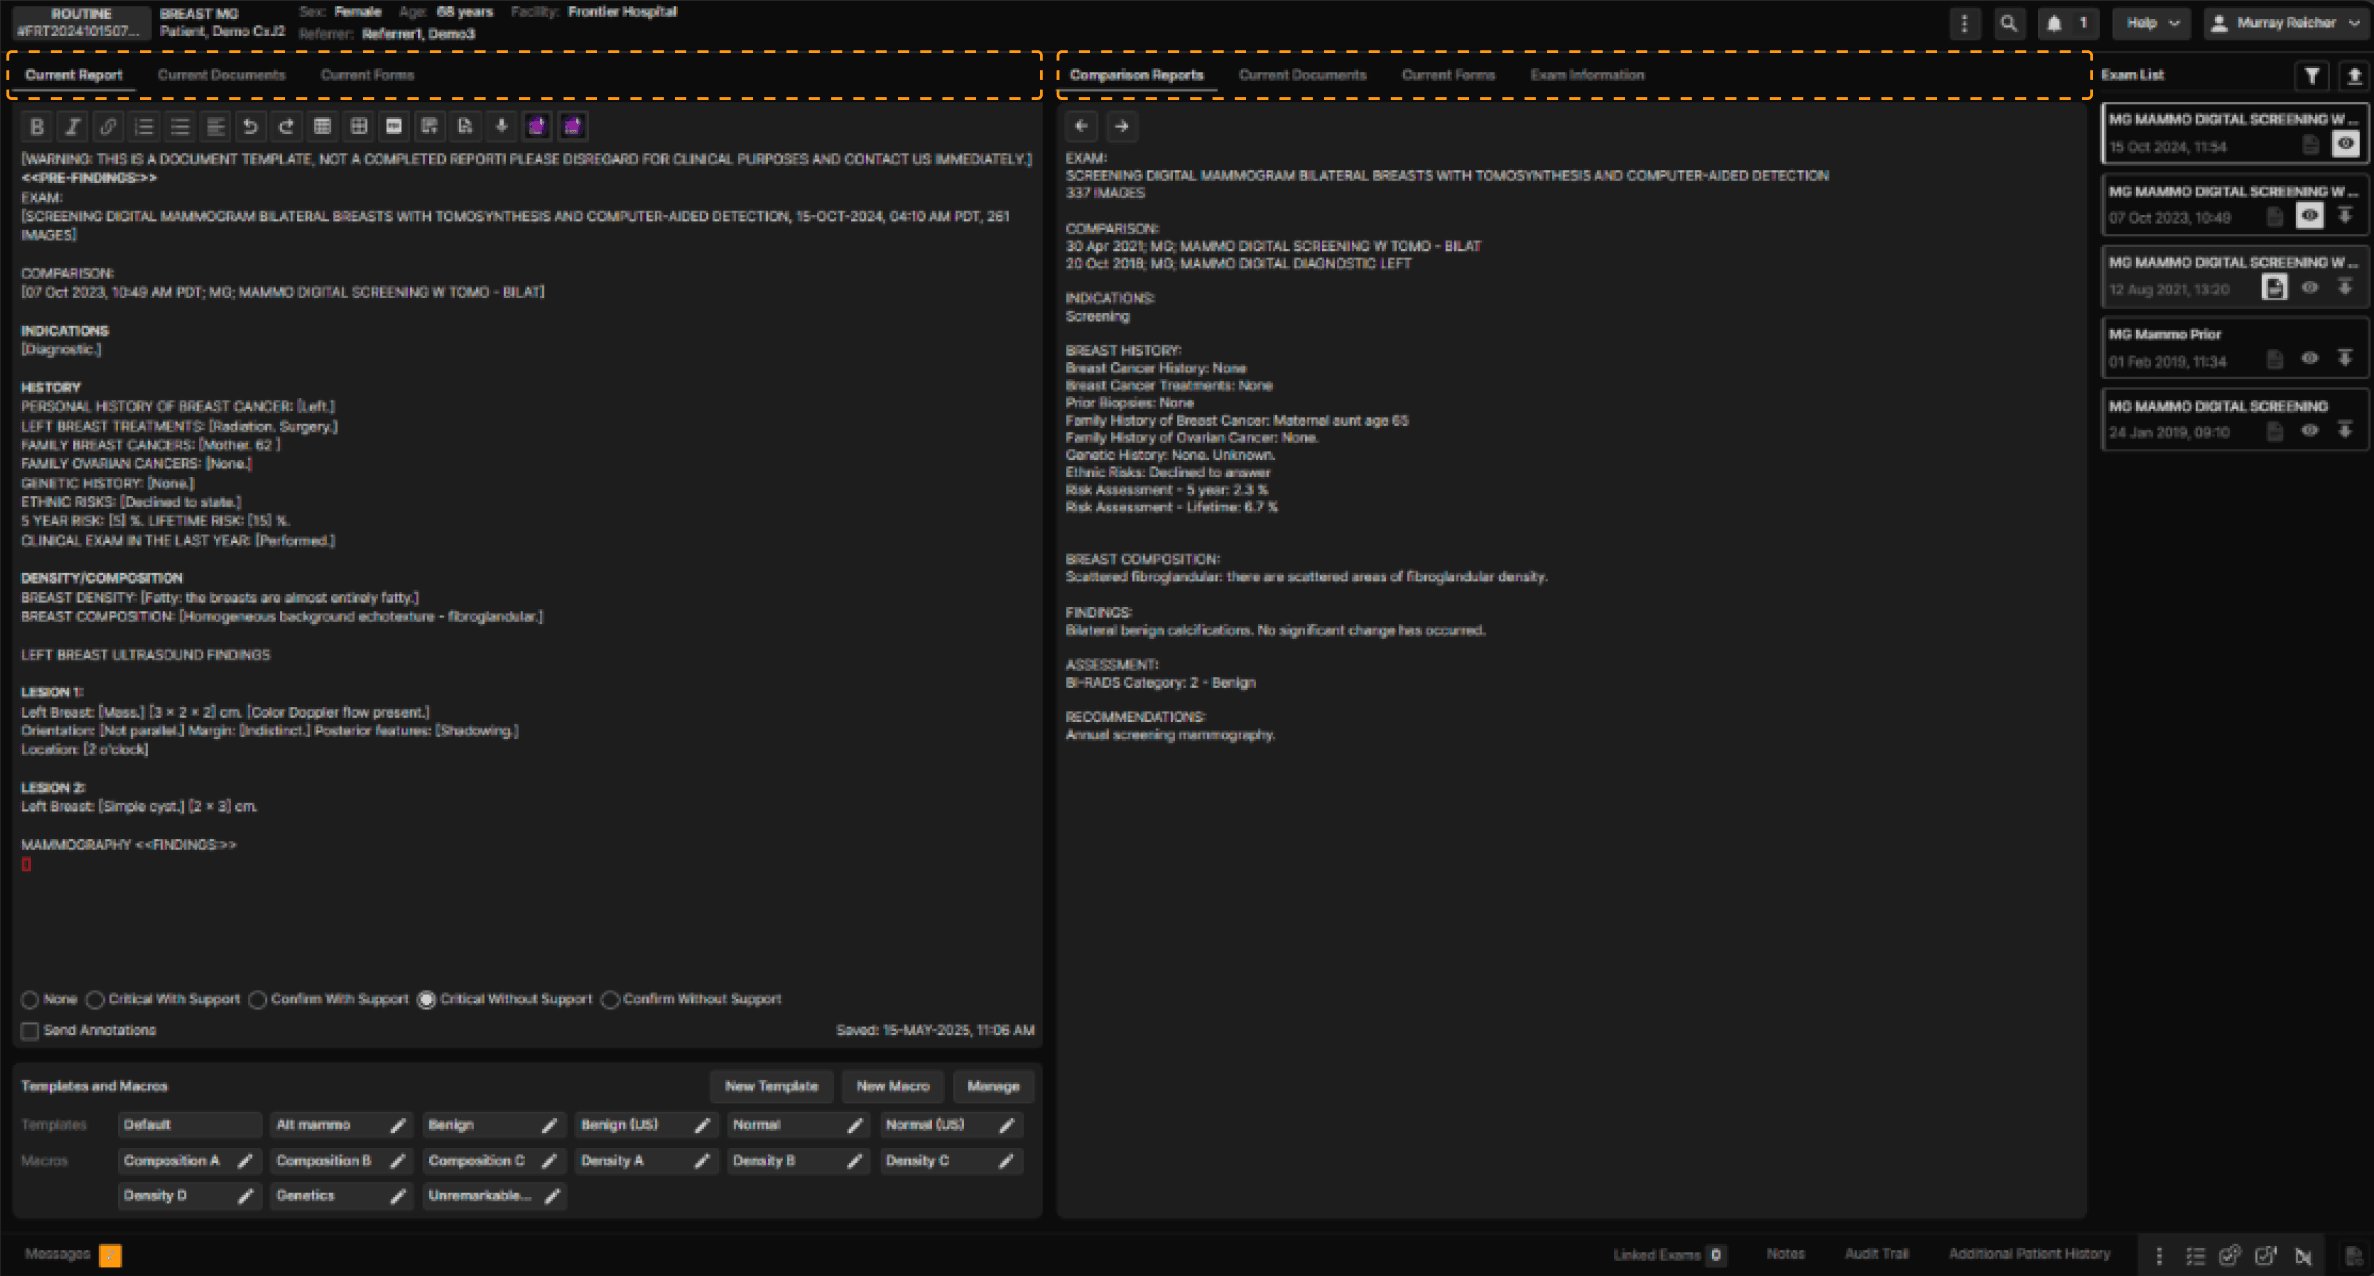
Tabs at the top of the left and right panels provide options to view Forms, Documents, and Exam Information. | |
 | |
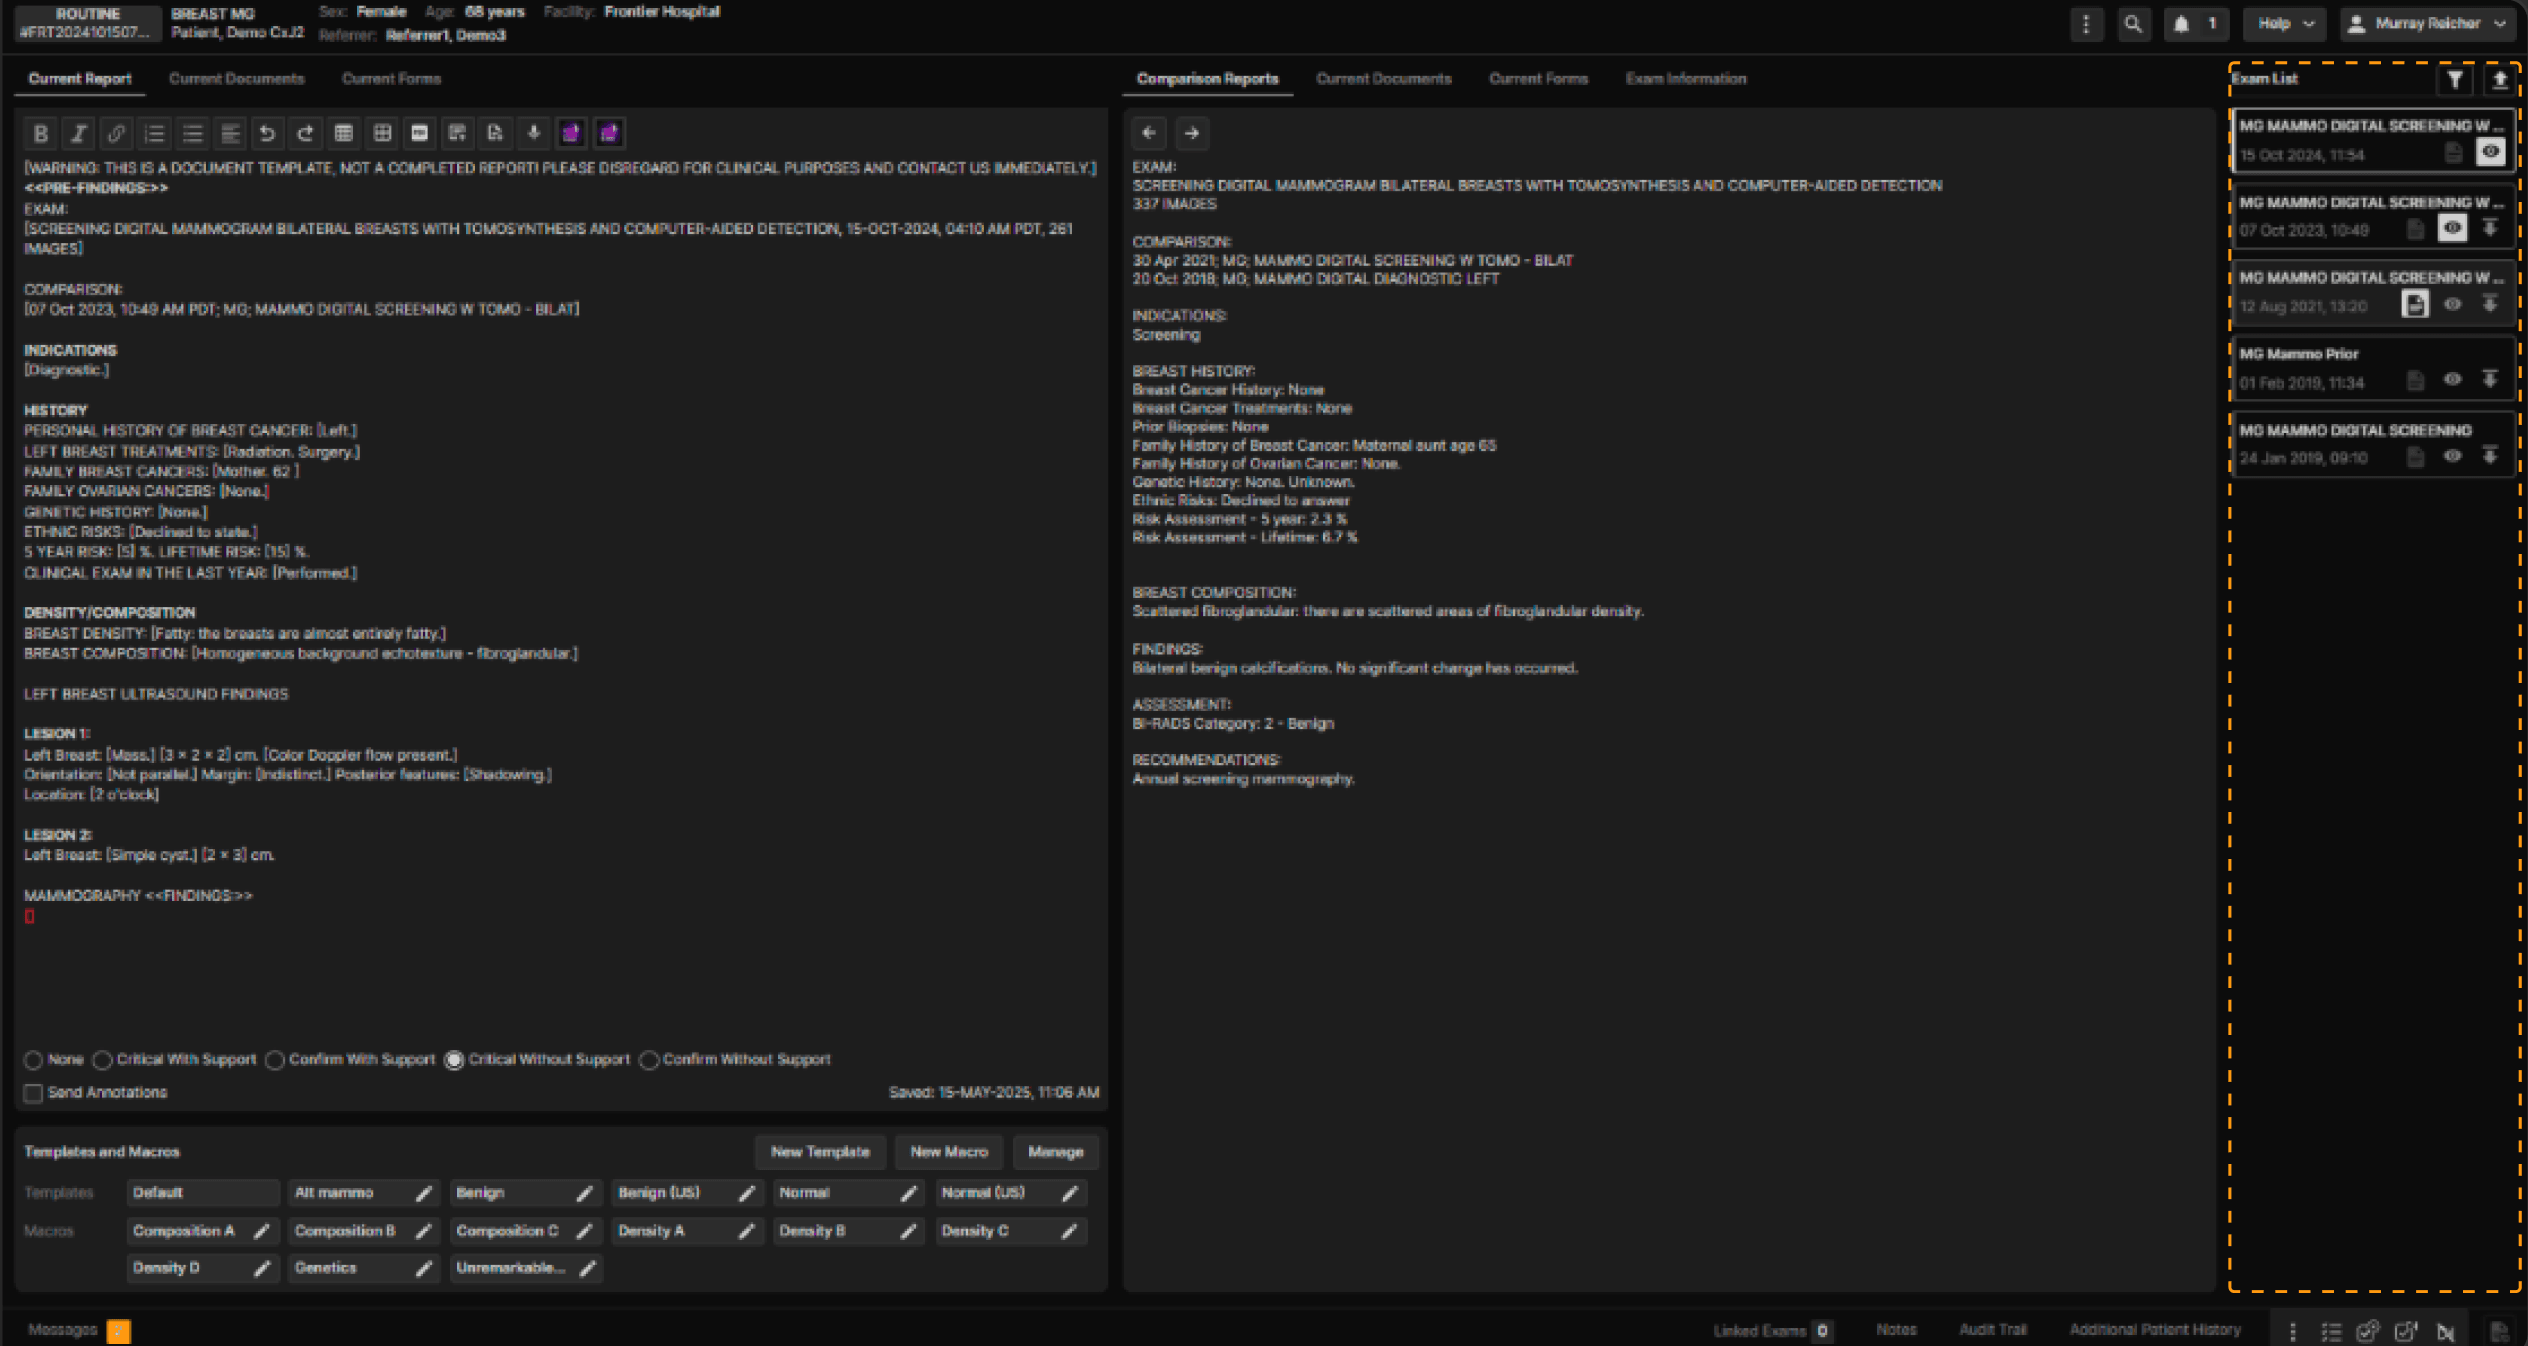
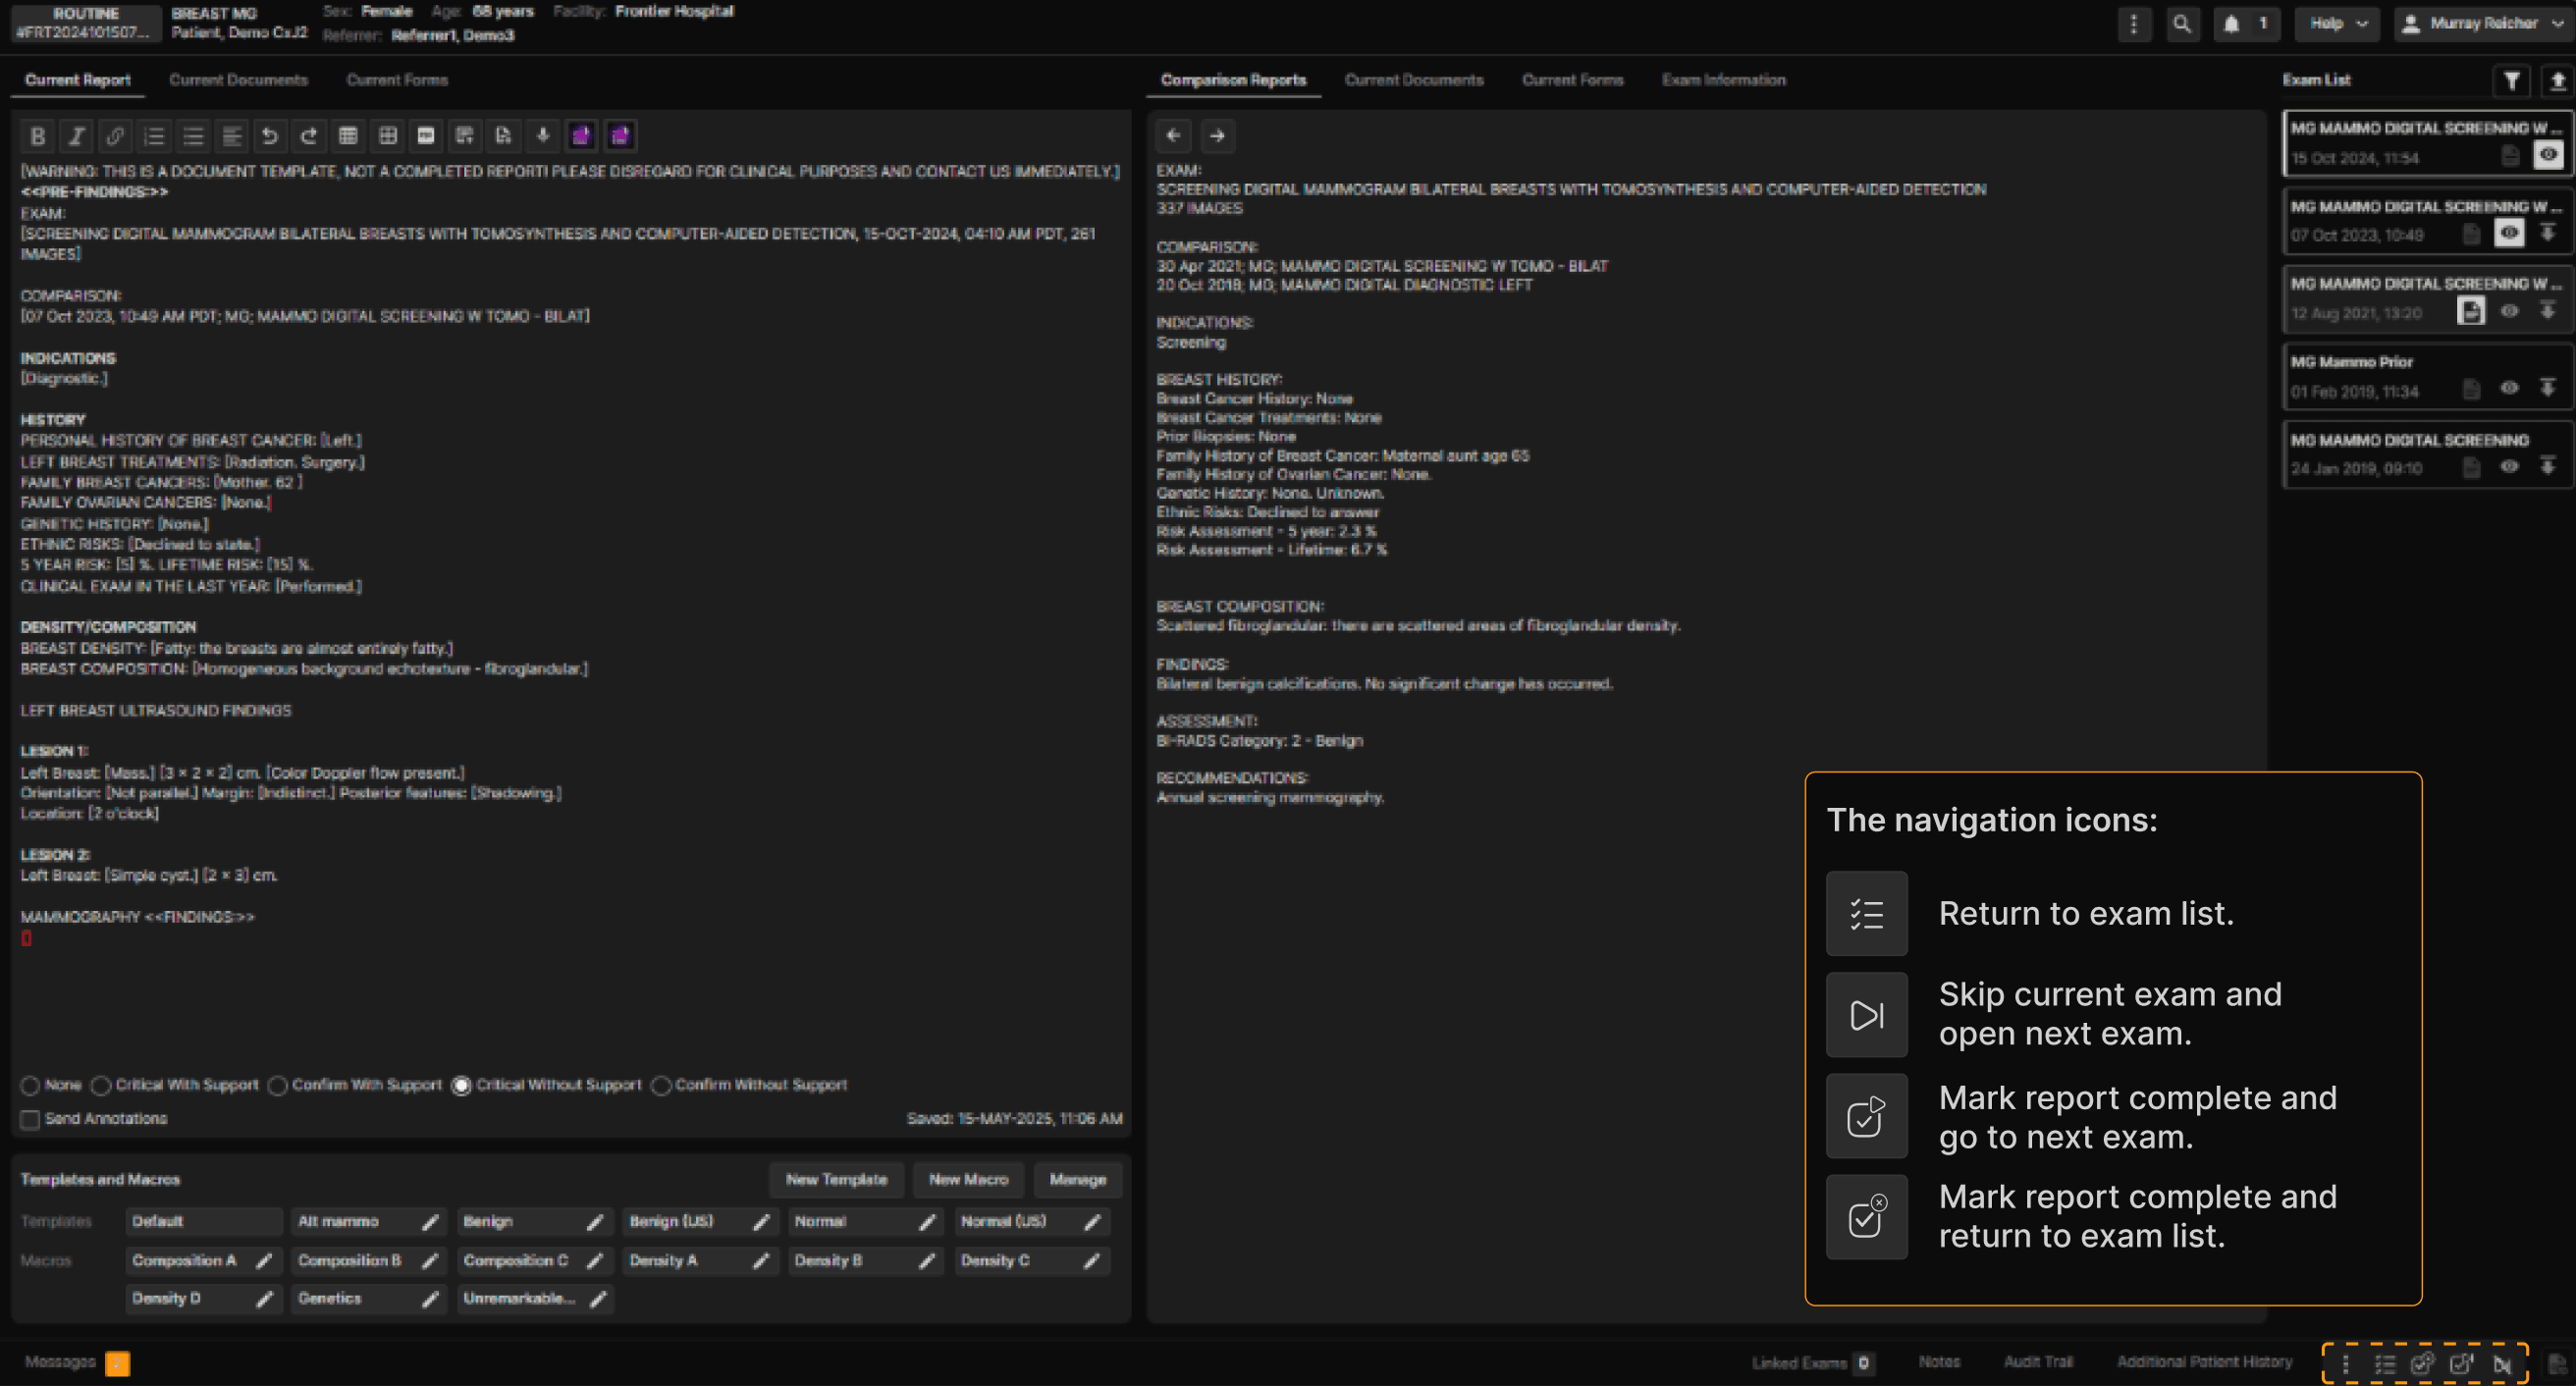
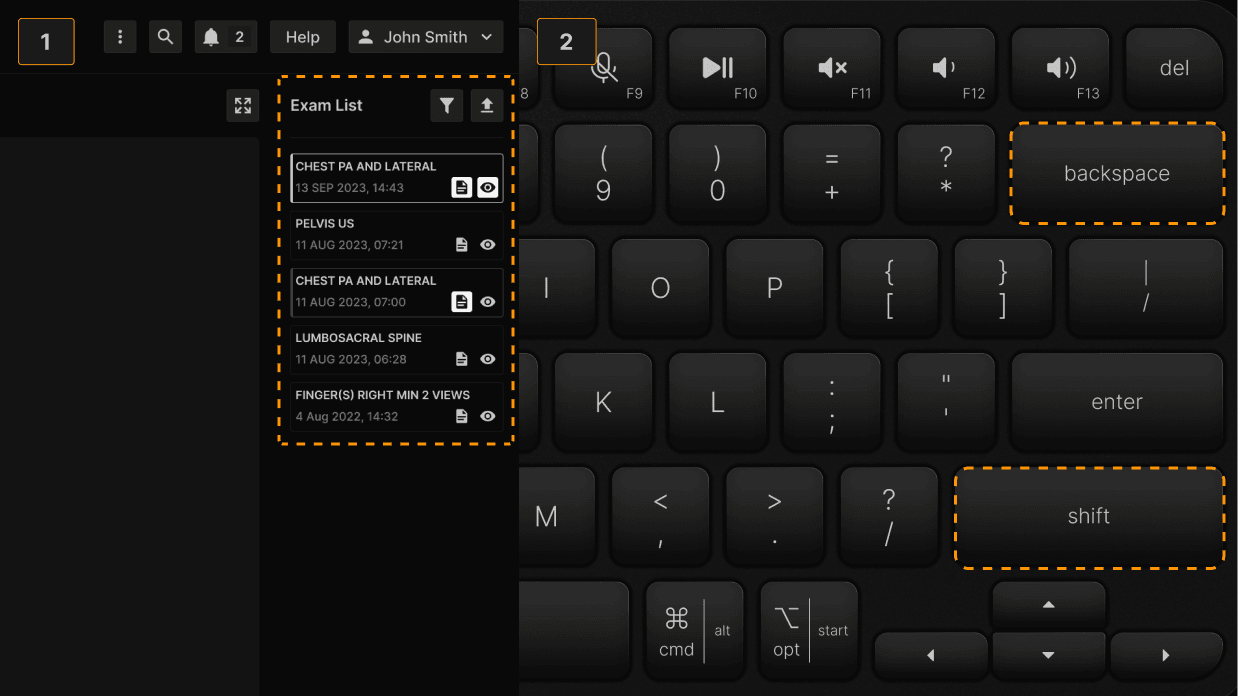
In the Exam List, the current exam is highlighted by a bright rectangular border. Relevant prior exams show a vertical gray bar at the left margin of each item. Click the report icon to view a report, the eye icon to view images or anywhere in the rectangle surrounding an item to view both the report and images. | |
 | |
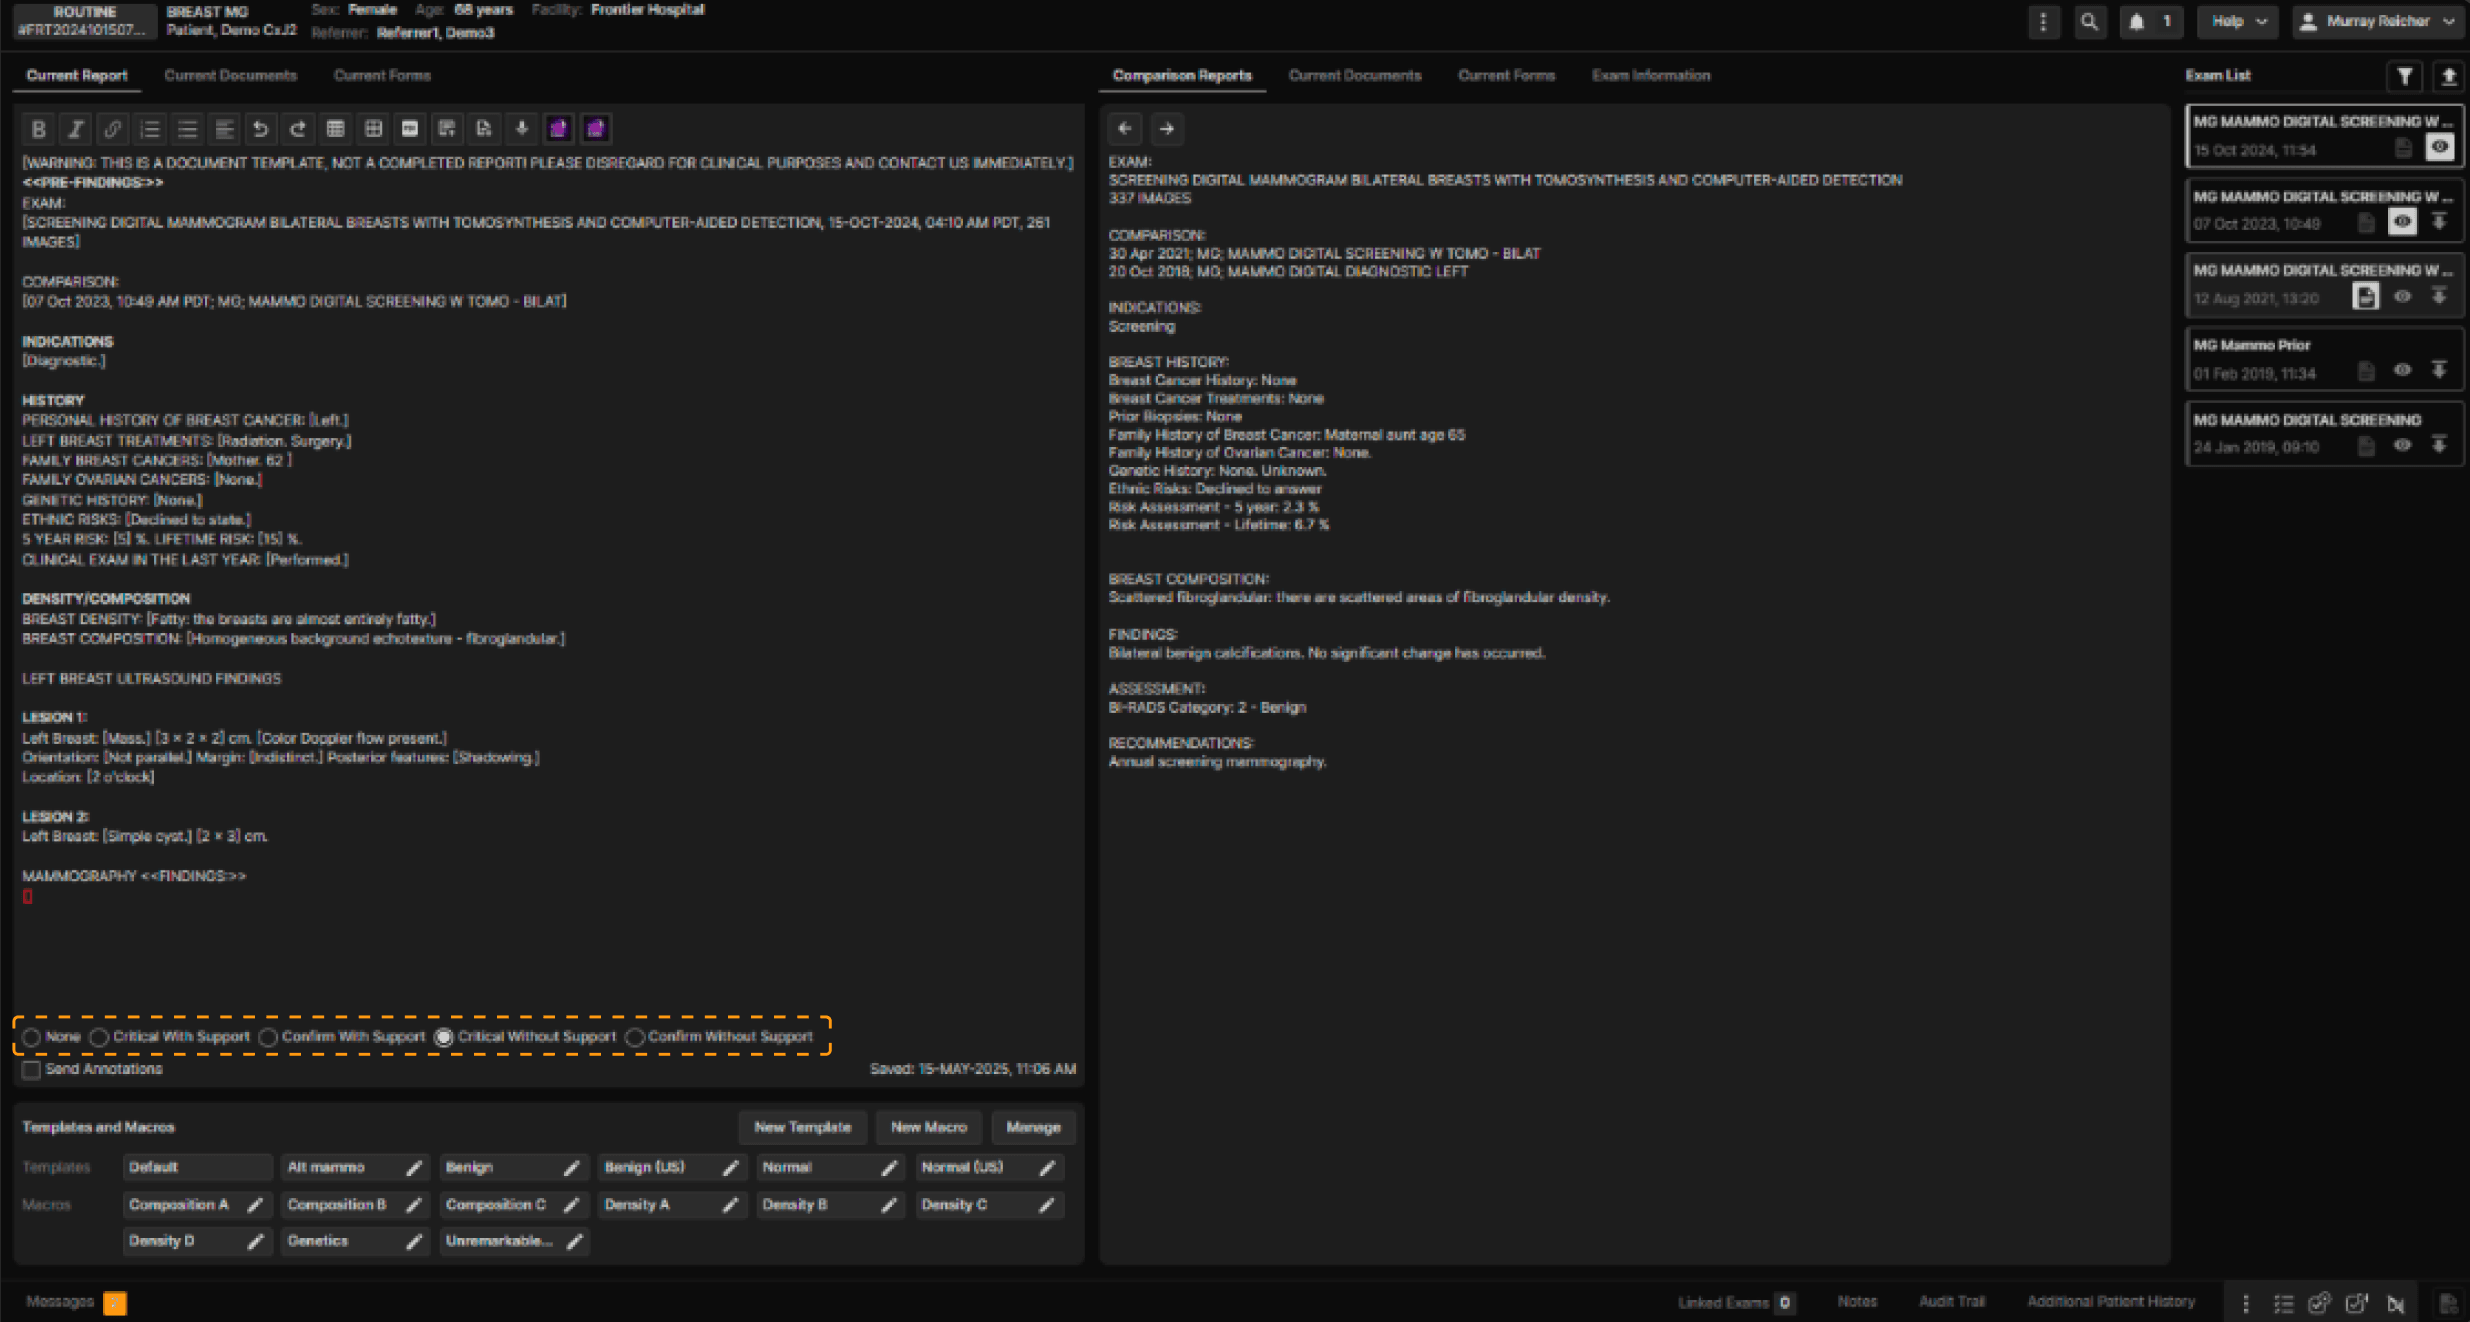
At the bottom of the current report, a series of radio buttons help you manage exams that contain Critical Results or require Confirmation of report receipt. | |
 | |
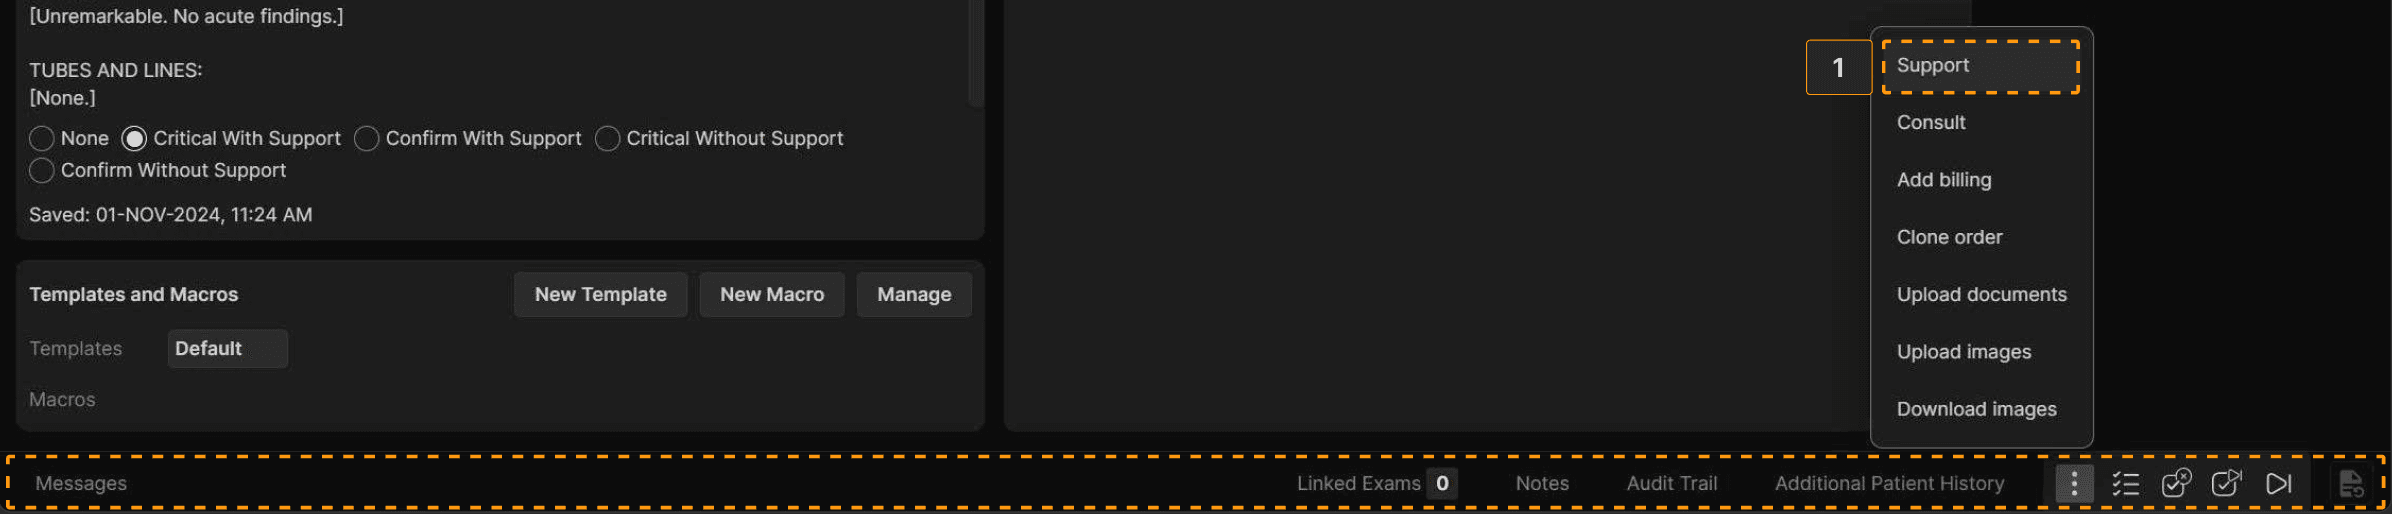
The Bottom Ribbon shows Messaging, Linked Exams, Notes, Audit Trail, Additional Patient History, and multiple icons. The three dots icon (1) accesses a menu of useful functions. Click Support from the menu to get help with exams that have problems which prevent your interpretation. | |
 | |
The navigation icons: | |
 |
Reporting Breast Imaging Exams | |
|---|---|
When the reporting screen appears, the default mammogram template is displayed in the left panel. If present, the most recent relevant report appears in the right panel. | |
 | |
TIP: If you customarily combine MG and breast US reports, train your staff to link such exams before you start reading. When the reading physician must do the linking, use the Linked Exams button in the Bottom Ribbon. It is best to start with the MG exam and link the US exam. | |
 | |
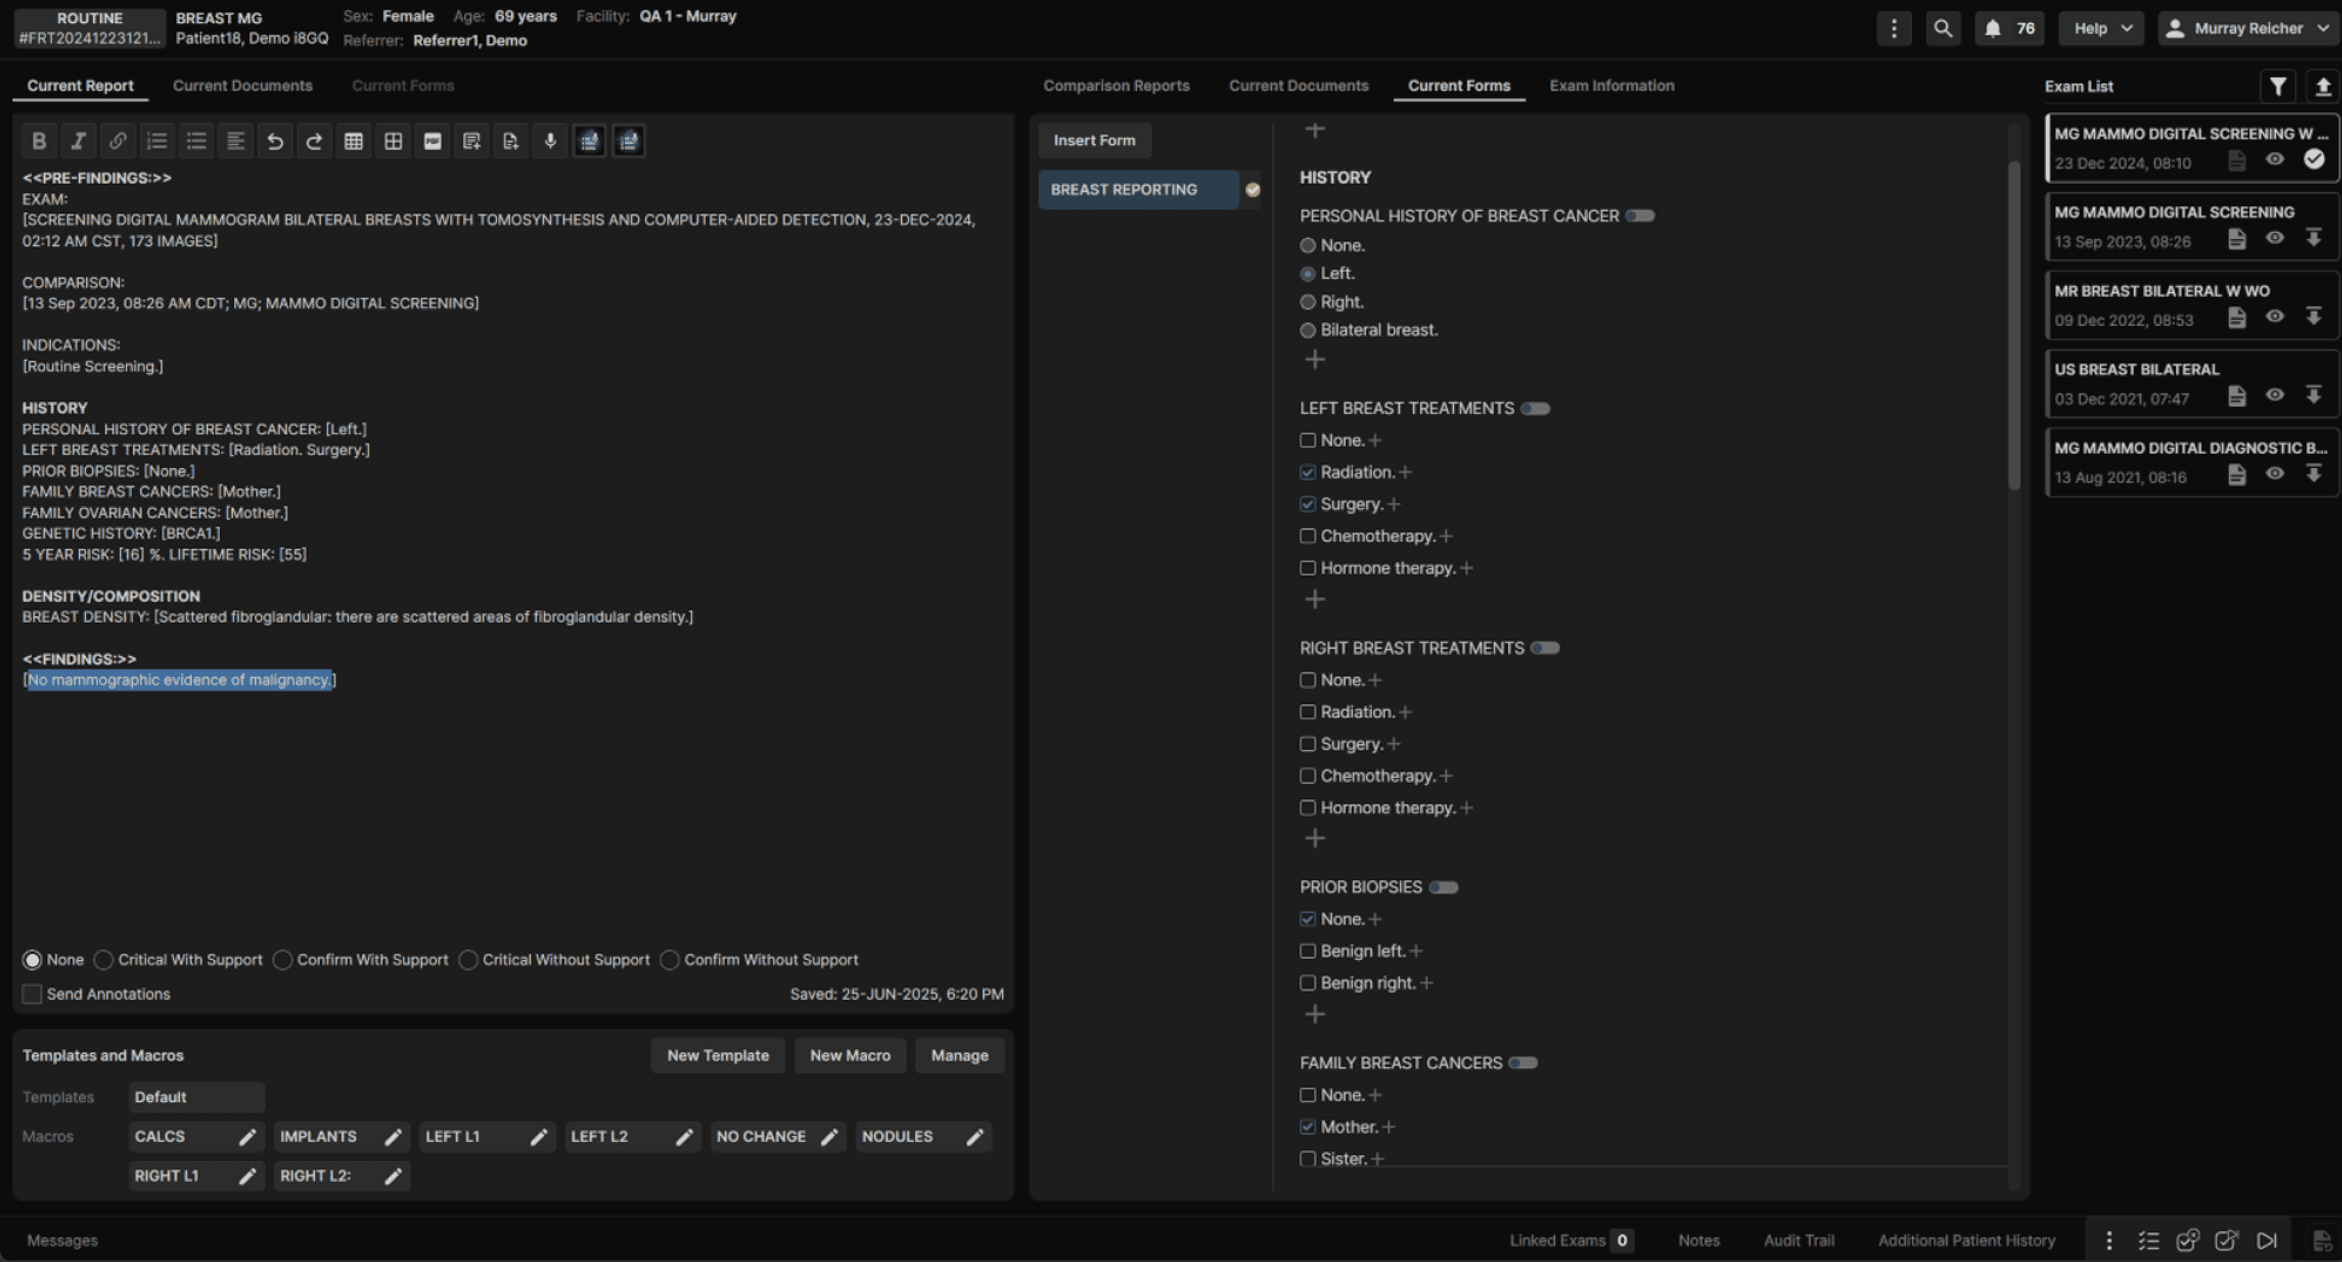
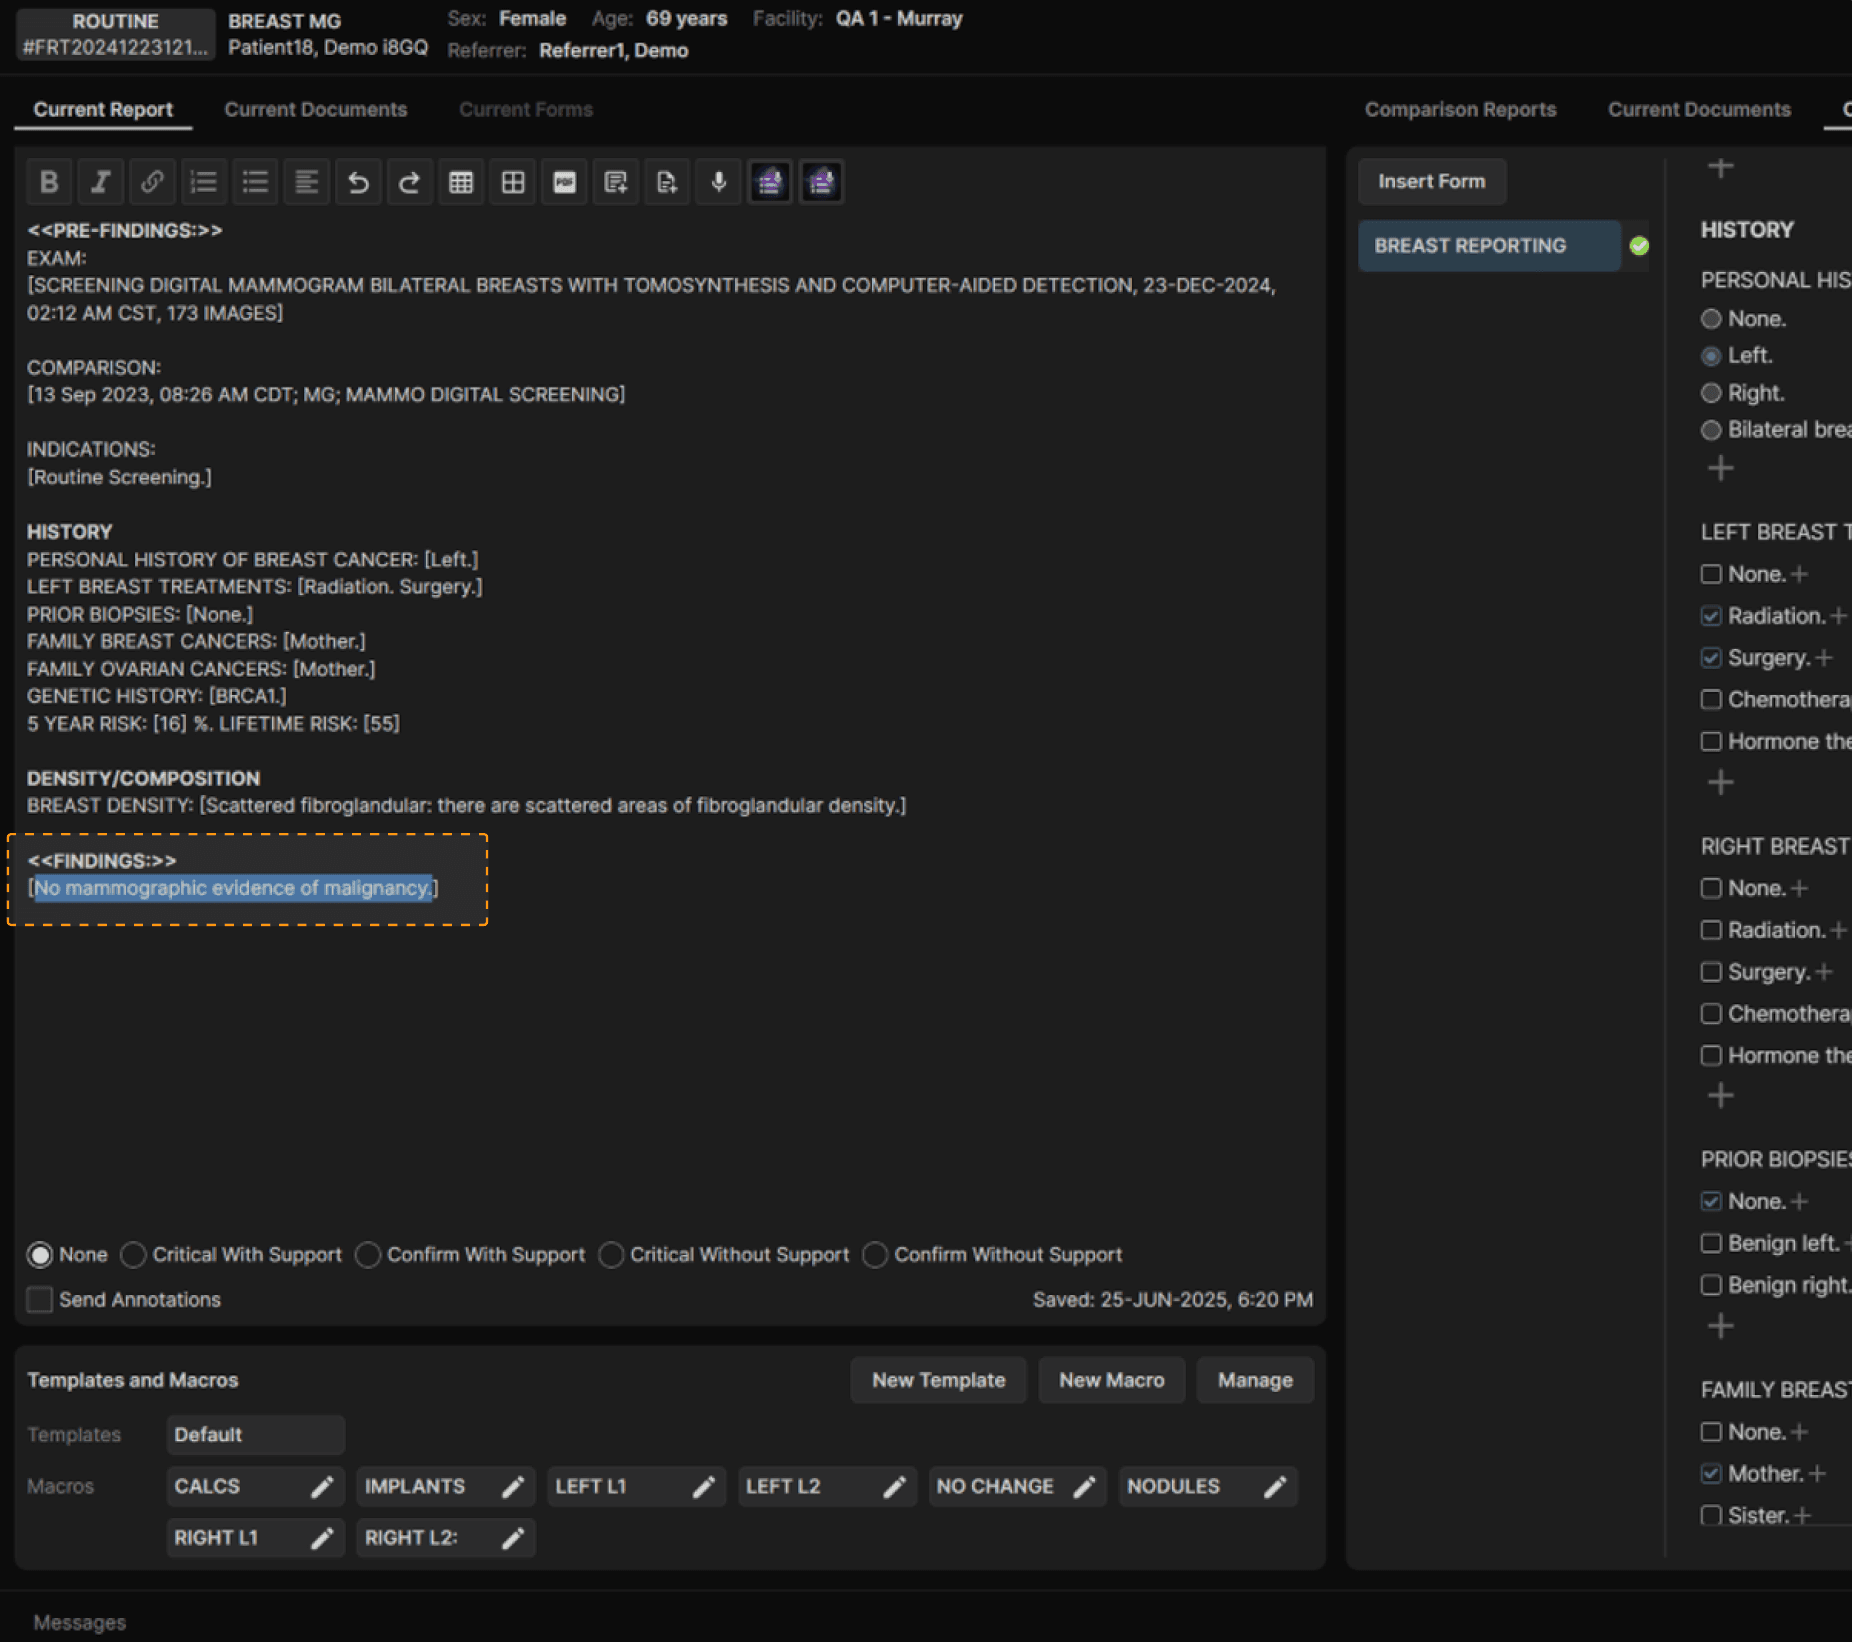
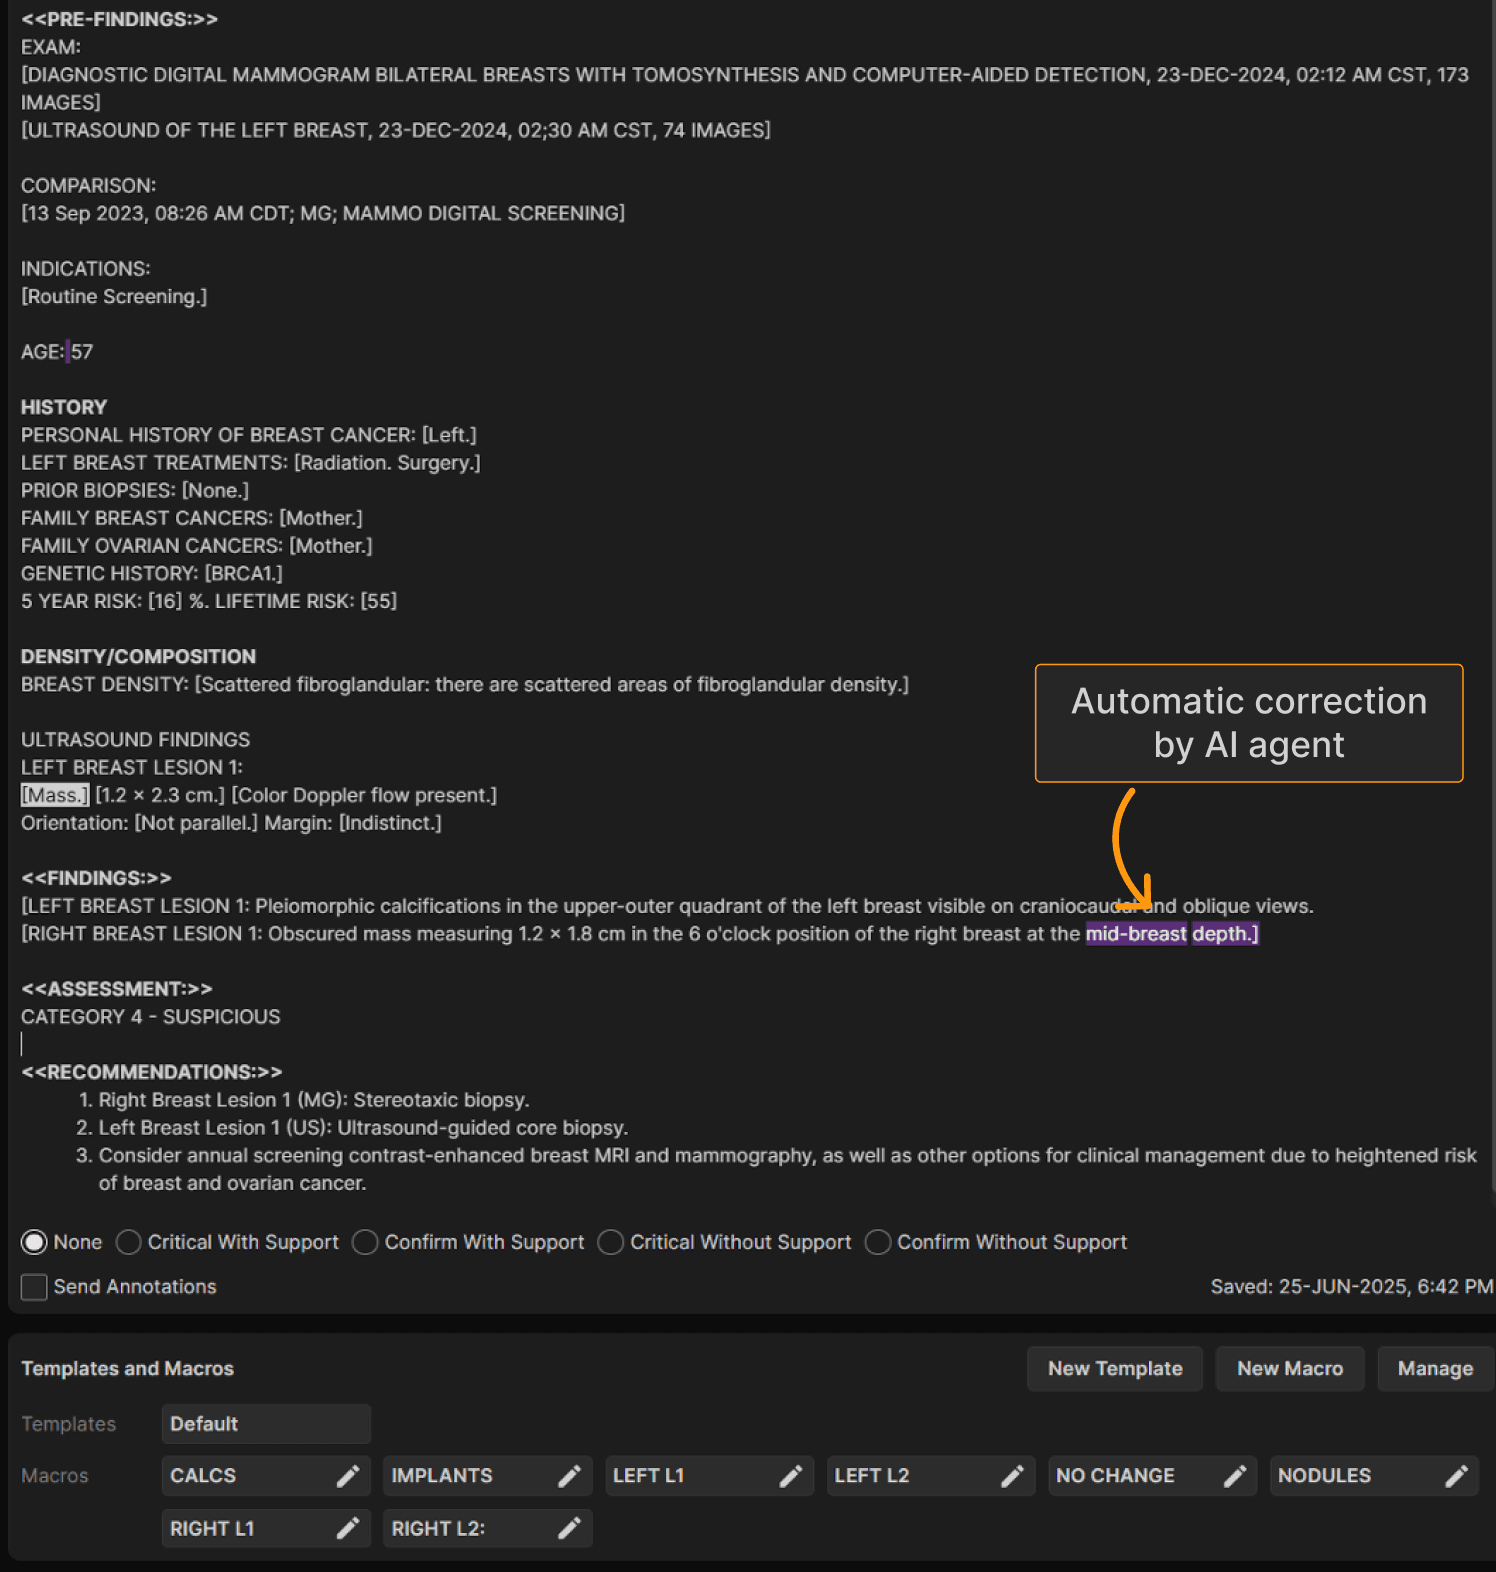
When the current report appears, the proper exam title(s), comparison citations, indications, history, composition, and ultrasound findings (for ultrasound exams or combined ultrasound/mammogram exams) can appear automatically, greatly improving the ease of reporting. The comparison citation is automatically updated whenever the reading physician displays a comparison report or images. In this example, the breast history was compiled from information in the Breast Reporting Form and automatically entered into the report. | |
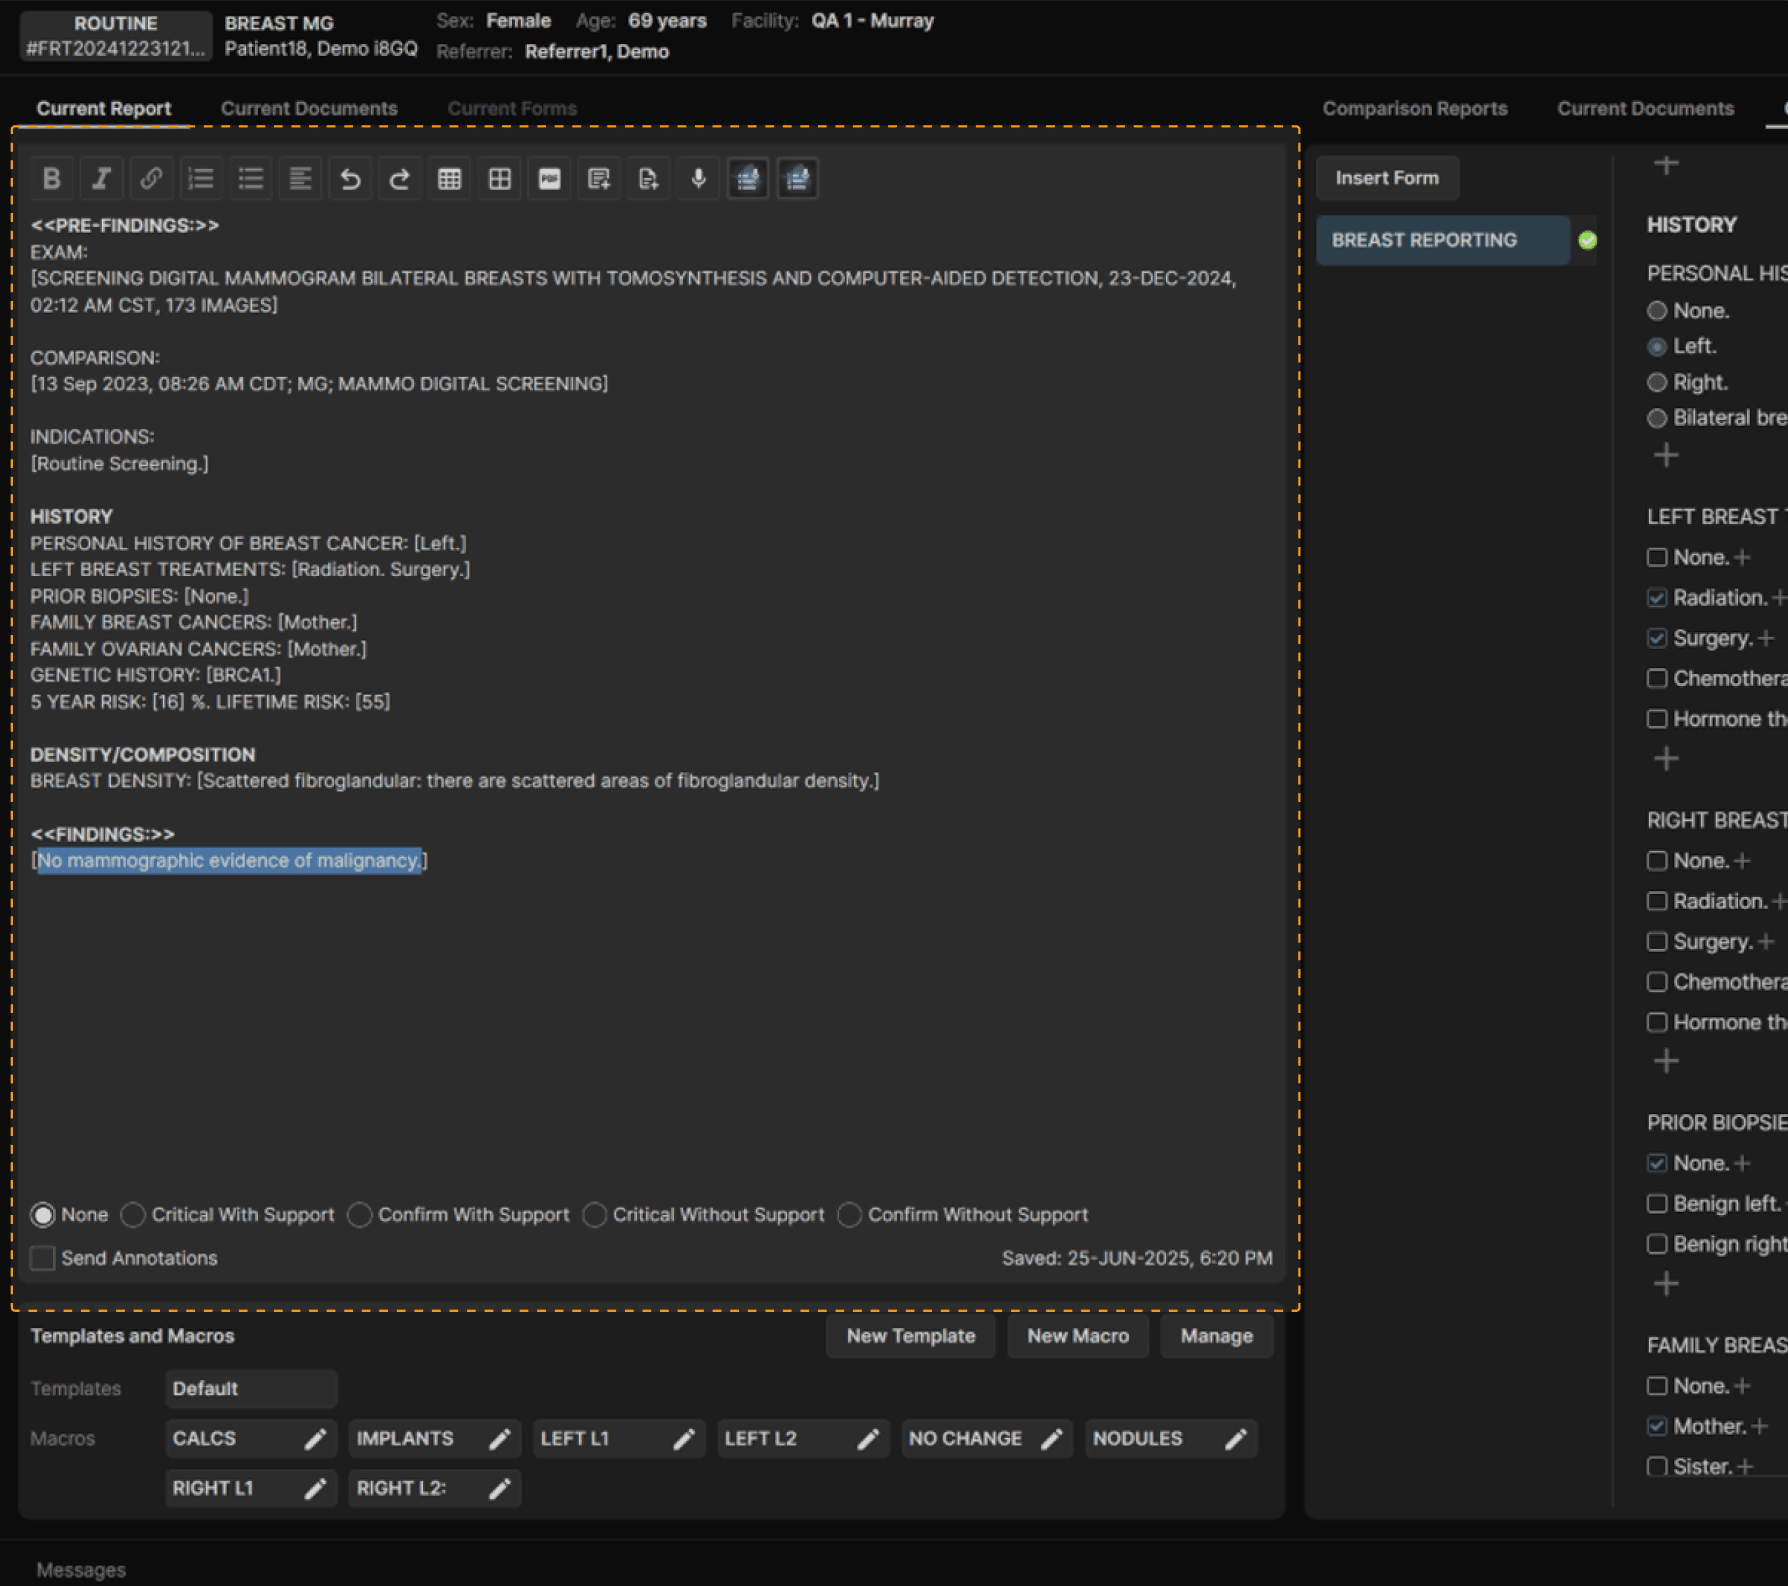 | |
TIP: The system automatically selects the first field in the FINDINGS section of the report to help expedite the reporting process. | |
 | |
TIP: To achieve optimal efficiency, you MUST configure the Breast Reporting Form and train your technologists to use the form properly. As previously noted, the Breast Reporting Form can be automatically populated from upstream systems, such as hospital information systems, ambulatory EMRs, and radiology information systems. We suggest your breast imaging technologists review these forms for accuracy and edit the form content as needed. | |
 | |
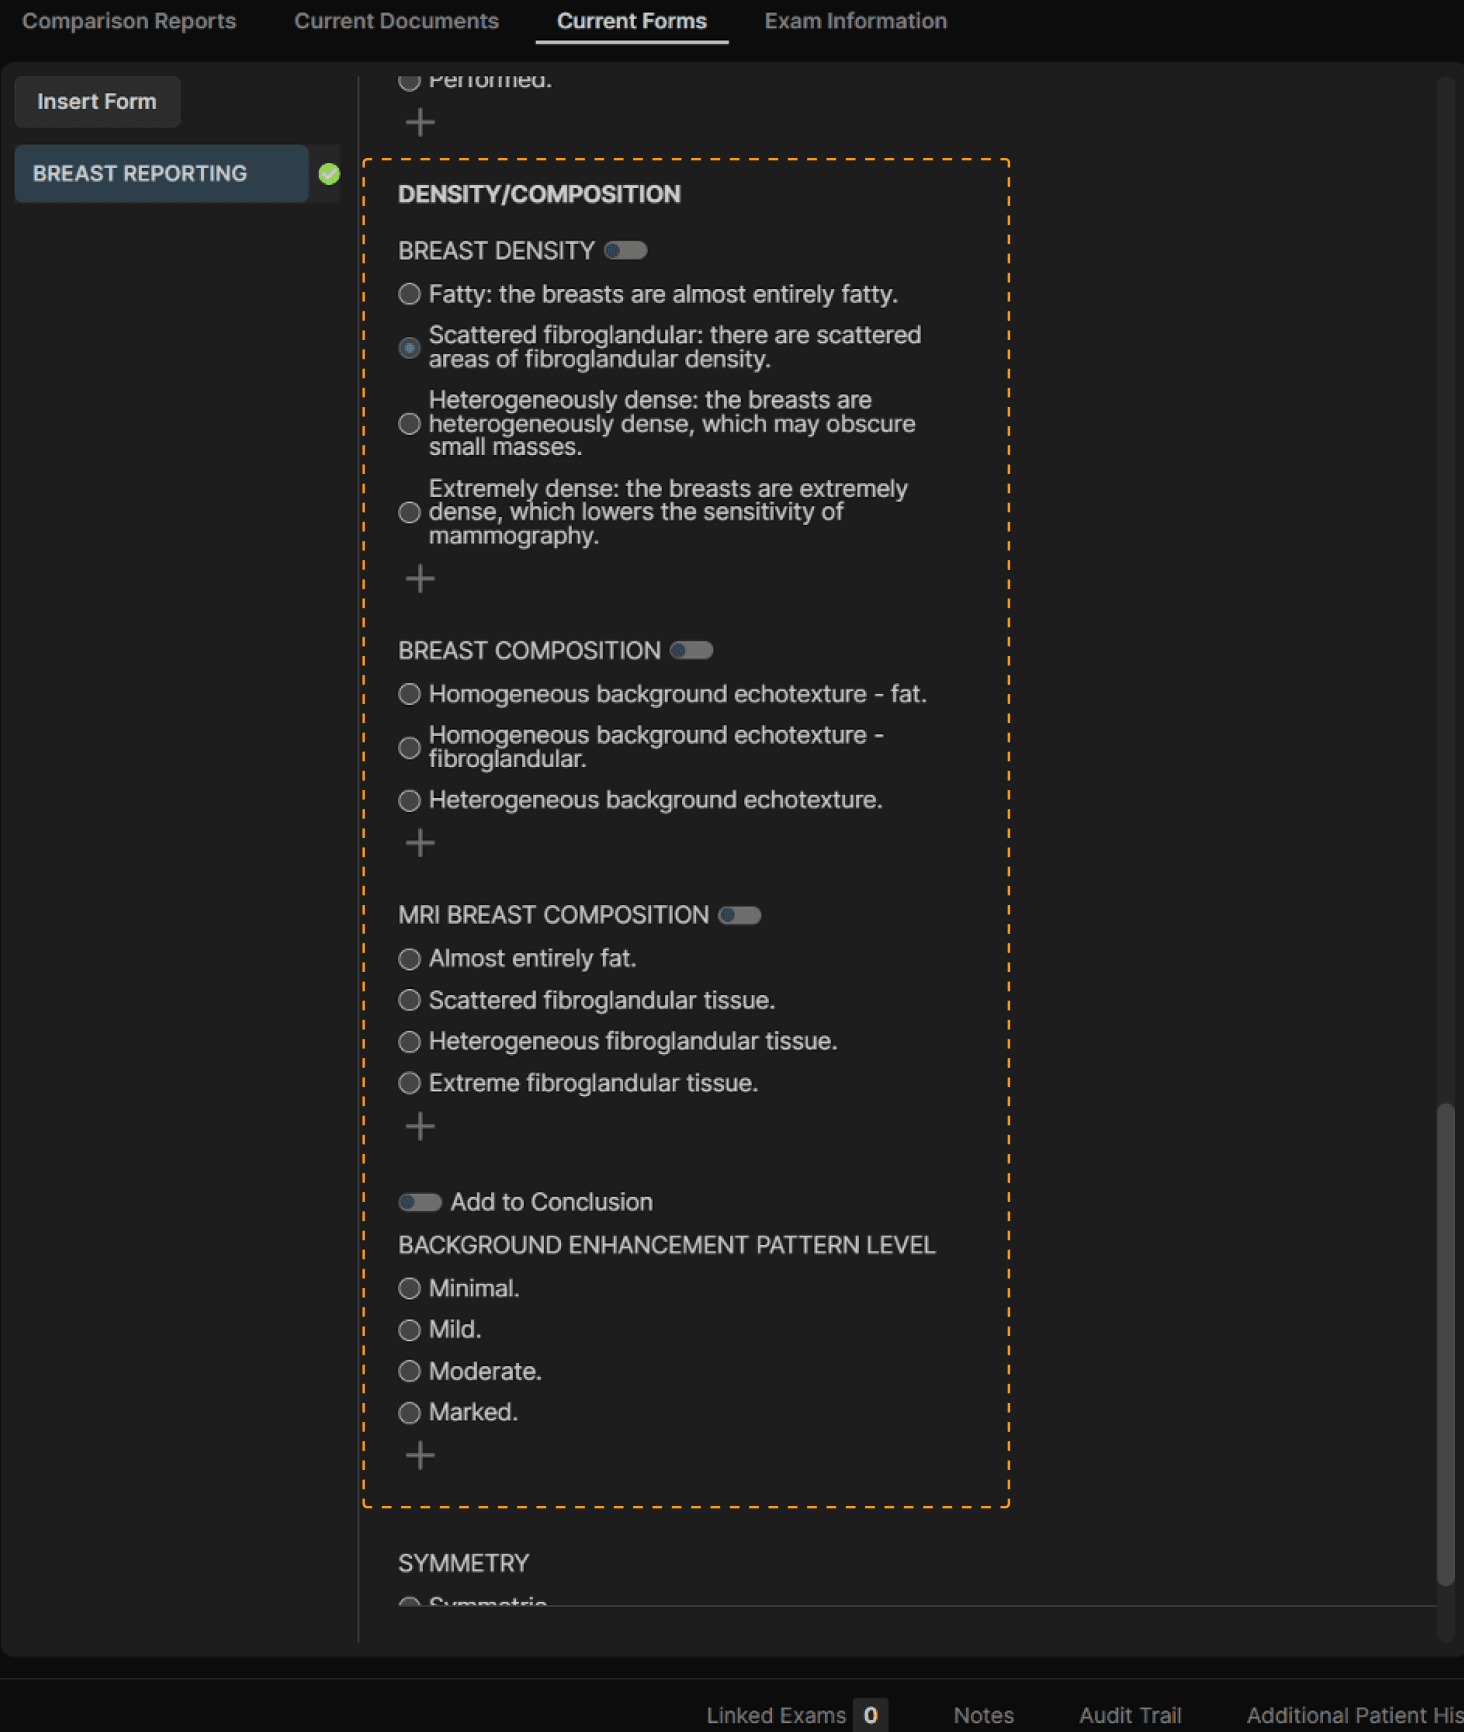
At the bottom of the Breast Reporting Form, there are options for providing the mammography breast density, ultrasound breast composition, and MR breast composition/enhancement pattern. This information can alternatively be provided by an upstream system. For practices that don’t own such an upstream system or wish to avoid the cost, you may train technologists to complete the information based on images or prior reports. | |
 | |
NOTE: As with all reporting, the reporting physician is responsible for the final report content. | |
 | |
To report a benign finding, simply dictate the finding, then activate Impress. Alternatively, use macros to report common benign abnormalities. | |
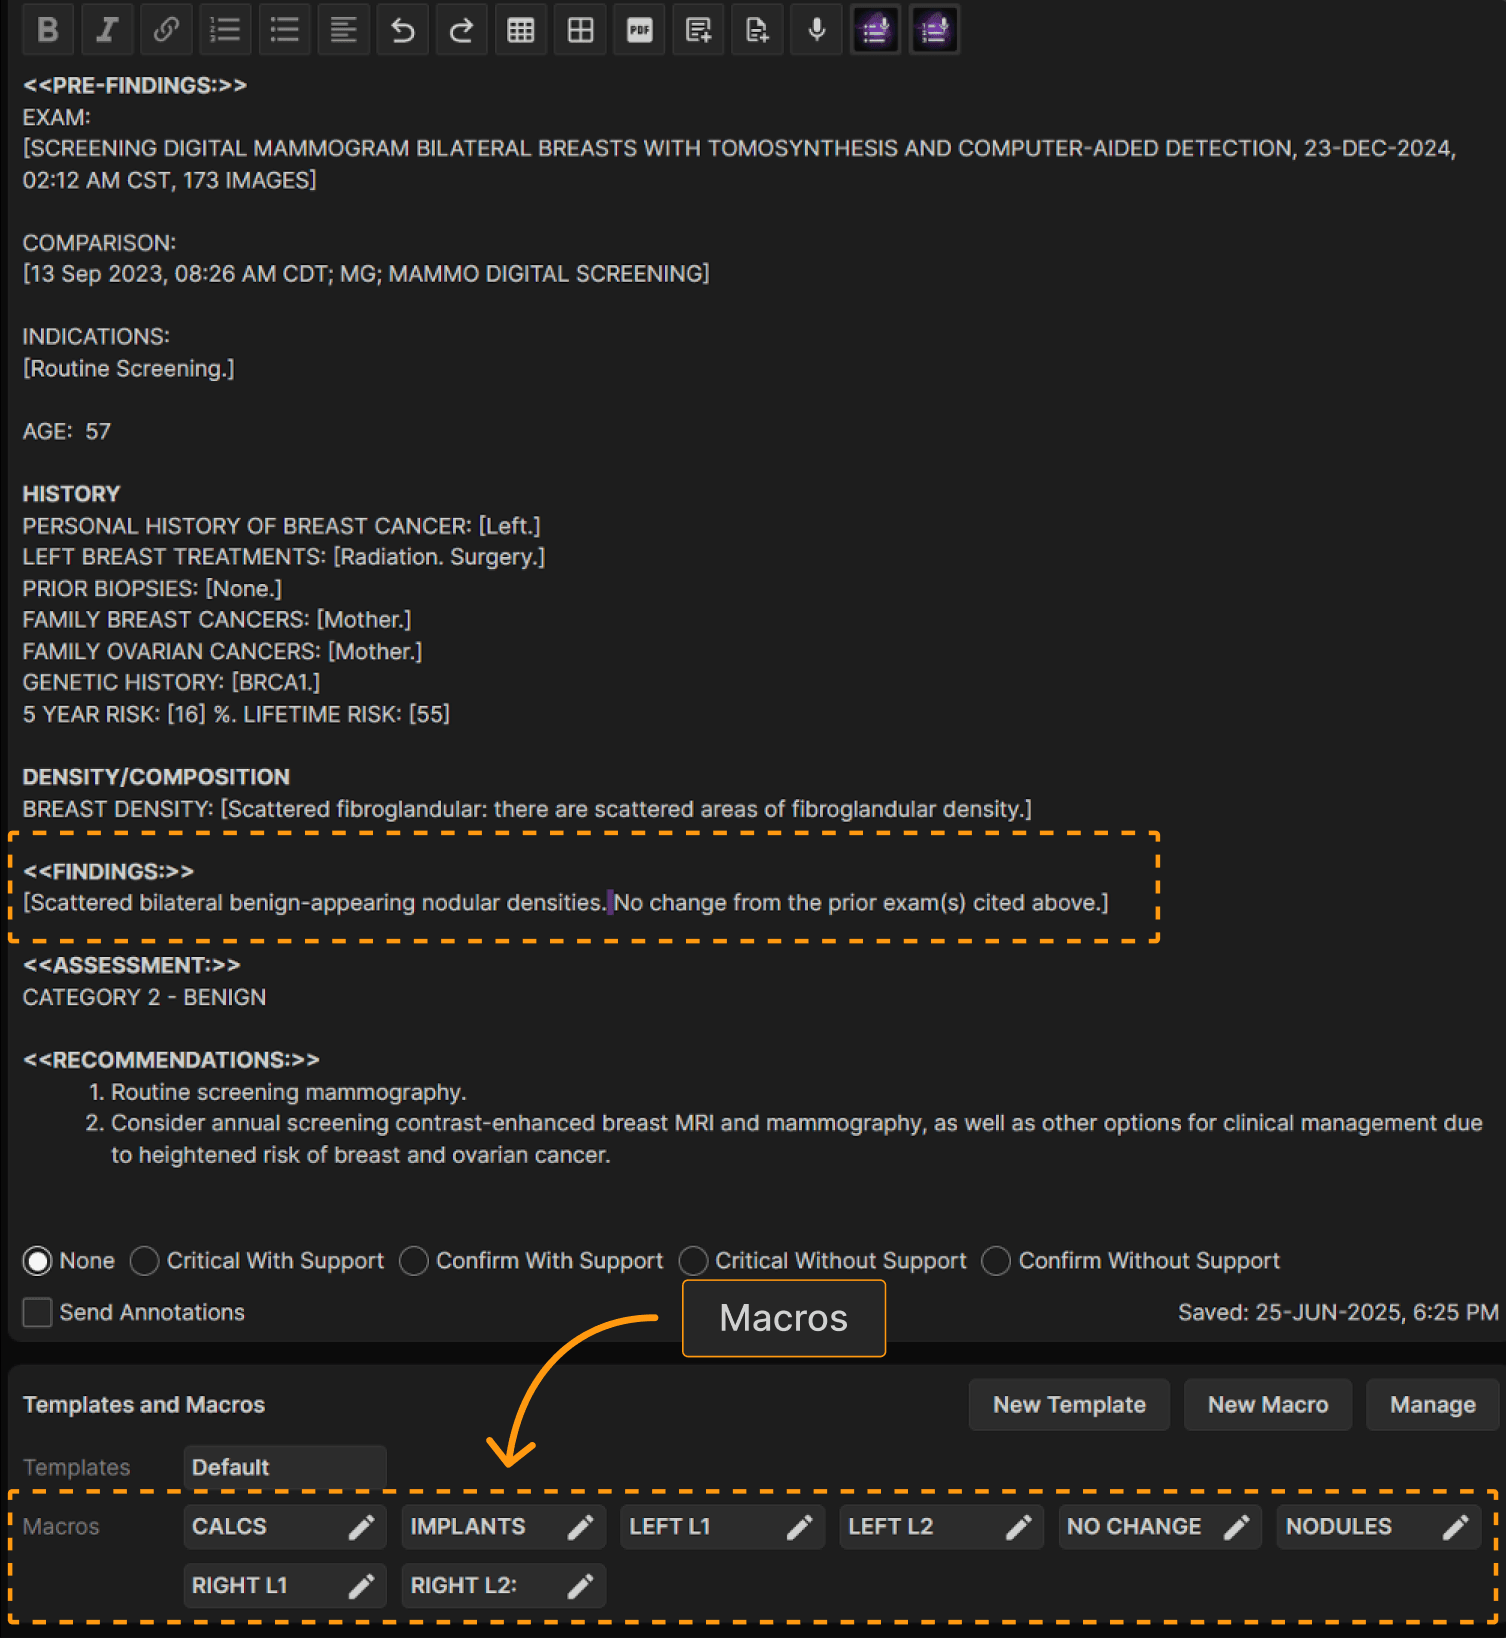 | |
To report non-benign findings, you must report the breast laterality and lesion number for each lesion. The easiest way to do this is to use the macros that come with the system by default or your own custom macros. | |
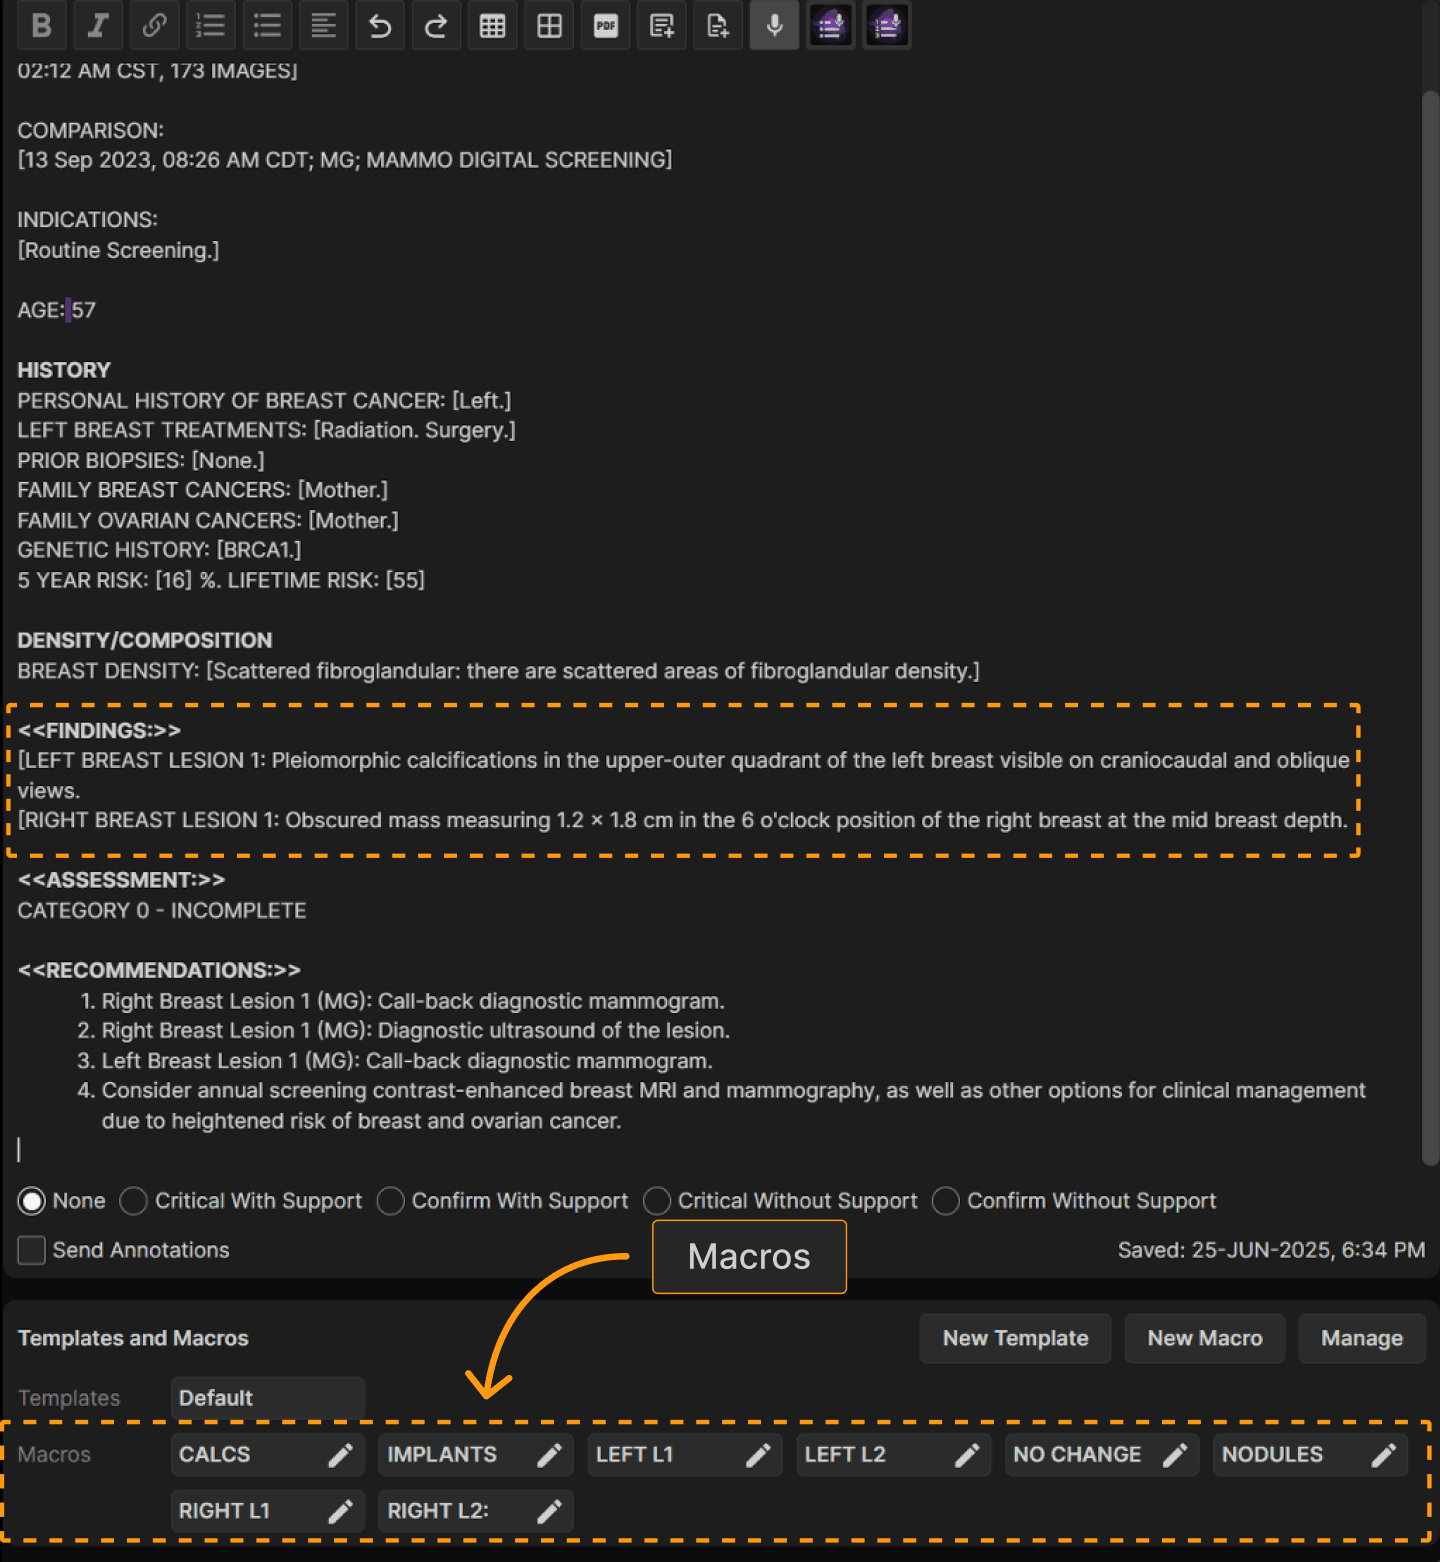 | |
TIP: The AI agent considers whether the exam is a screening exam, diagnostic exam, and if there is a combined report with ultrasound findings. Note that each lesion receives its own recommendation(s) so that third-party systems can easily track each recommendation. | |
 |
Viewing and Comparing Images | ||
|---|---|---|
First, a few words about mammogram hanging protocols. To access all hanging protocols, use the dropdown menu under your name at the right of the Top Ribbon. | ||
 | ||
| ||
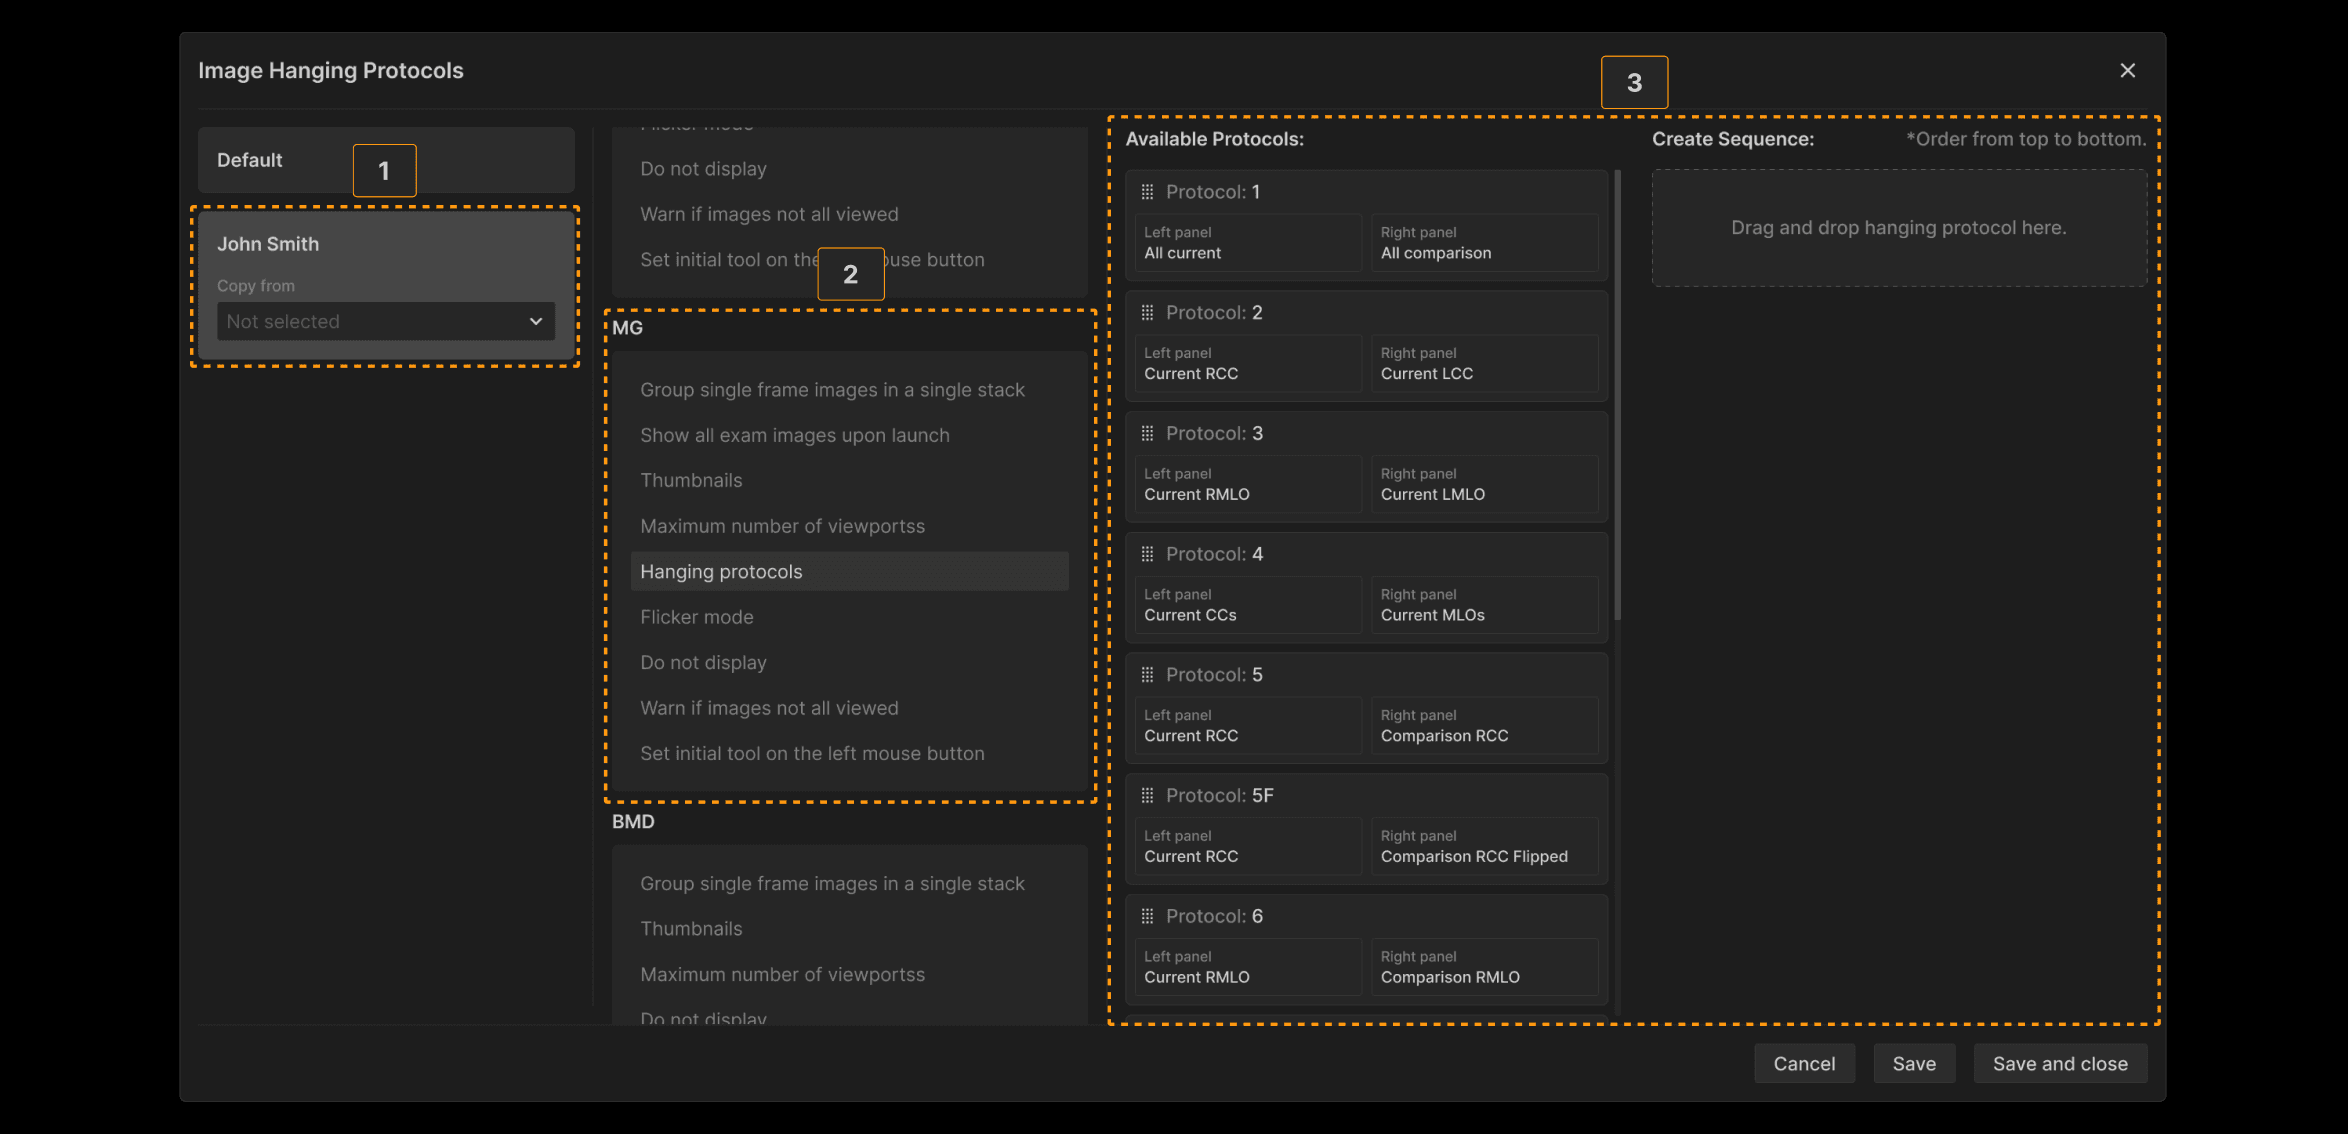 | ||
Drag from the Available Protocols panel to the Create Sequence panel to reassign the keyboard shortcuts and arrange the order you desire. An example is shown below: | ||
 | ||
When images appear, the first protocol in the reading sequence is displayed initially. You can use the number keys to select other protocols based on the order in your custom reading sequence or use the keyboard keys “[“ and “]” to move forward or backward through your custom sequence. Peripheral devices that can enhance your experience and their profiles are shown in HELP. | ||
| ||
 | ||
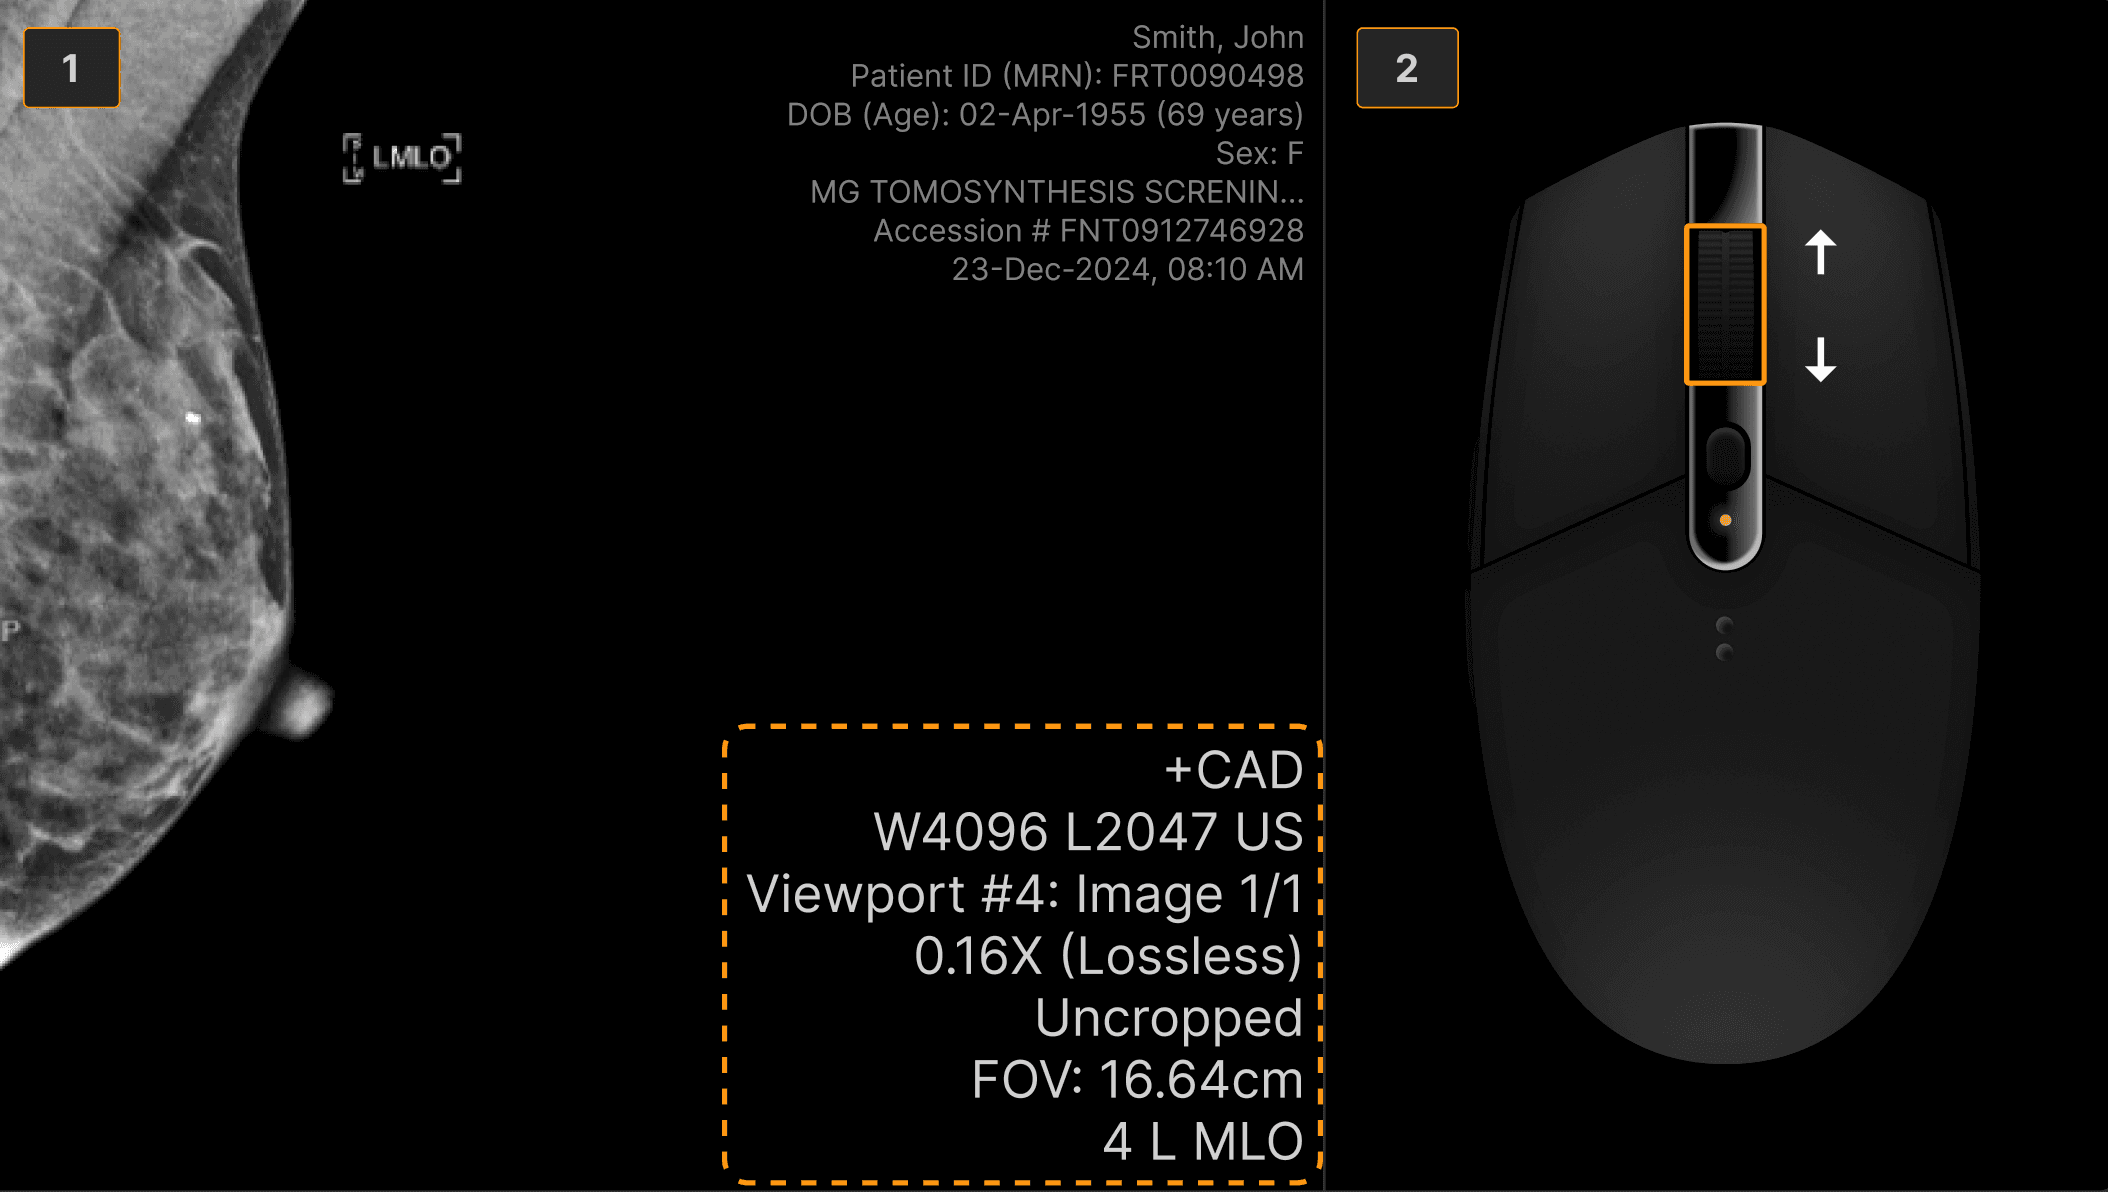
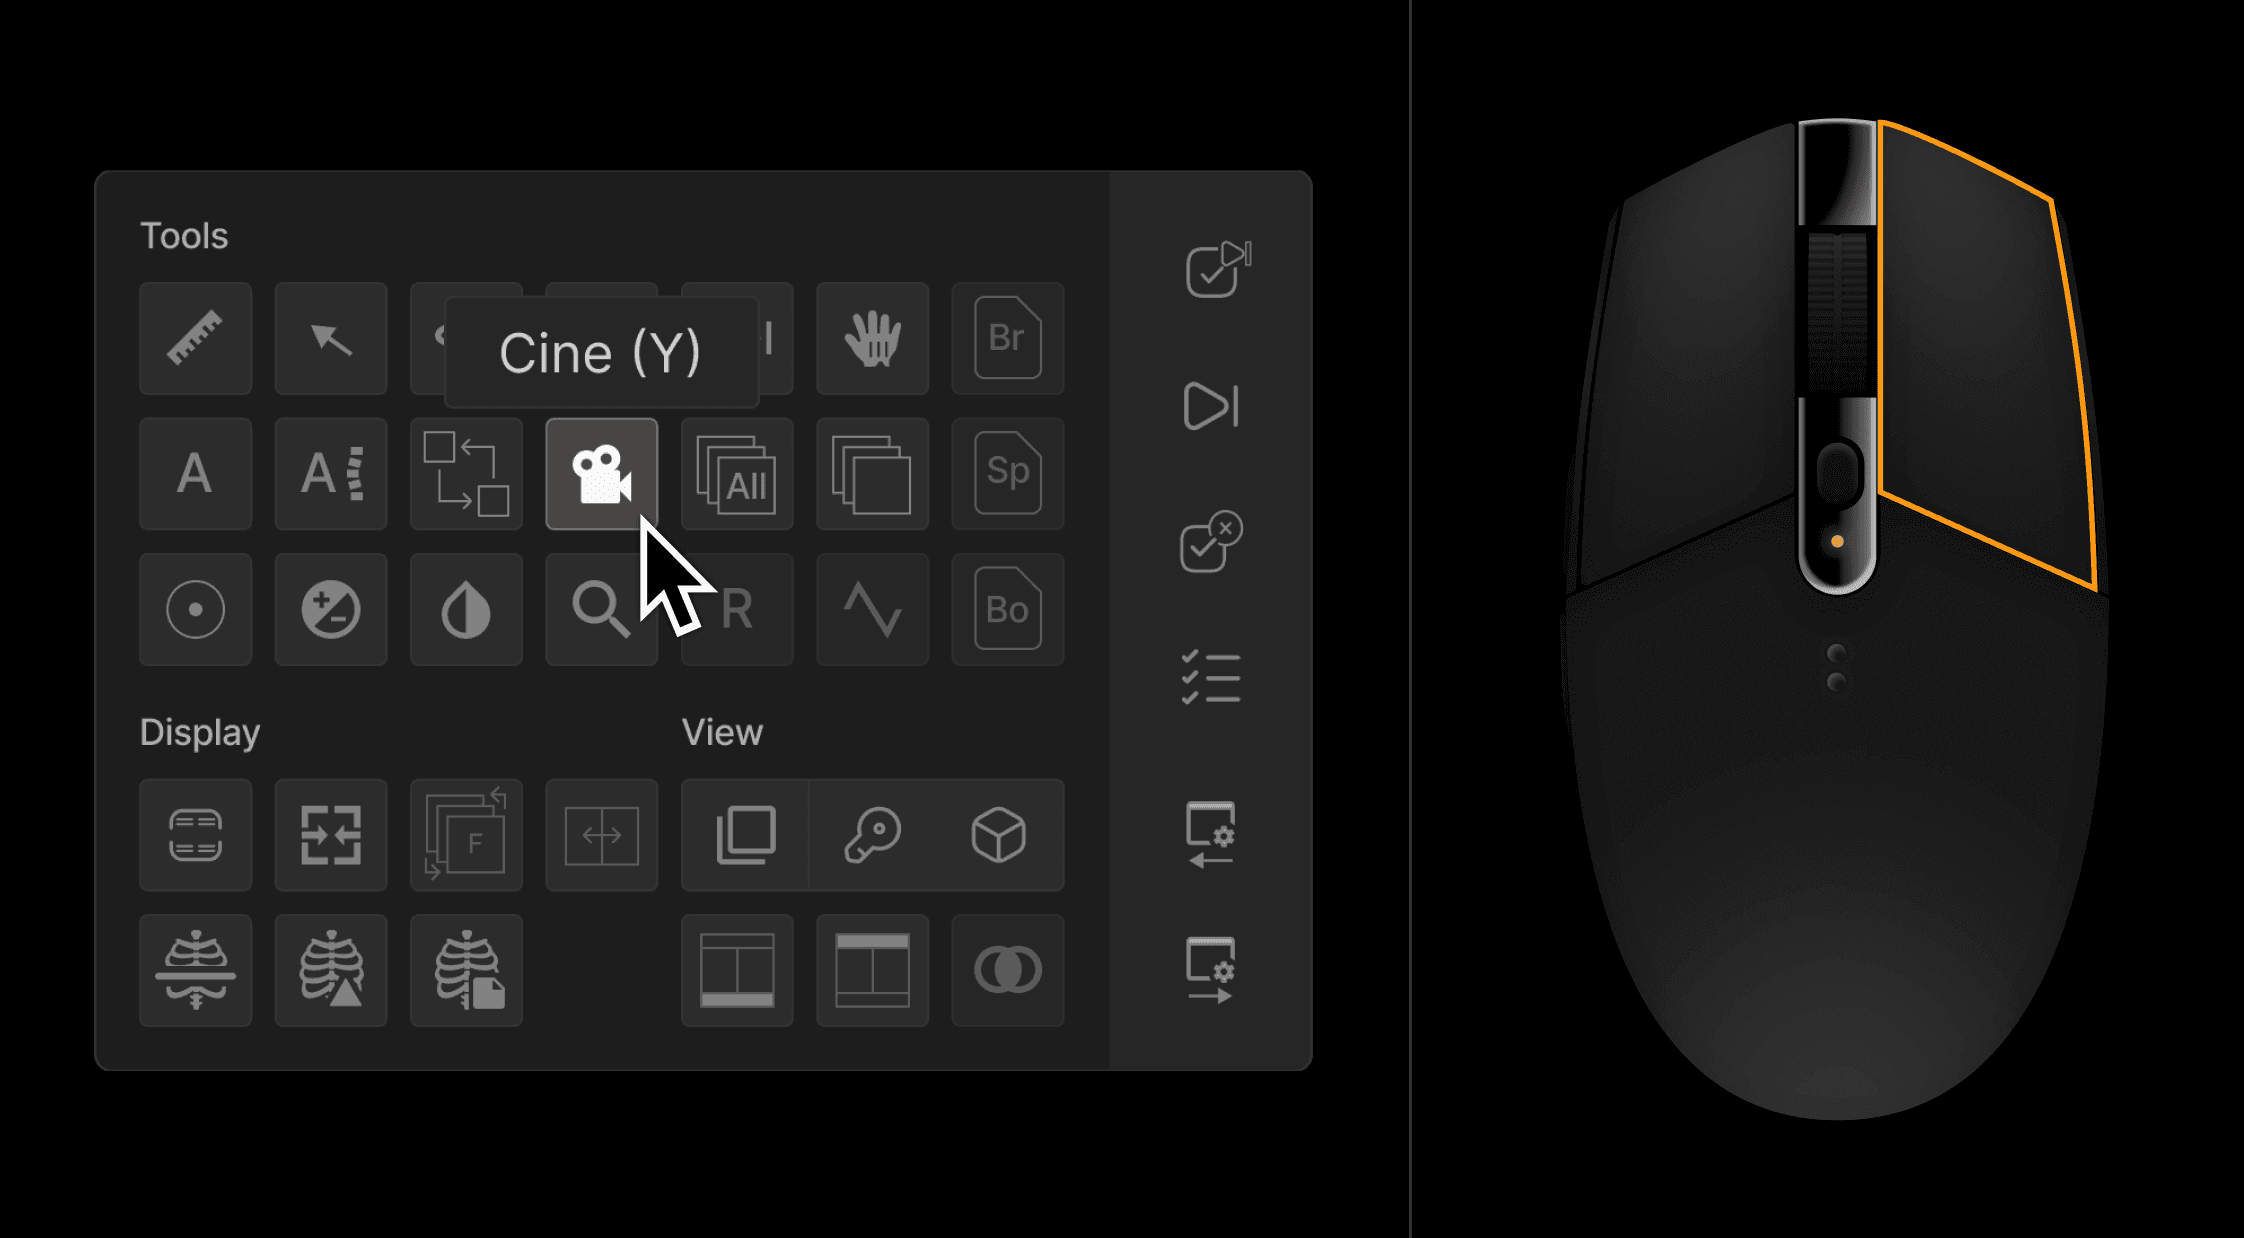
When a tomosynthesis series is playing, there is no need to turn it off. Simply move the mouse wheel to immediately control the frame-by-frame movement. | ||
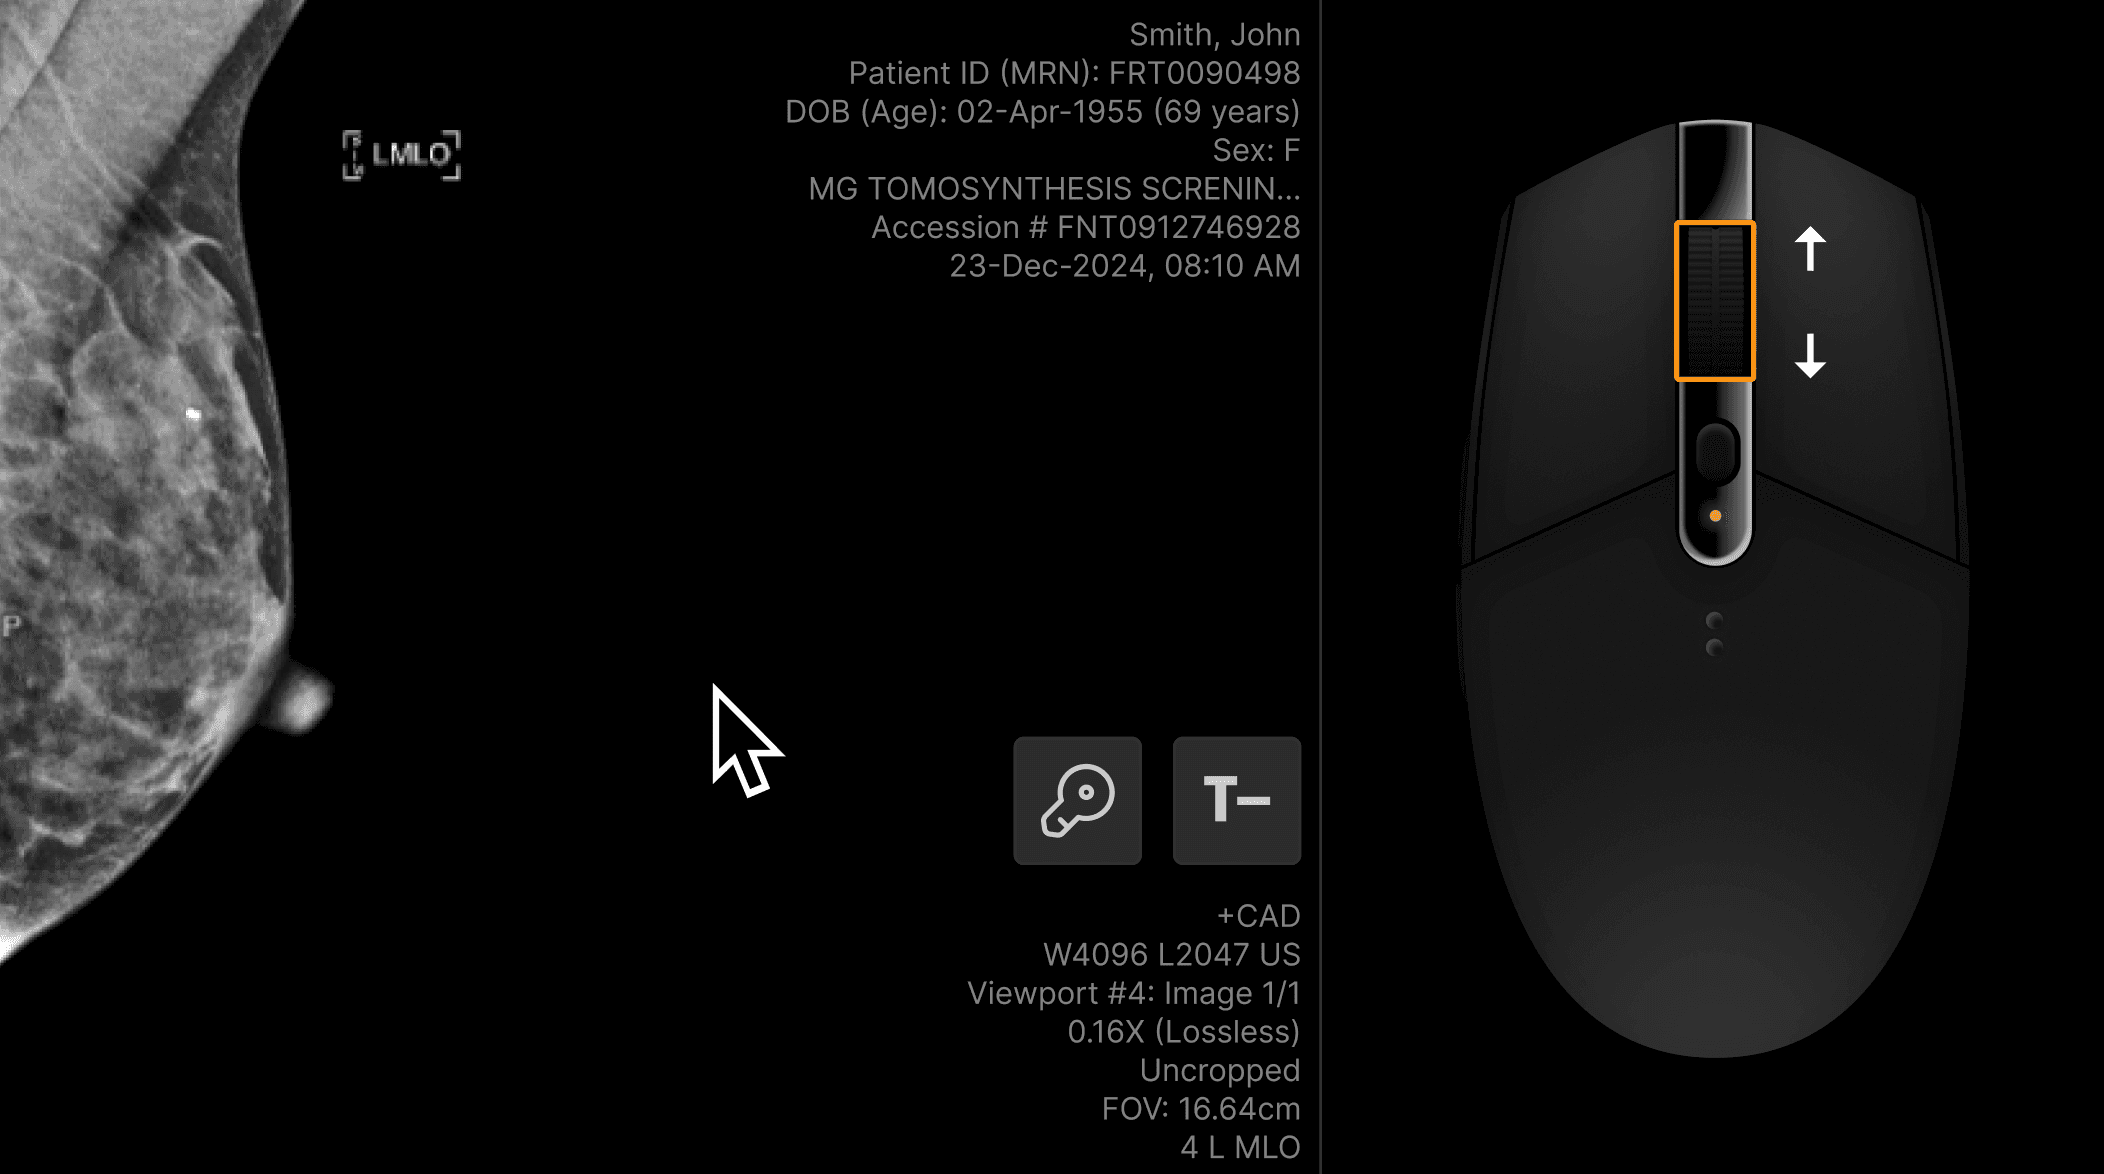 | ||
Click the left mouse button to restart playing the series. | ||
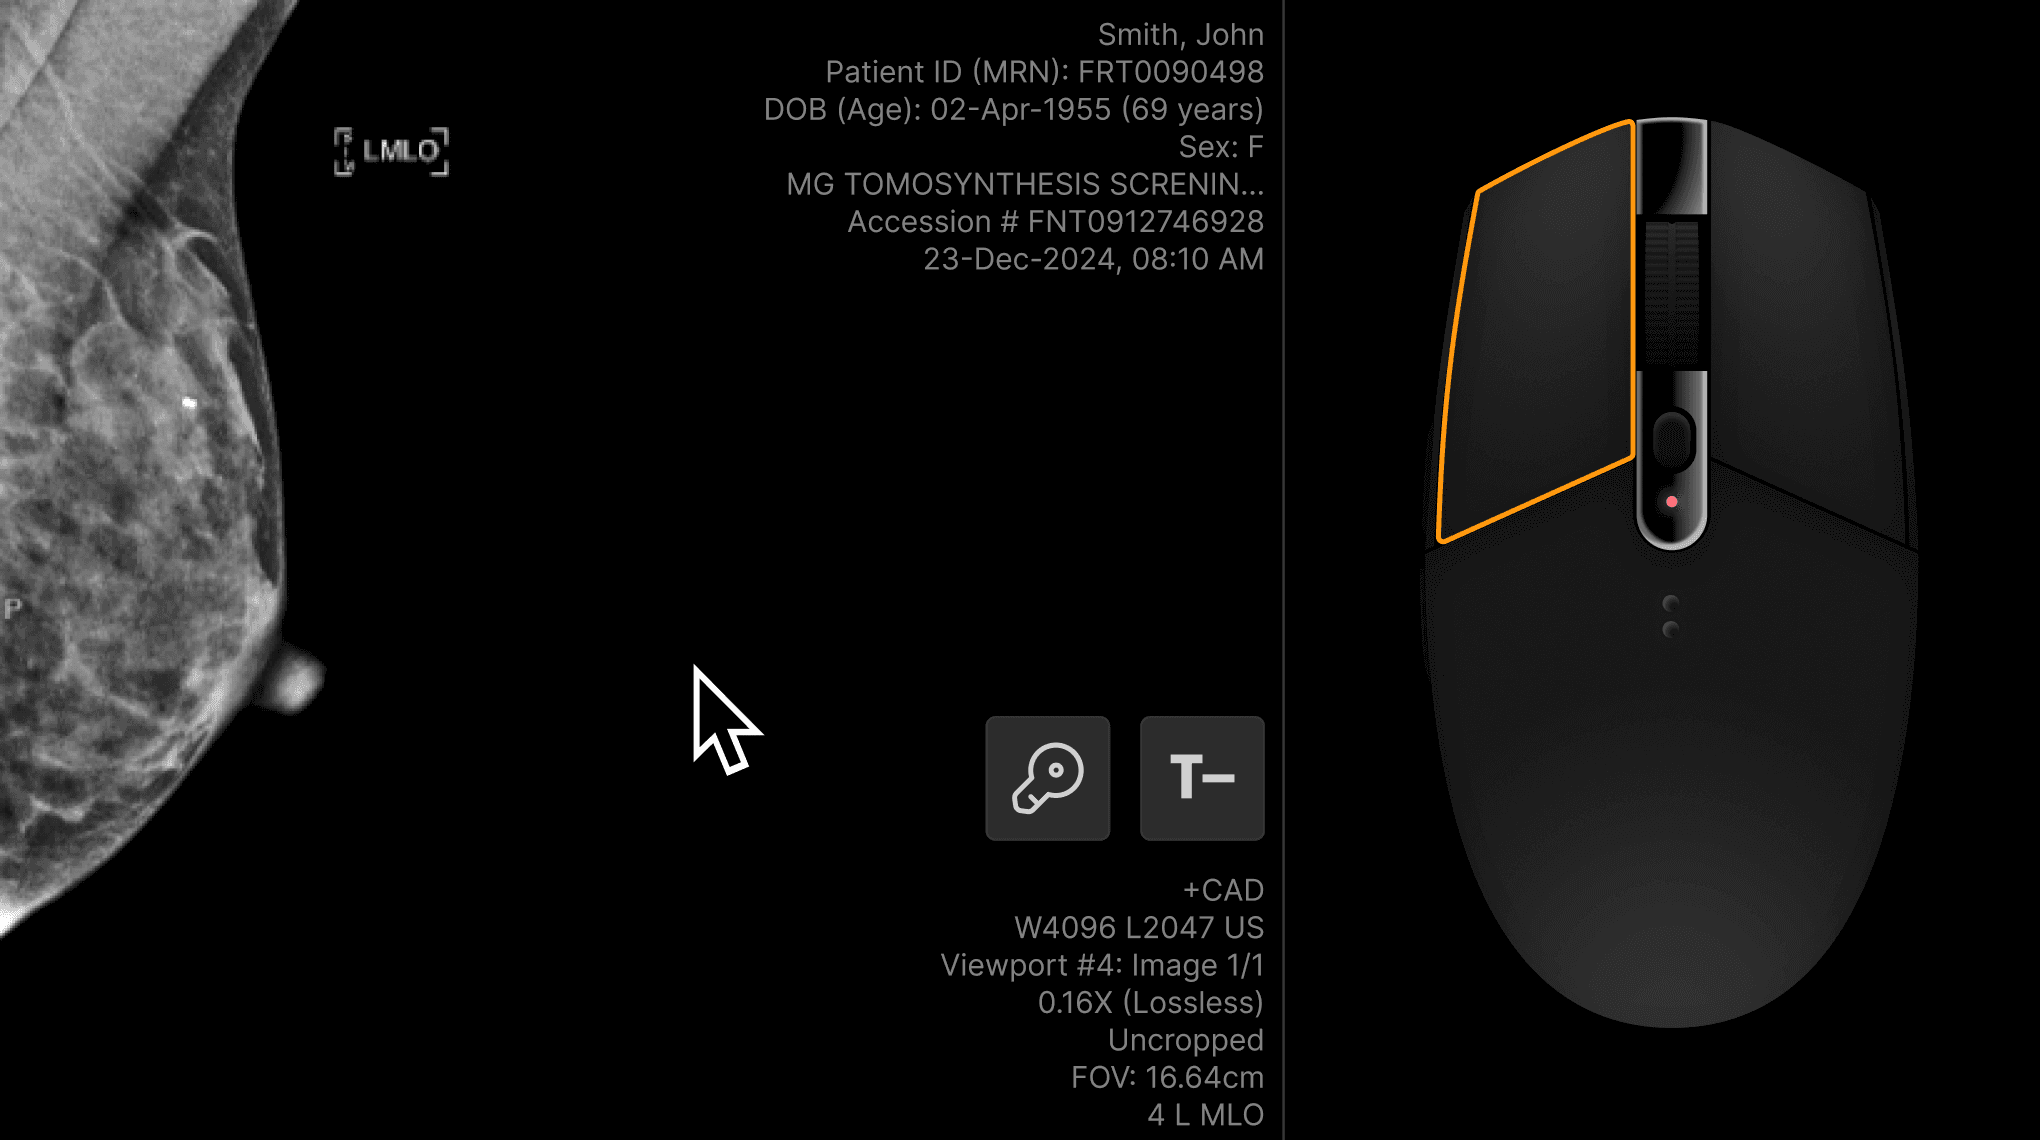 | ||
This method of controlling the cine tool is useful for many types of imaging exams (ultrasound multi-frame images and large CT series to name a few). | ||
| ||
 | ||
| ||
 | ||
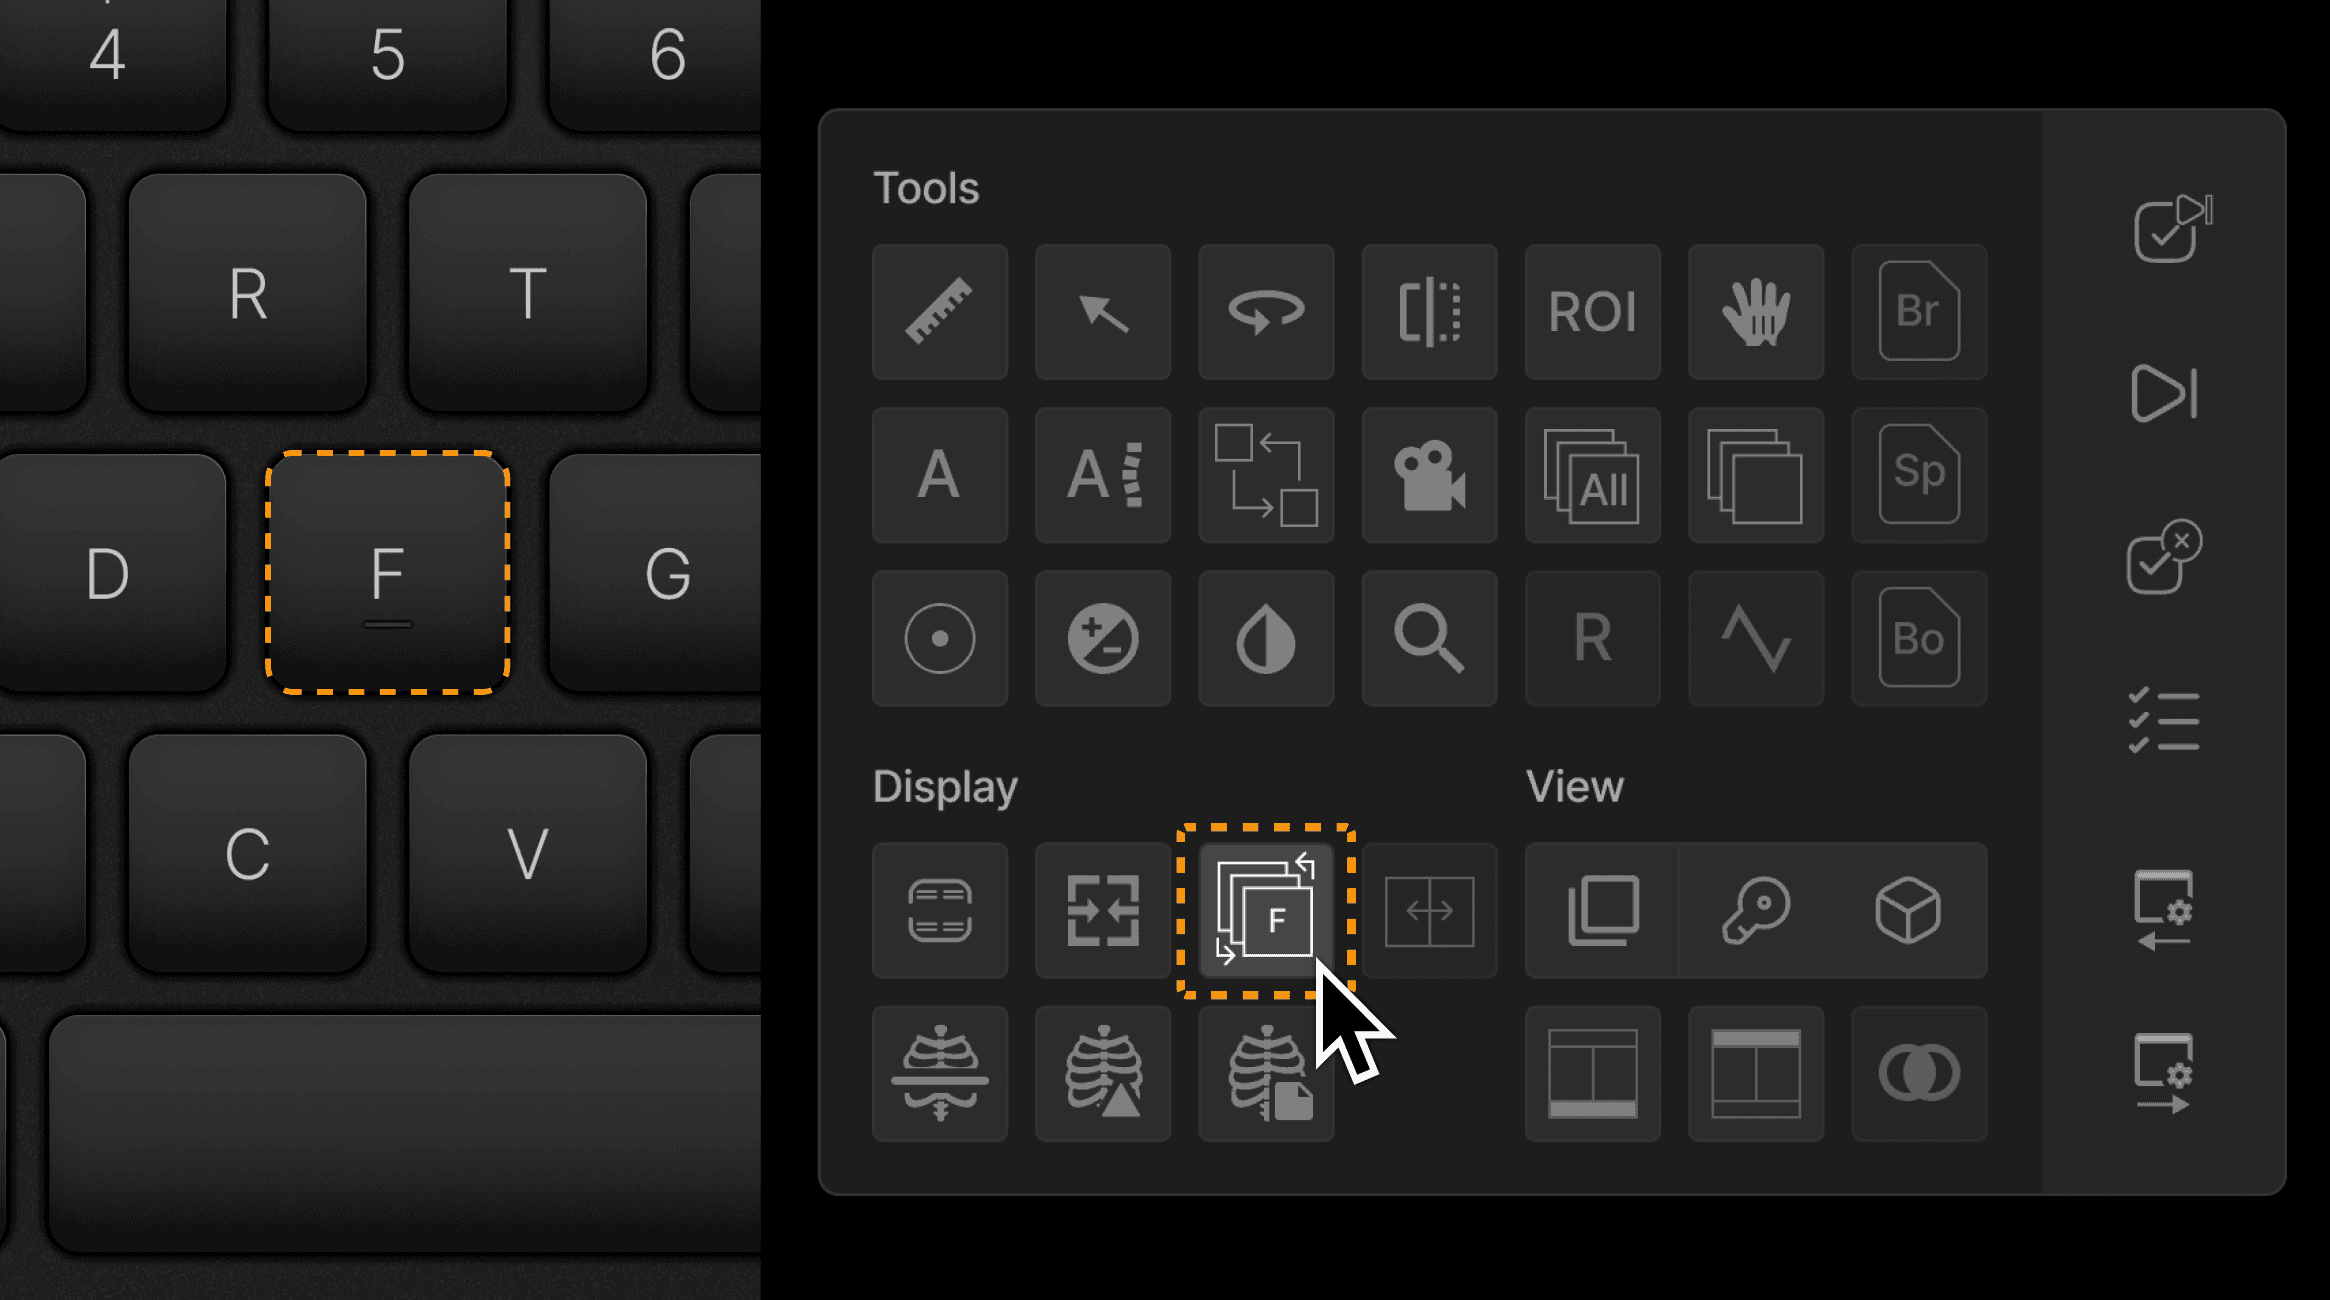
Flicker is a special protocol that can be accessed by clicking the F shortcut or by accessing the Flicker tool in the toolbox. Flicker stacks the CC and MLO views in a chronological sequence. | ||
 | ||
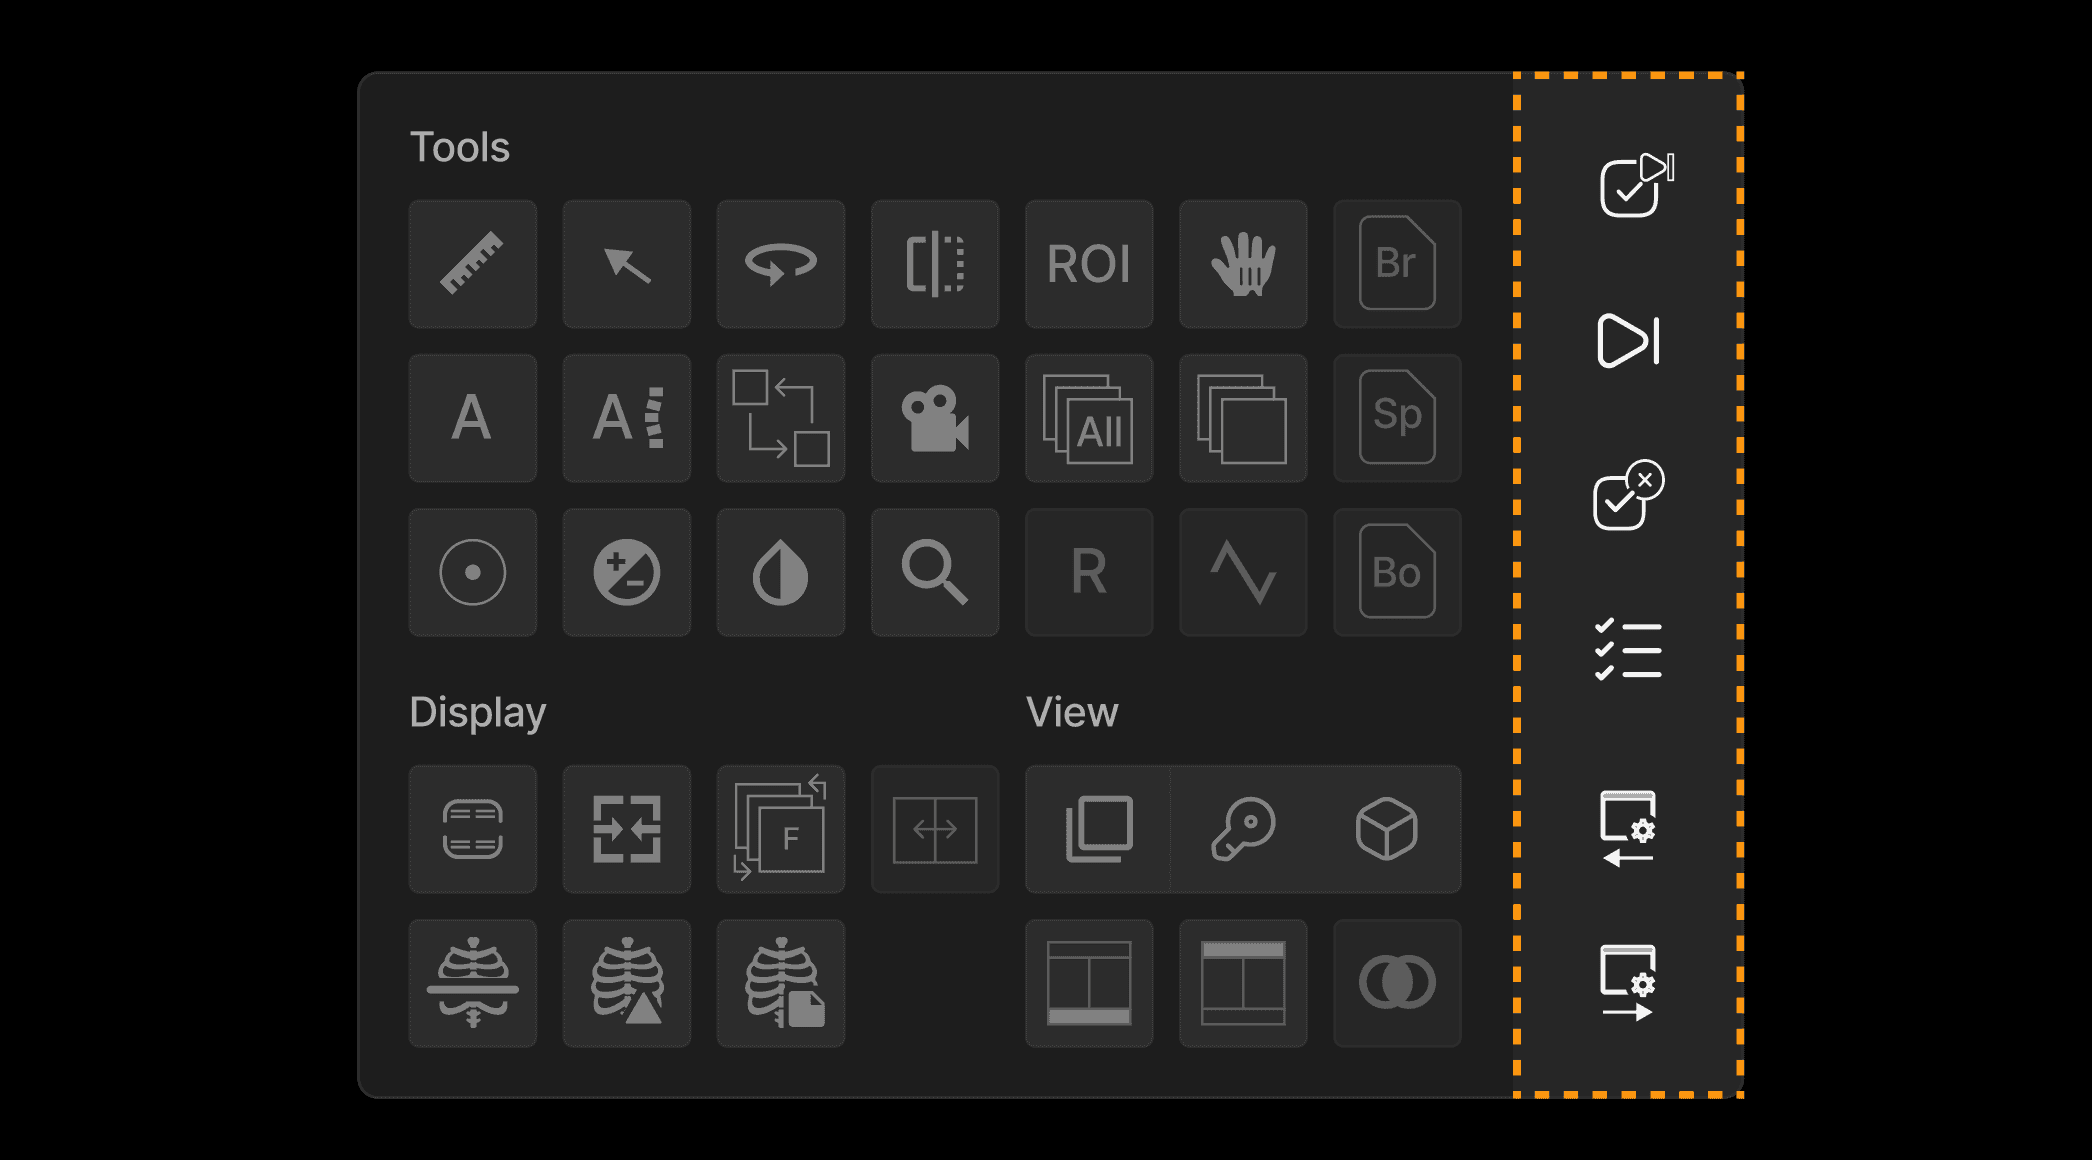
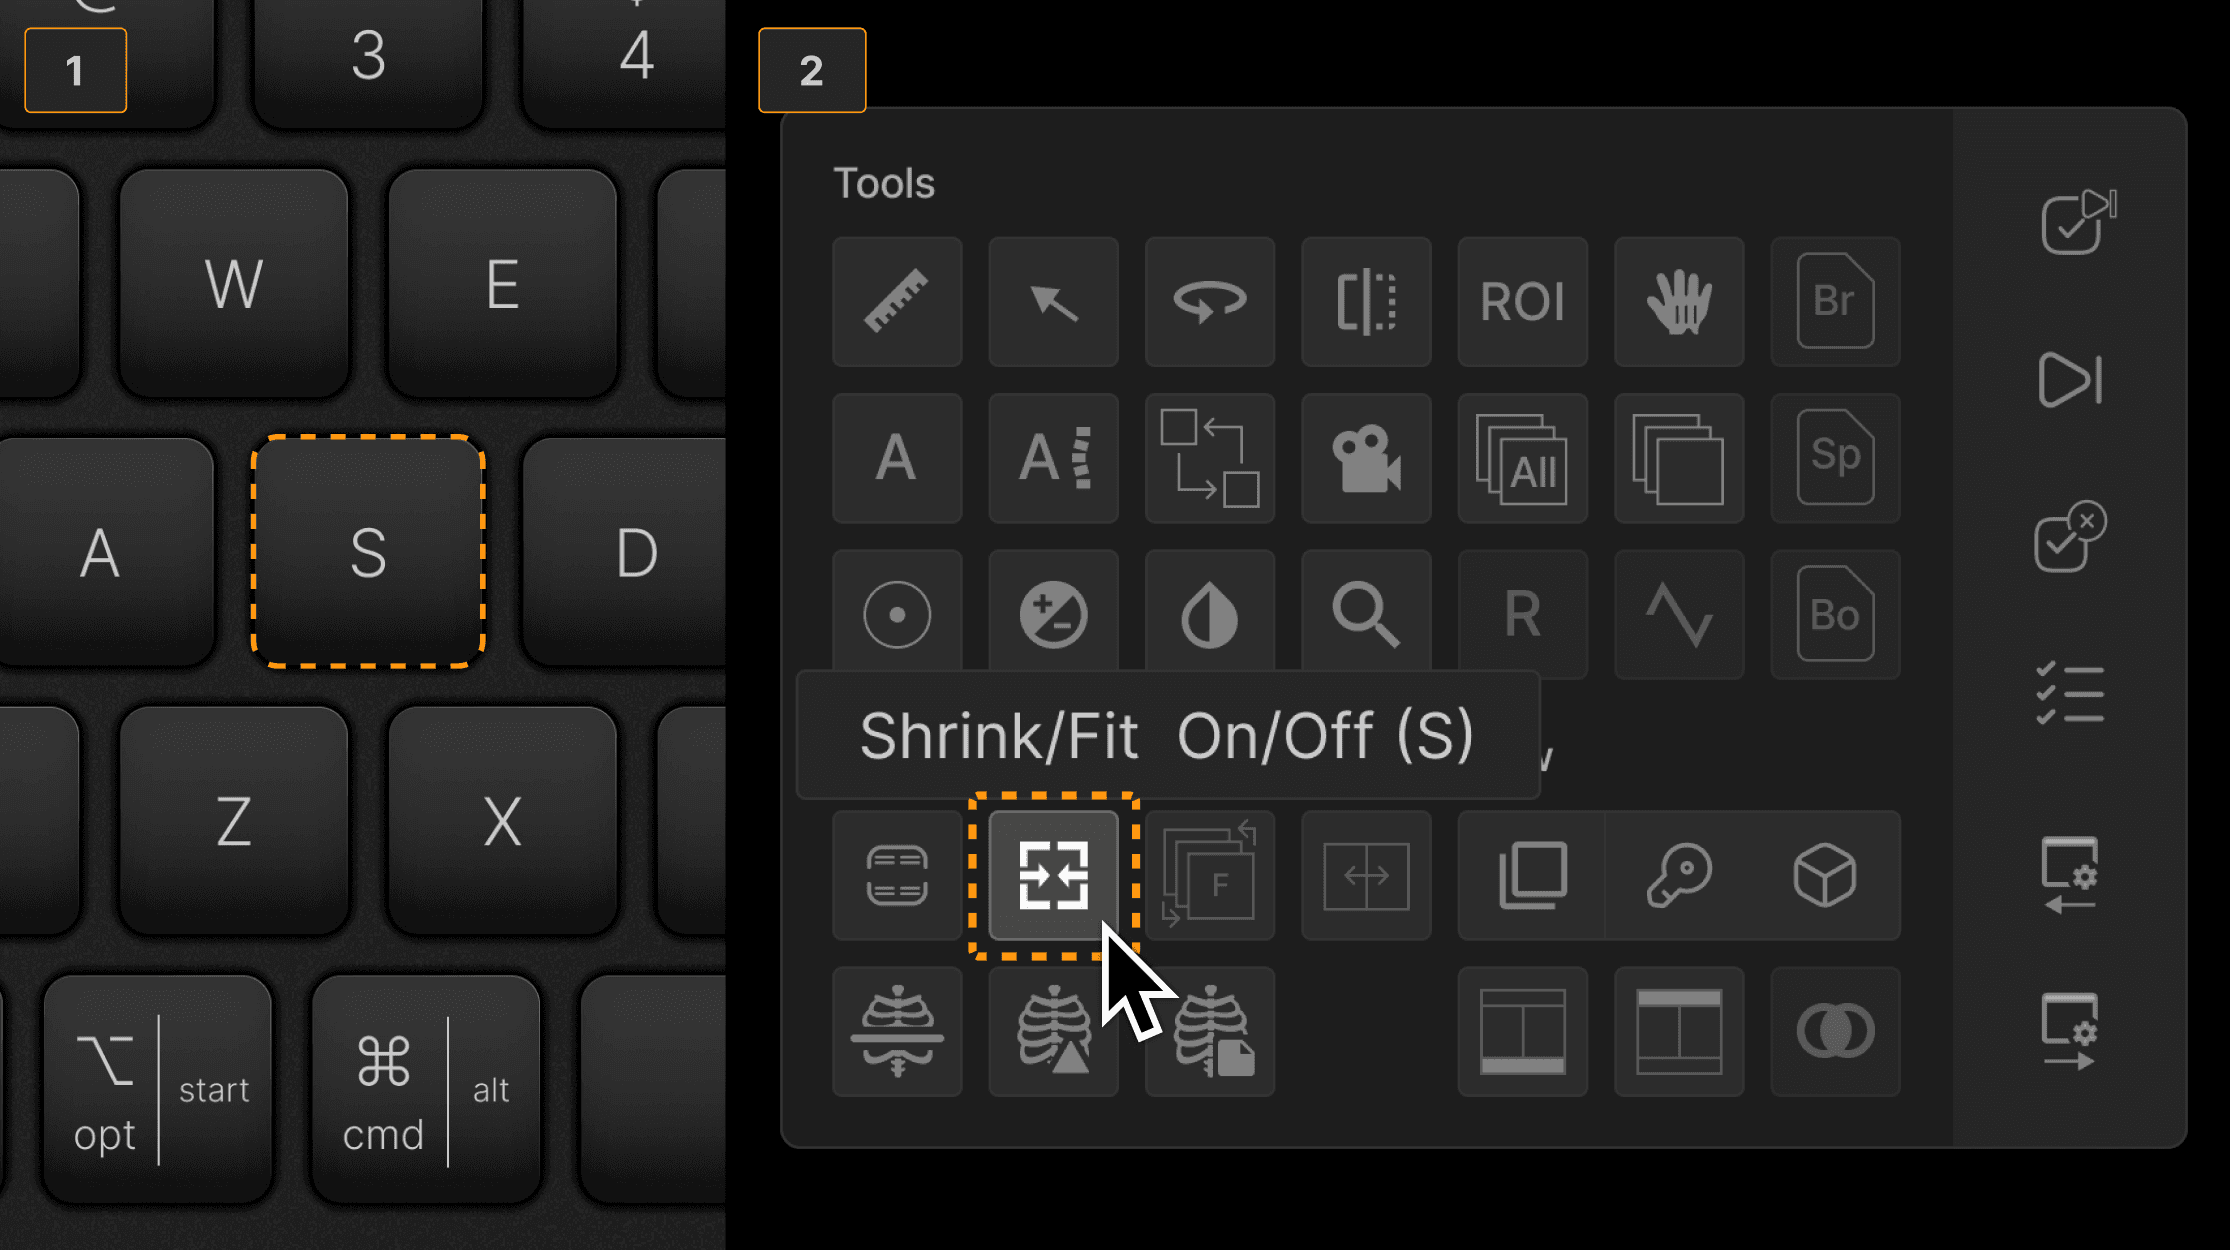
Right press to access the toolbox for commonly used tools and functions such as image annotation, shrink to fit toggle on/off, or CAD on/off. As shown, hovering the cursor over any tool reveals the tooltip and keyboard shortcut. | ||
 | ||
TIP: The right column of the toolbox provides convenient navigation tools, reducing mouse movements required to navigate between exams. | ||
 | ||
| ||
 | ||
TIP: When the Pan tool is moved to near the border of mammogram images that are side by side, the tool controls both mammogram images with automatic mirroring to facilitate symmetric comparison. | ||
 |