How to use it (step‑by‑step) |
|---|
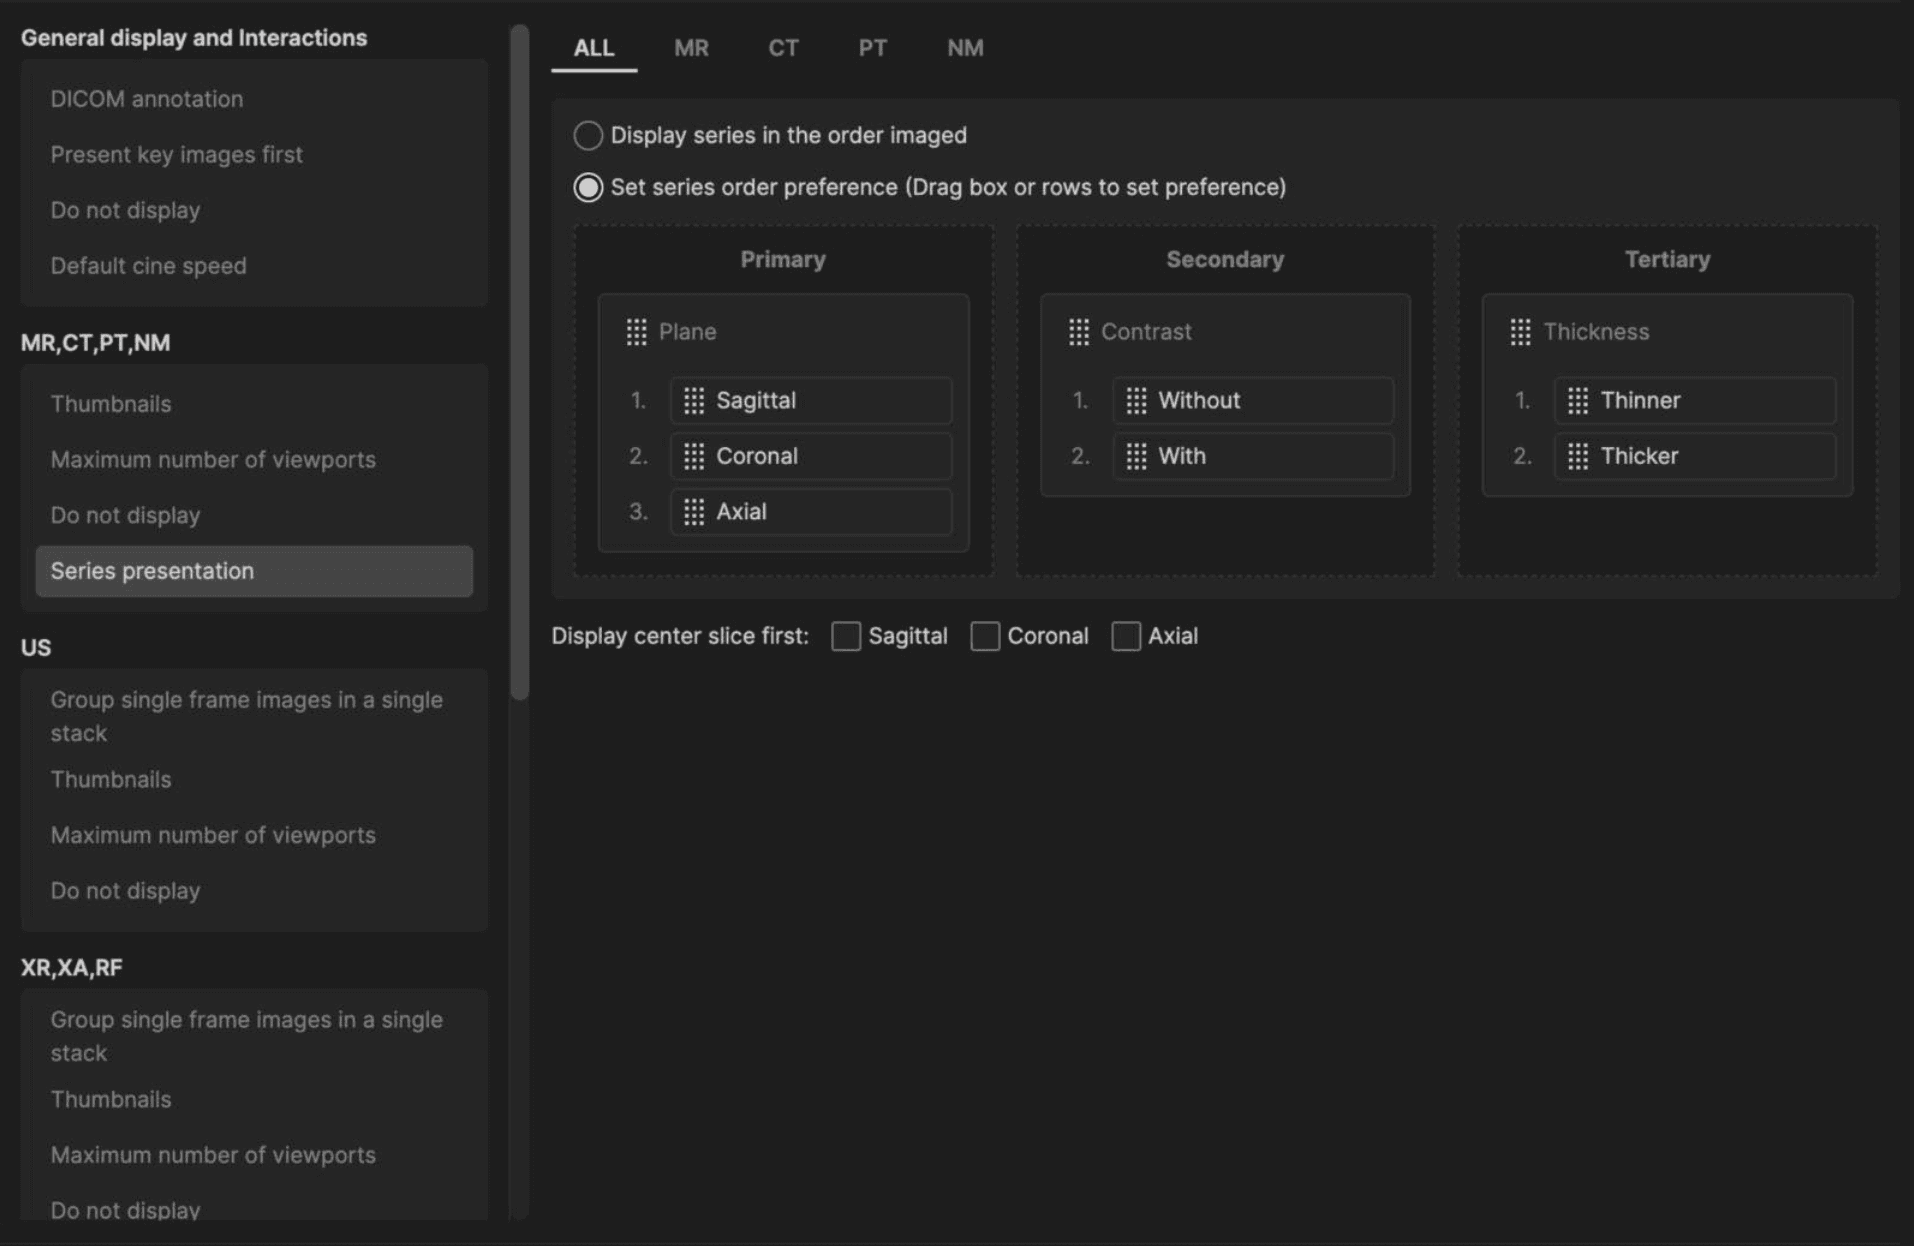
1. Set-up your Series Presentation hanging protocol. Define the sort priority using drag-and-drop controls across primary, secondary, and tertiary levels. Organize series based on key attributes including: Plane (Axial, Sagittal, or Coronal) Contrast (With or Without) Slice Thickness (Thinner or Thicker)
|
 |
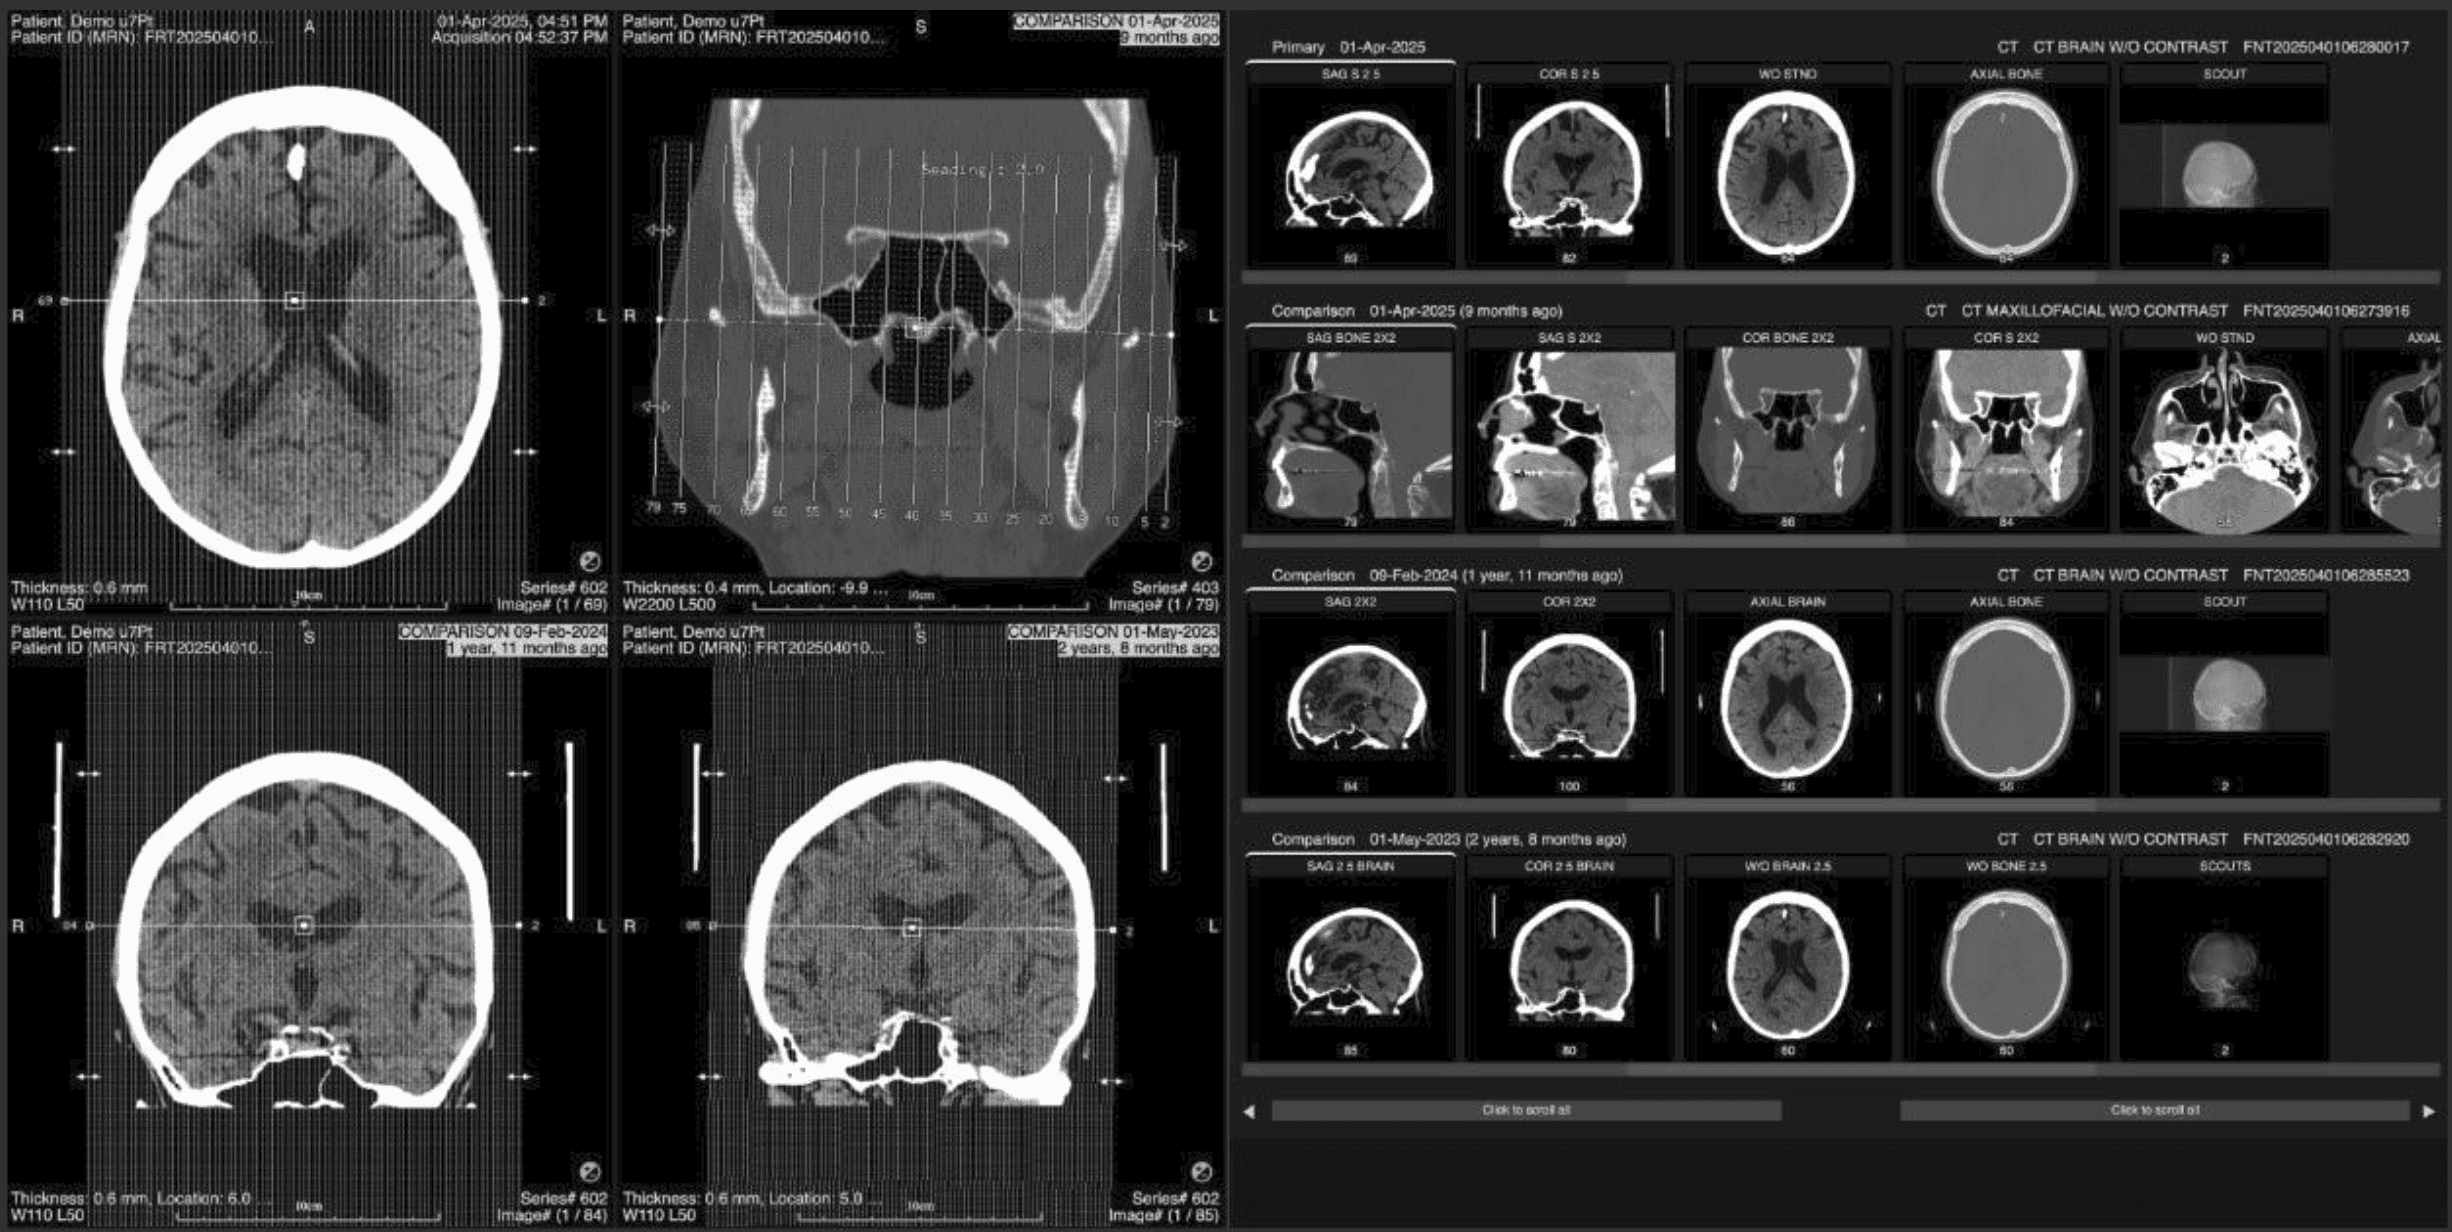
2. Turn Compare Mode on Open a supported exam: CT, MR, PET, NM, US, or XR. Turn Compare Mode on using either: The Compare Mode button in the toolbox or the D keyboard shortcut.
If there is at least one prior, the layout changes to: Left: up to 4 empty viewports. Right: up to 4 thumbnail rows (current + priors).
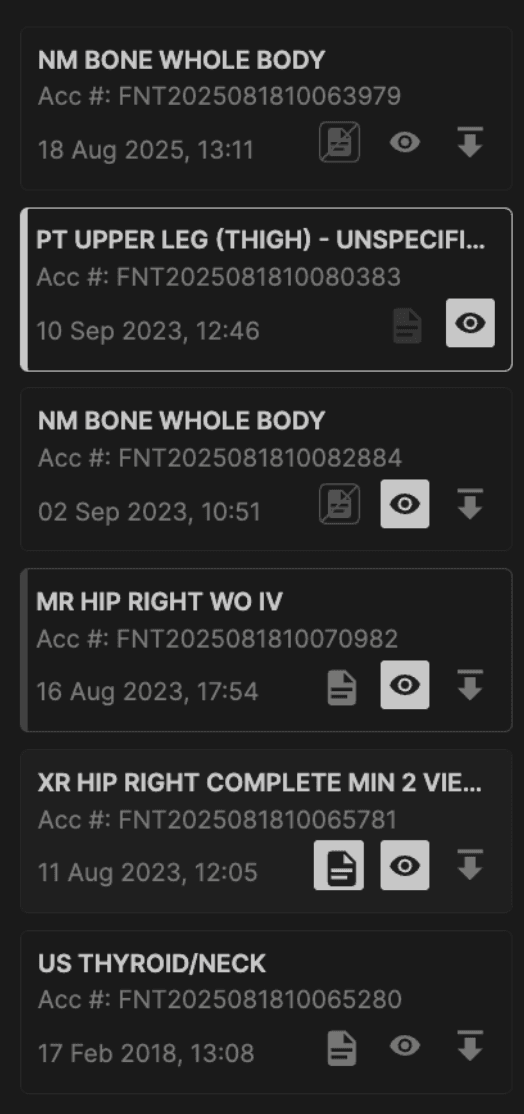
To choose additional exams, select the eye icon on the worklist to populate into Compare Mode.
If there is no prior exam, Compare Mode will not be available. |
 |
3. Understand the thumbnail rows and scrolling Each exam has its own row with its own scrollbar. Use the global left and right buttons to move all thumbnail rows together: Single click: move by one thumbnail column. Press and hold: continuous scrolling.
|
4. Load series into the viewports You can load images into the left viewports in two main ways: Drag and drop (custom layouts). Drag a thumbnail from any row onto a viewport. That viewport shows the selected series from that exam. Repeat in other viewports for any combination you need.
Double‑click a column (aligned layouts) Double‑click any thumbnail column on the right. The series in that column across all rows are loaded into the left viewports: 2 thumbnail rows: 2 filled viewports. 3 thumbnail rows: 3 filled viewports. 4 thumbnail rows: 4 filled viewports.
If a row has no series in that column, its corresponding viewport remains empty.
Which series are considered “in that column” depends on where each thumbnail row’s scrollbar is positioned, plus any global scrolling you have done. |
5. Use tools while in Compare Mode The usual image tools (for example, window/level, zoom, pan) are available in the left viewports. If you switch display modes: 2D / 3D / Fusion would apply to the left panel, and the right rows remain visible which would help you load the series of your choice.
Turning Compare Mode off returns the viewer to your prior layout. If you then turn Compare Mode back on, it starts again from the default Compare layout empty viewports on the left, rows on the right.
|
6. Hide comparison exams If one of the prior exams is not useful: In the right panel, find the comparison row you want to remove. Click on the highlighted eye icon option for that row. The row disappears from Compare Mode, and its images no longer appear in viewports.
|