Reading physician essentials
How to create reading physician–level templates
Step 1: Access Reading Physician–Level Templates To get started, log in as a reading physician and navigate to your Profile. From there, open Custom Templates and Macros. | |
|---|---|
 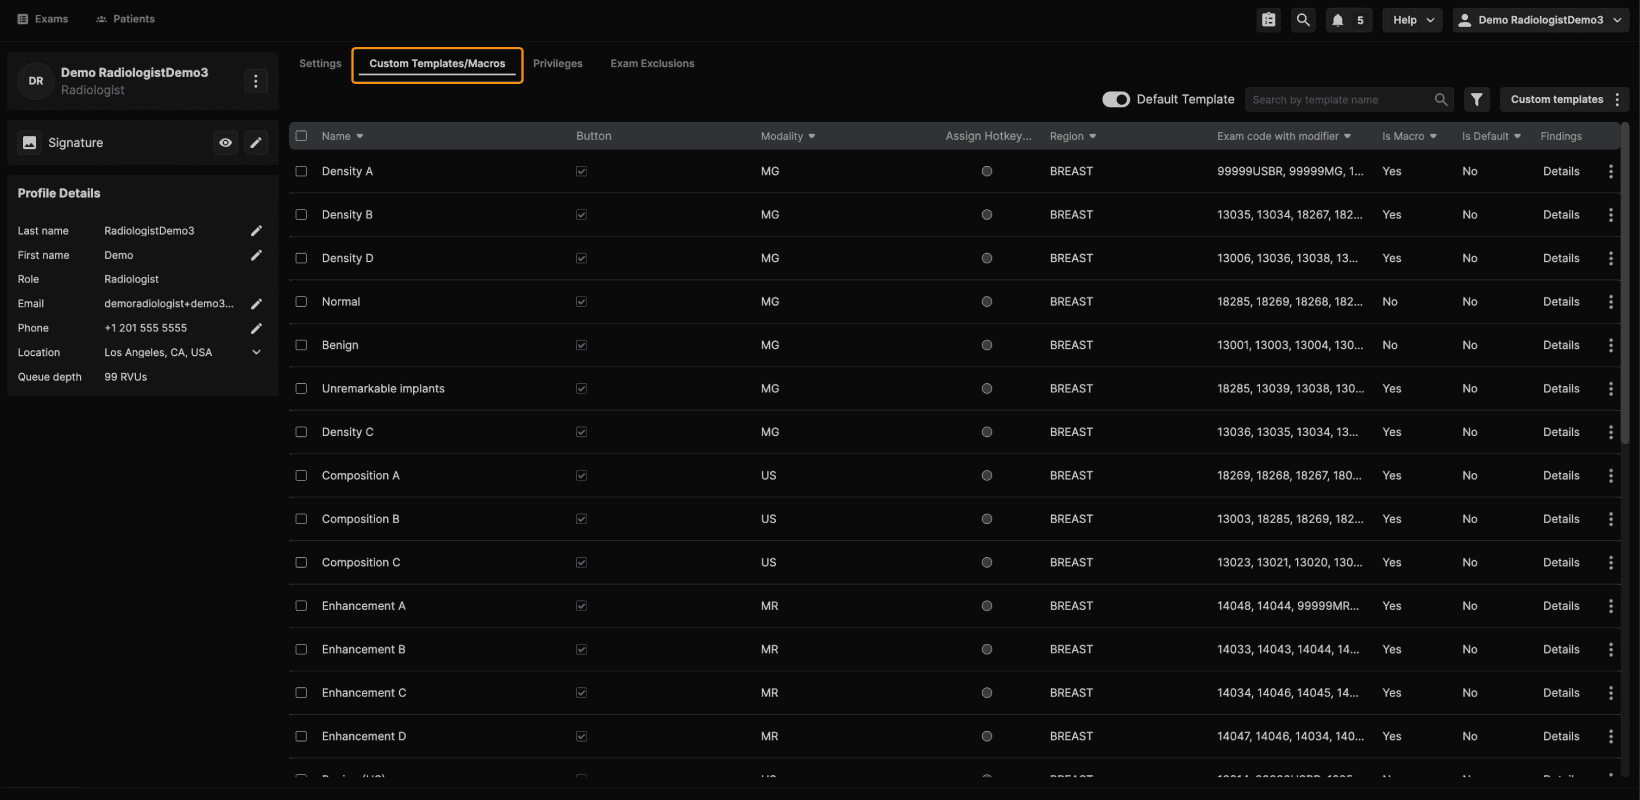 |
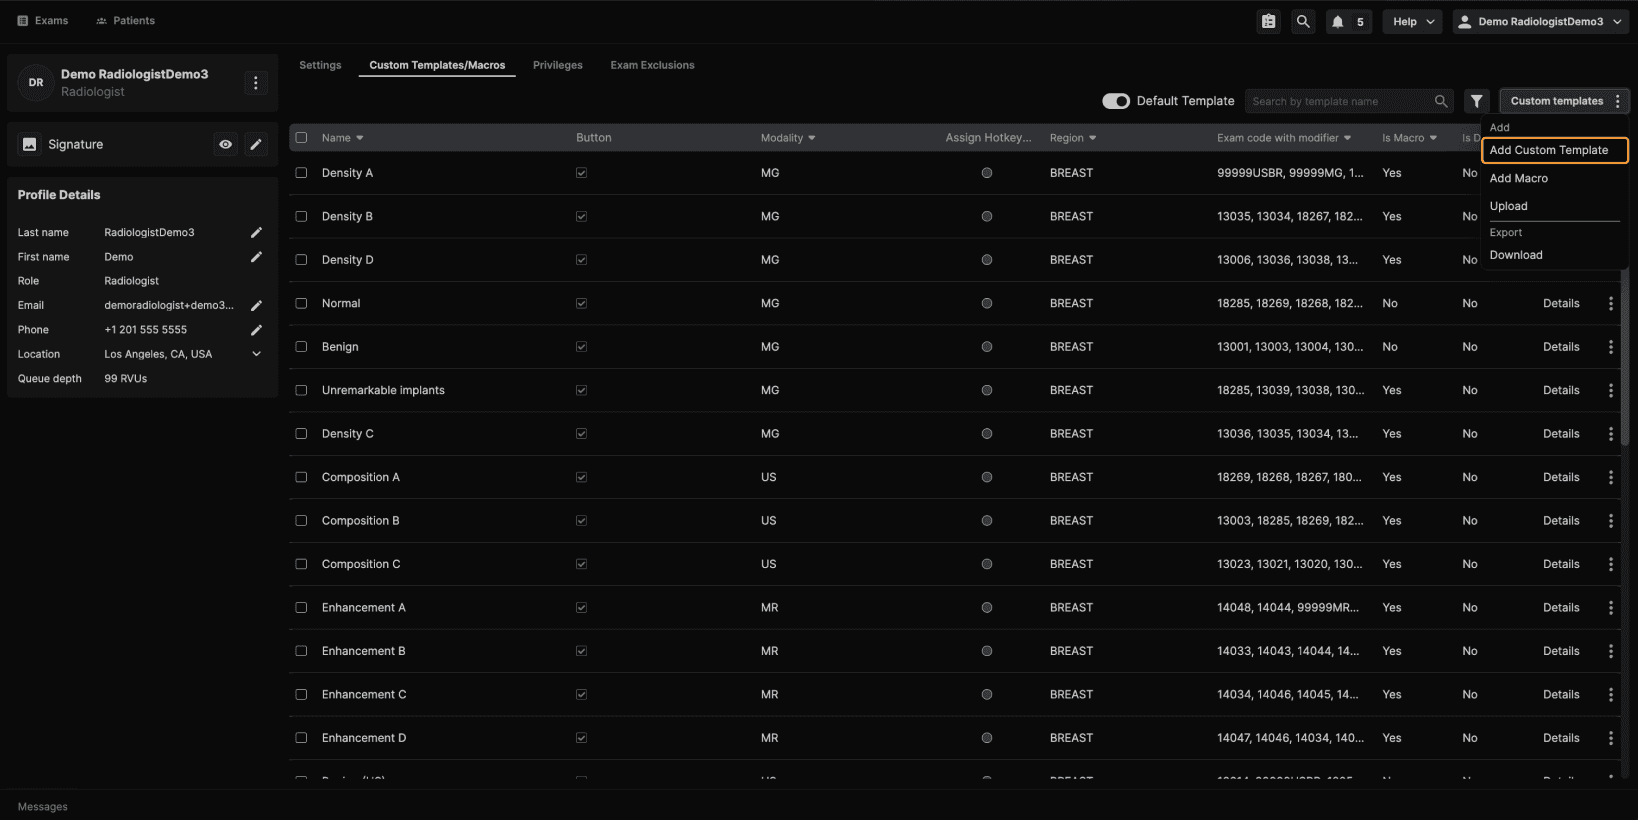
Step 2: Create a New Template or Macro To create a new template, select Add Custom Template. This opens the template creation screen. |
|---|
 |
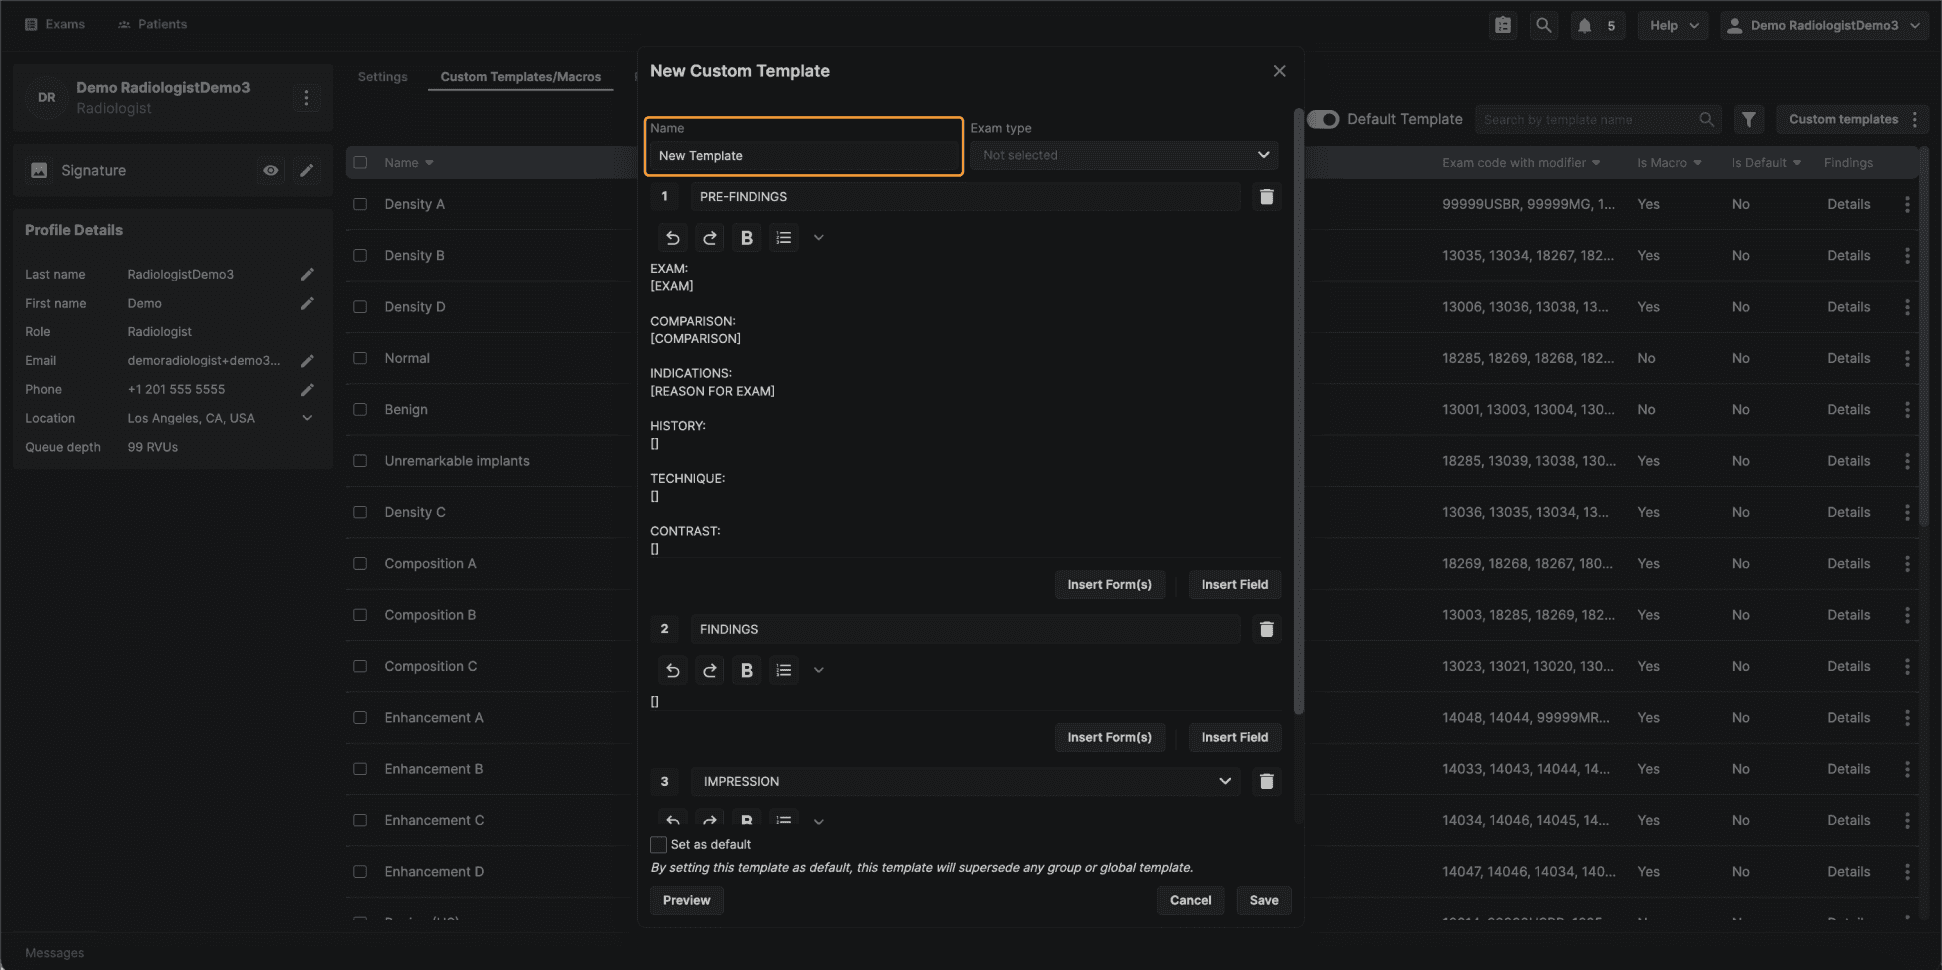
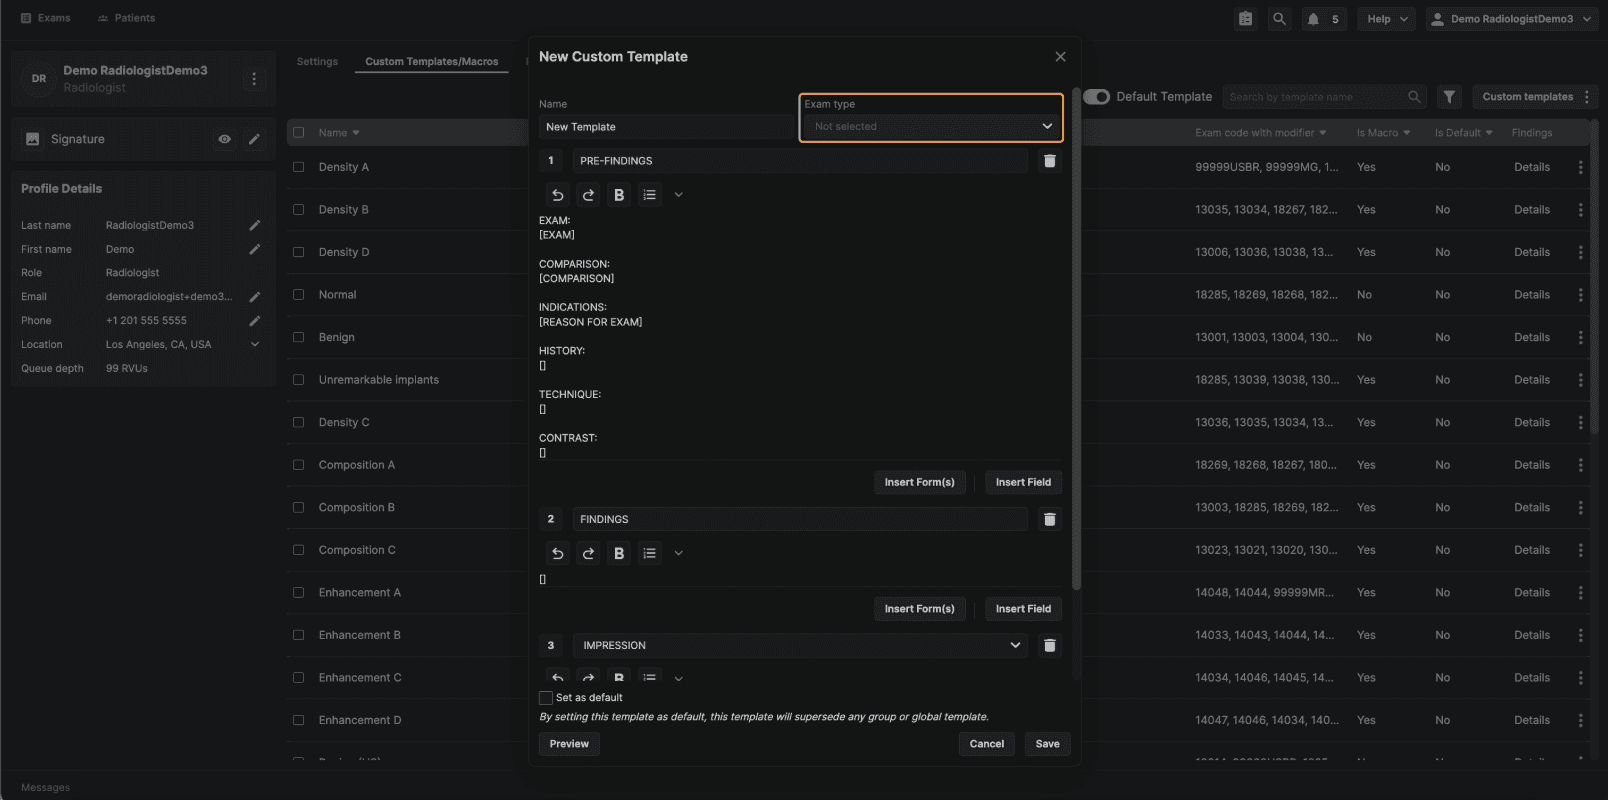
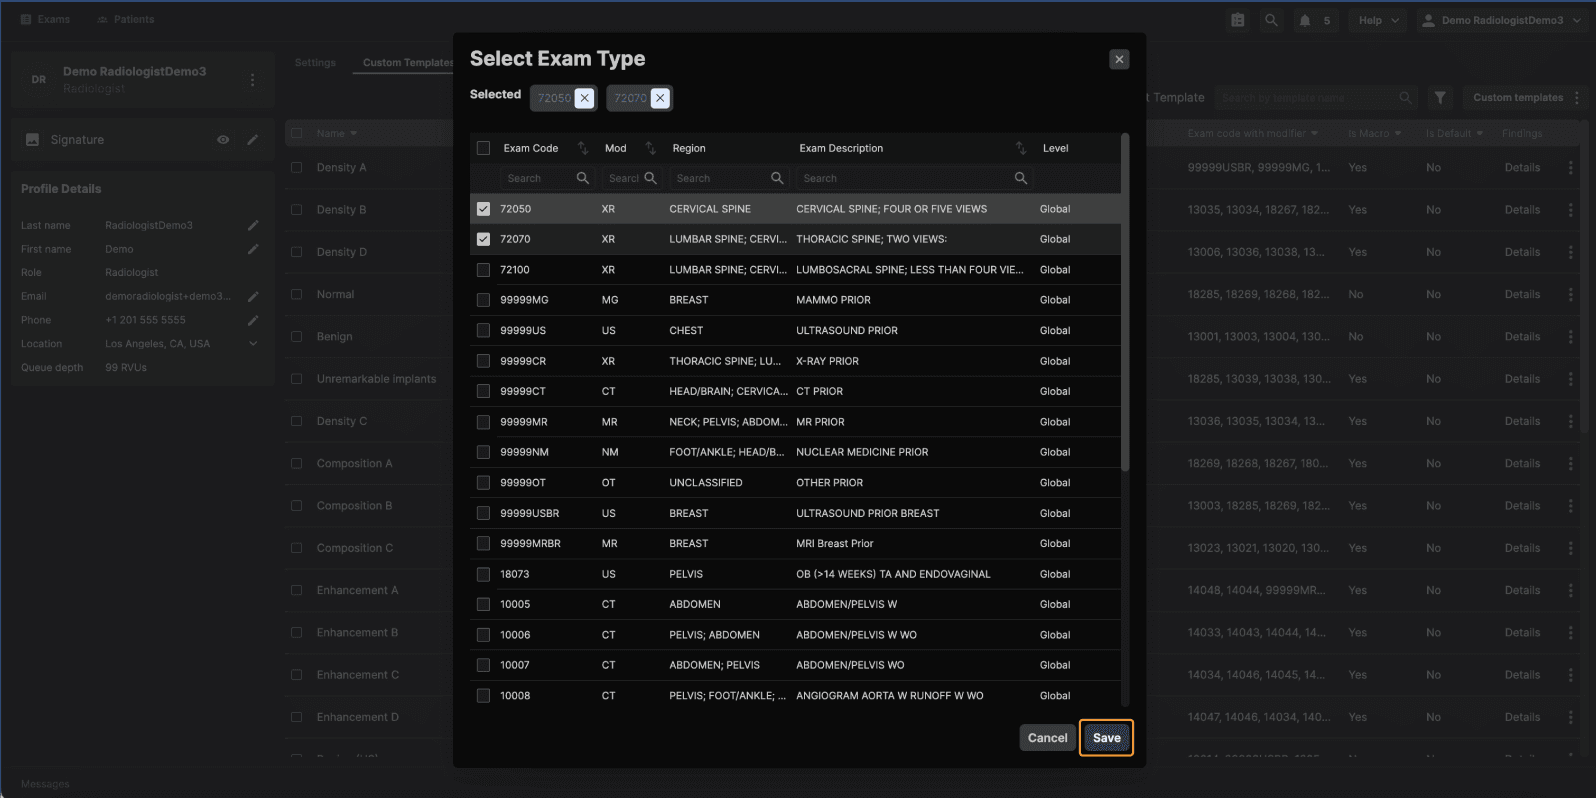
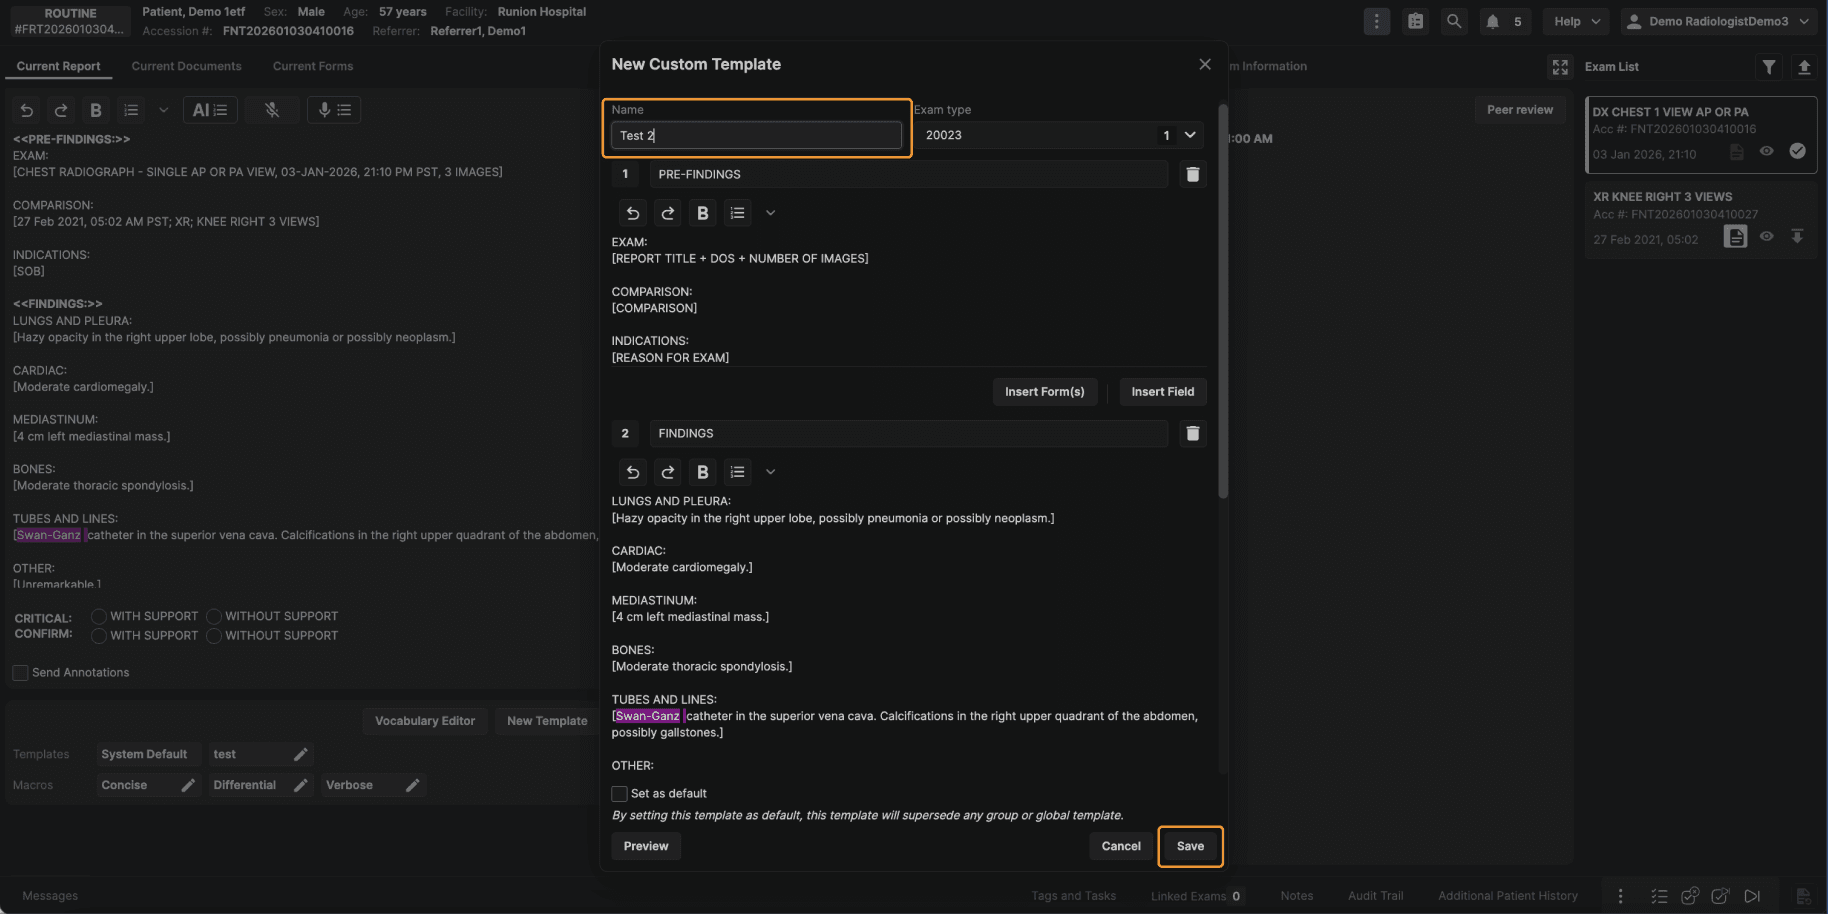
Step 3: Name the Template and Select Exam Codes In the template editor:
|
|---|
 |
Once exam codes are selected, the template will be associated with those exam types. |
  |
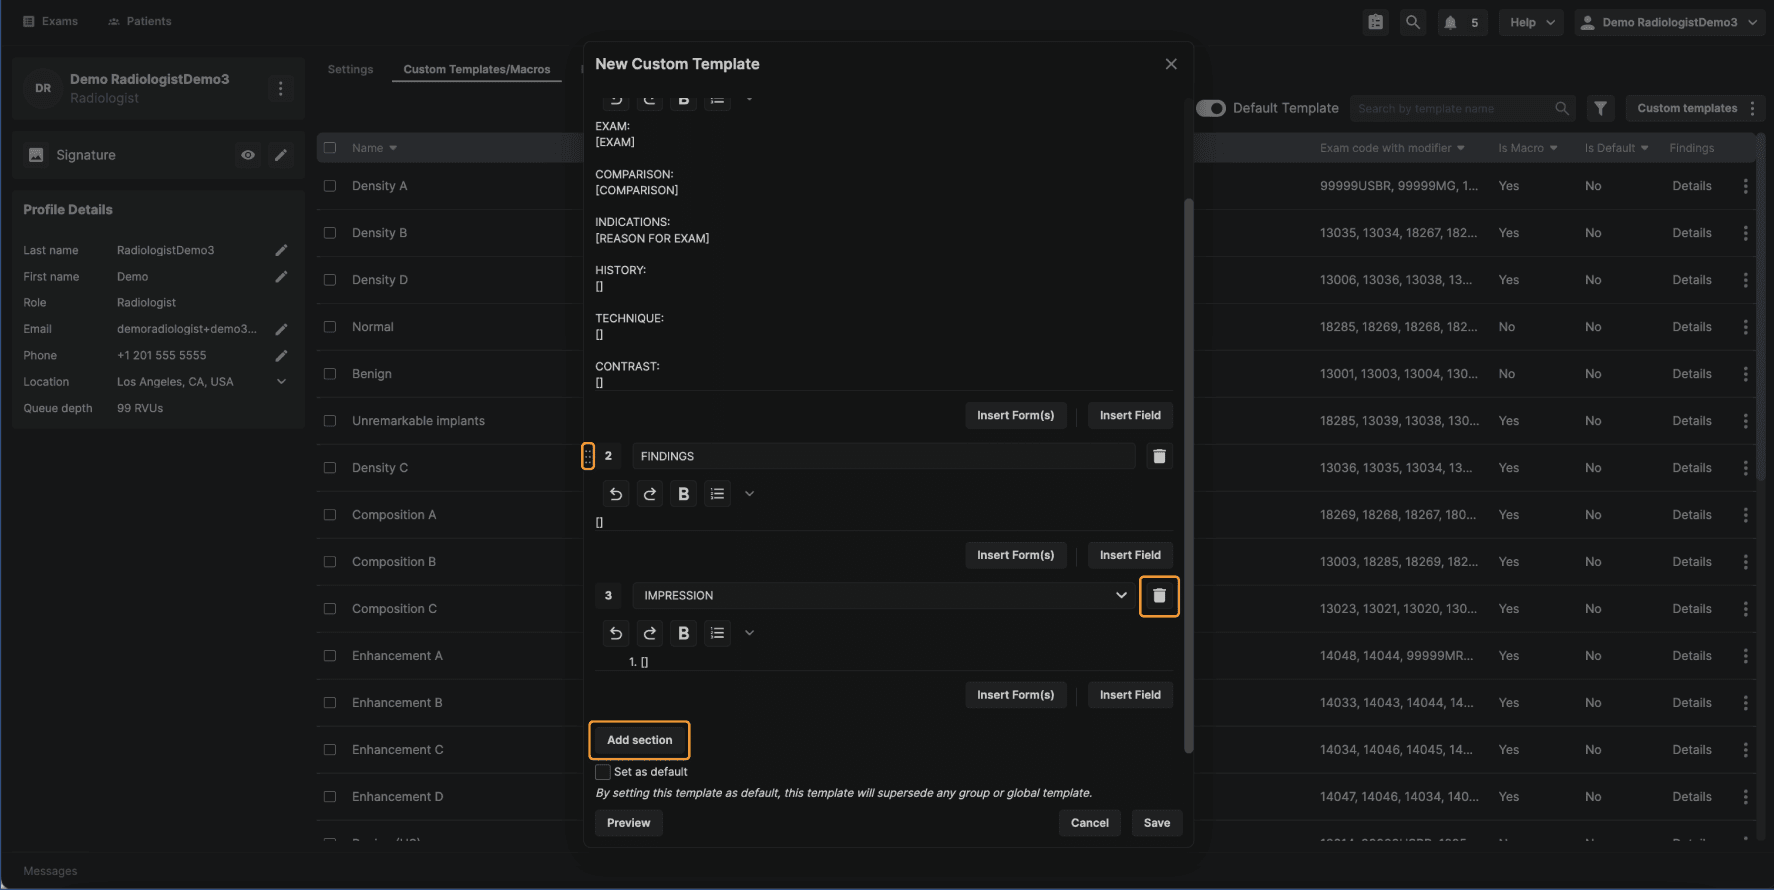
Step 4: Configure the Template Structure The template opens with predefined sections. From here, you can:
All section controls are available directly within the template editor. |
|---|
 |
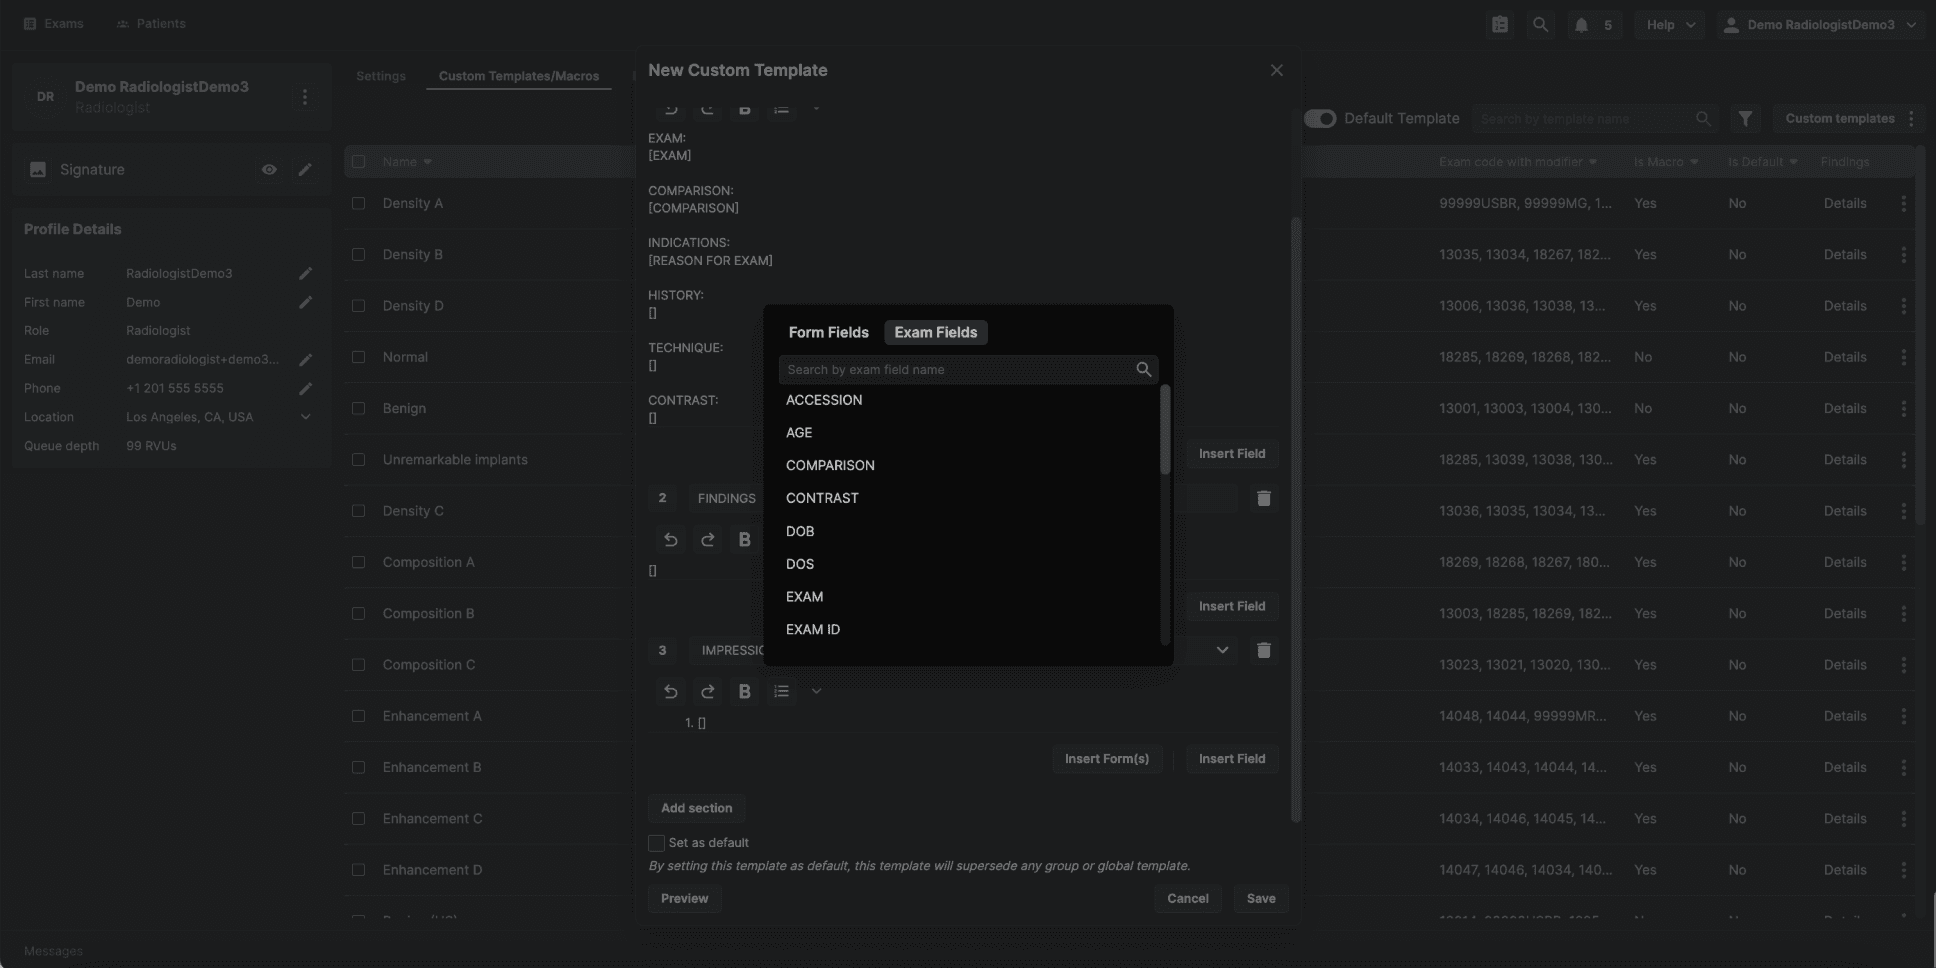
Step 5: Add Template Content, Forms, and Exam Fields Within each template section, you can add content in multiple ways:
|
|---|
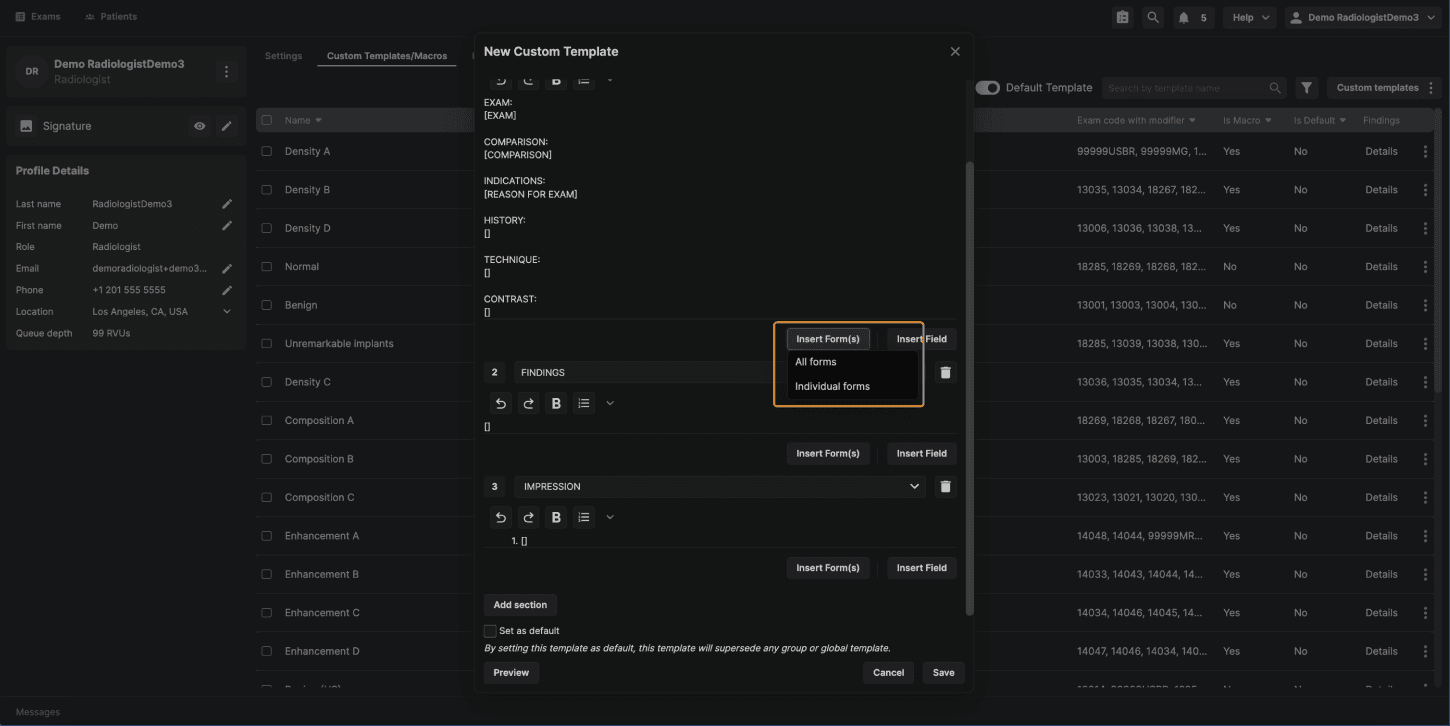 |
When an exam contains the selected forms or fields, that information will automatically populate in the report, reducing manual entry and improving consistency. |
  |
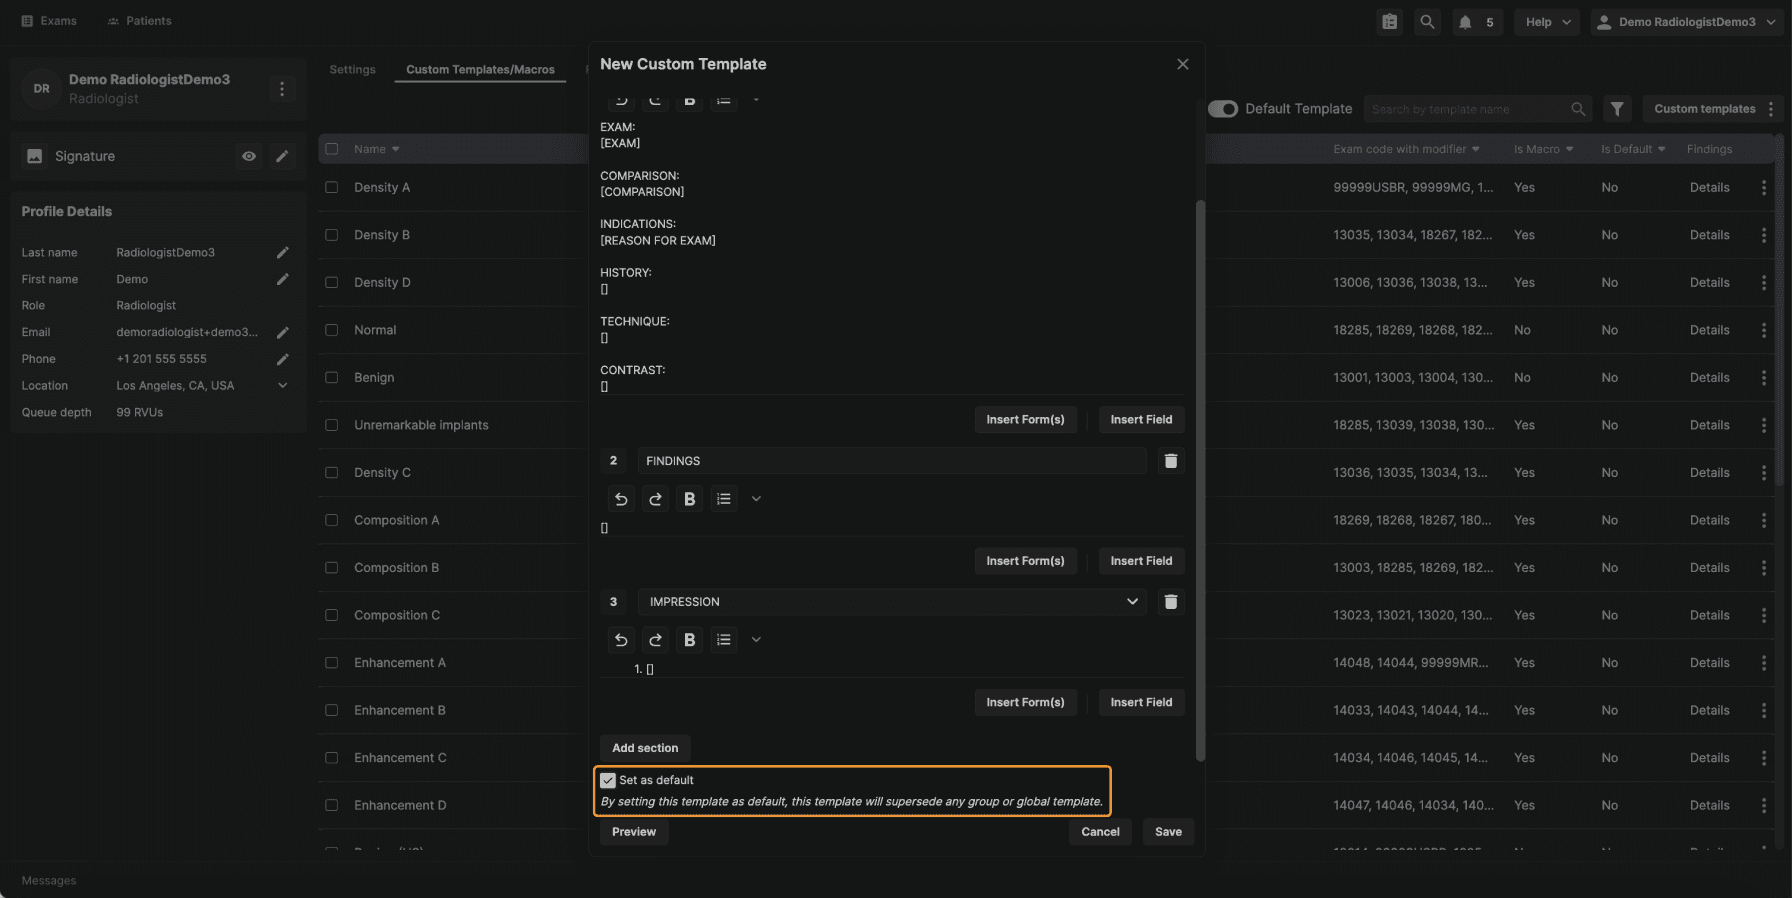
Step 6: (Optional) Set the Template as Default Reading physician–level templates include an option that is not available at other template levels: Set as Default.
This setting can be changed later if needed. |
|---|
 |
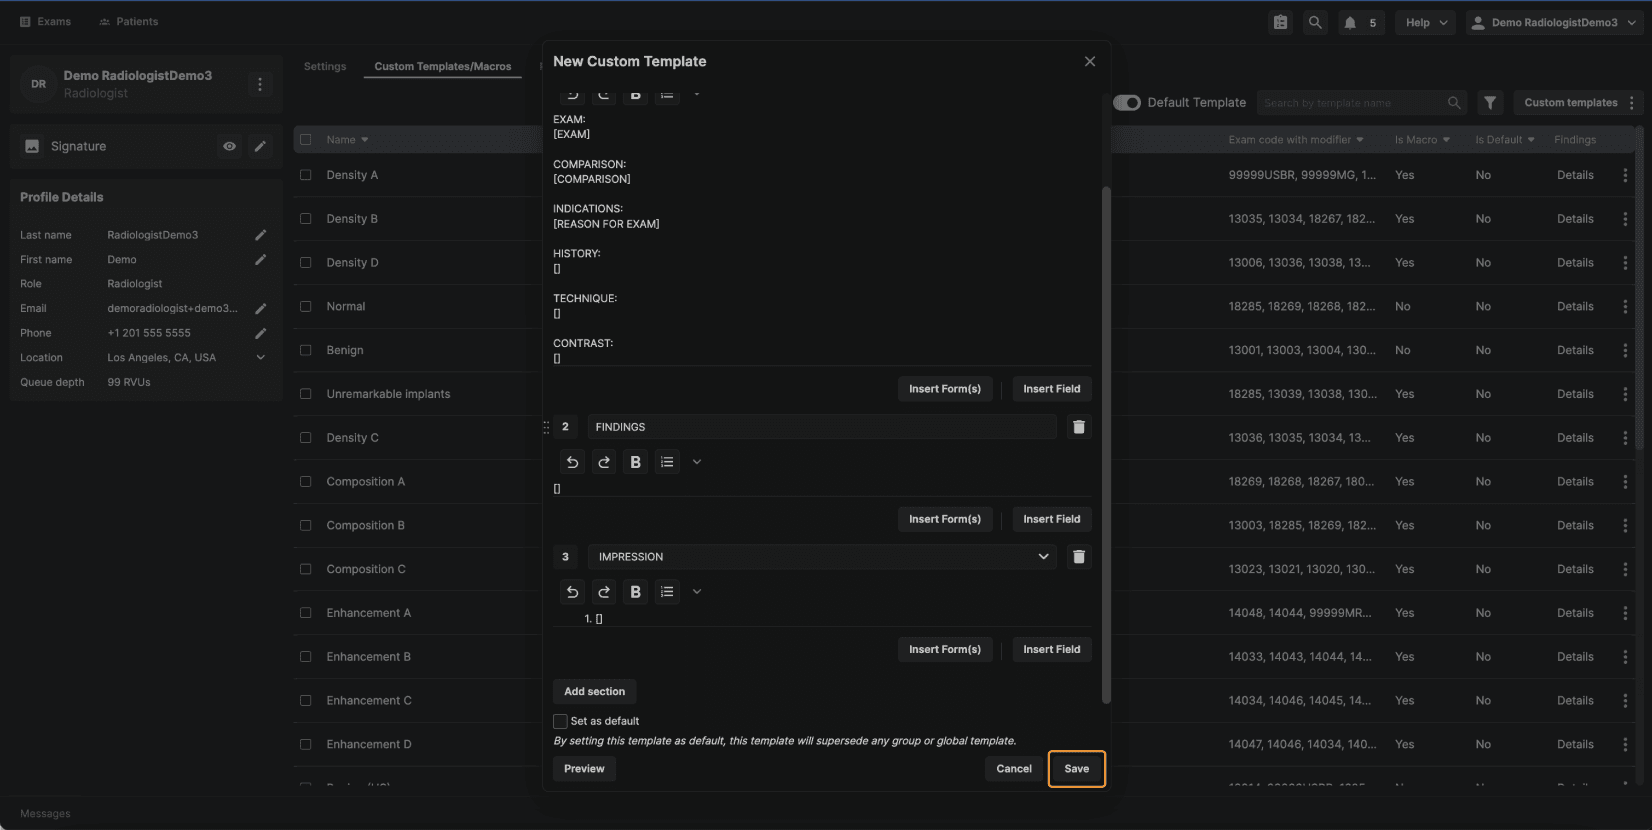
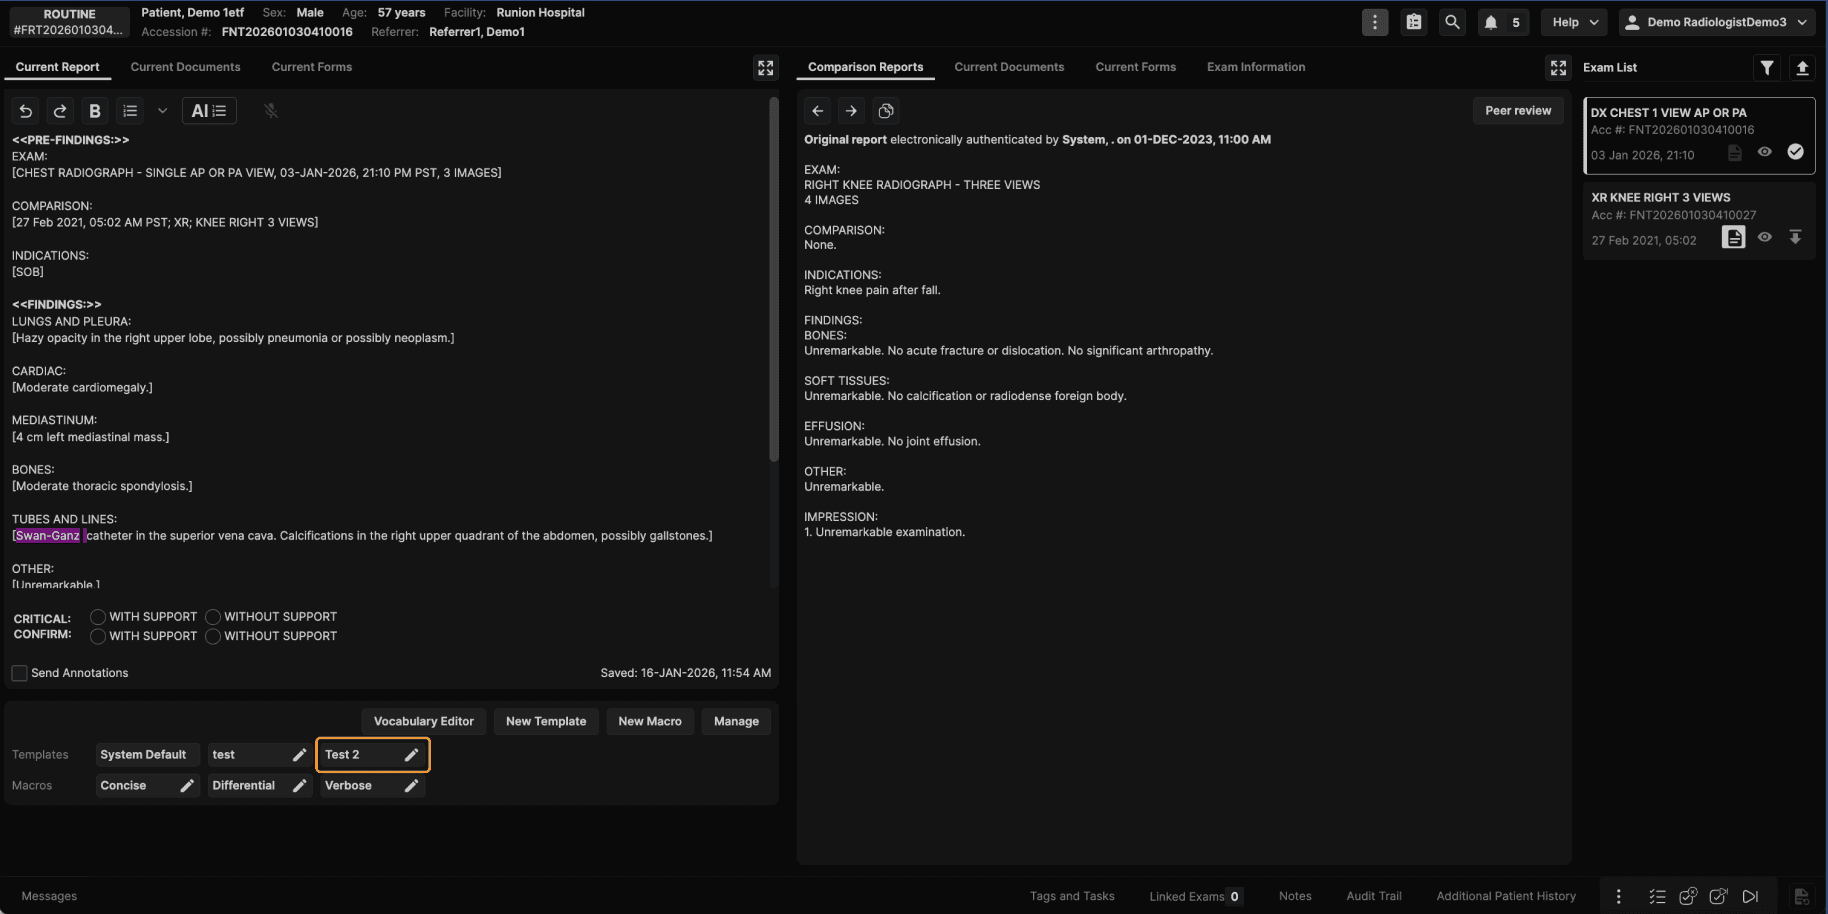
Step 7: Save the Template Once the template is configured, select Save. The template will now appear in your personal template list under Custom Templates and Macros. |
|---|
 |
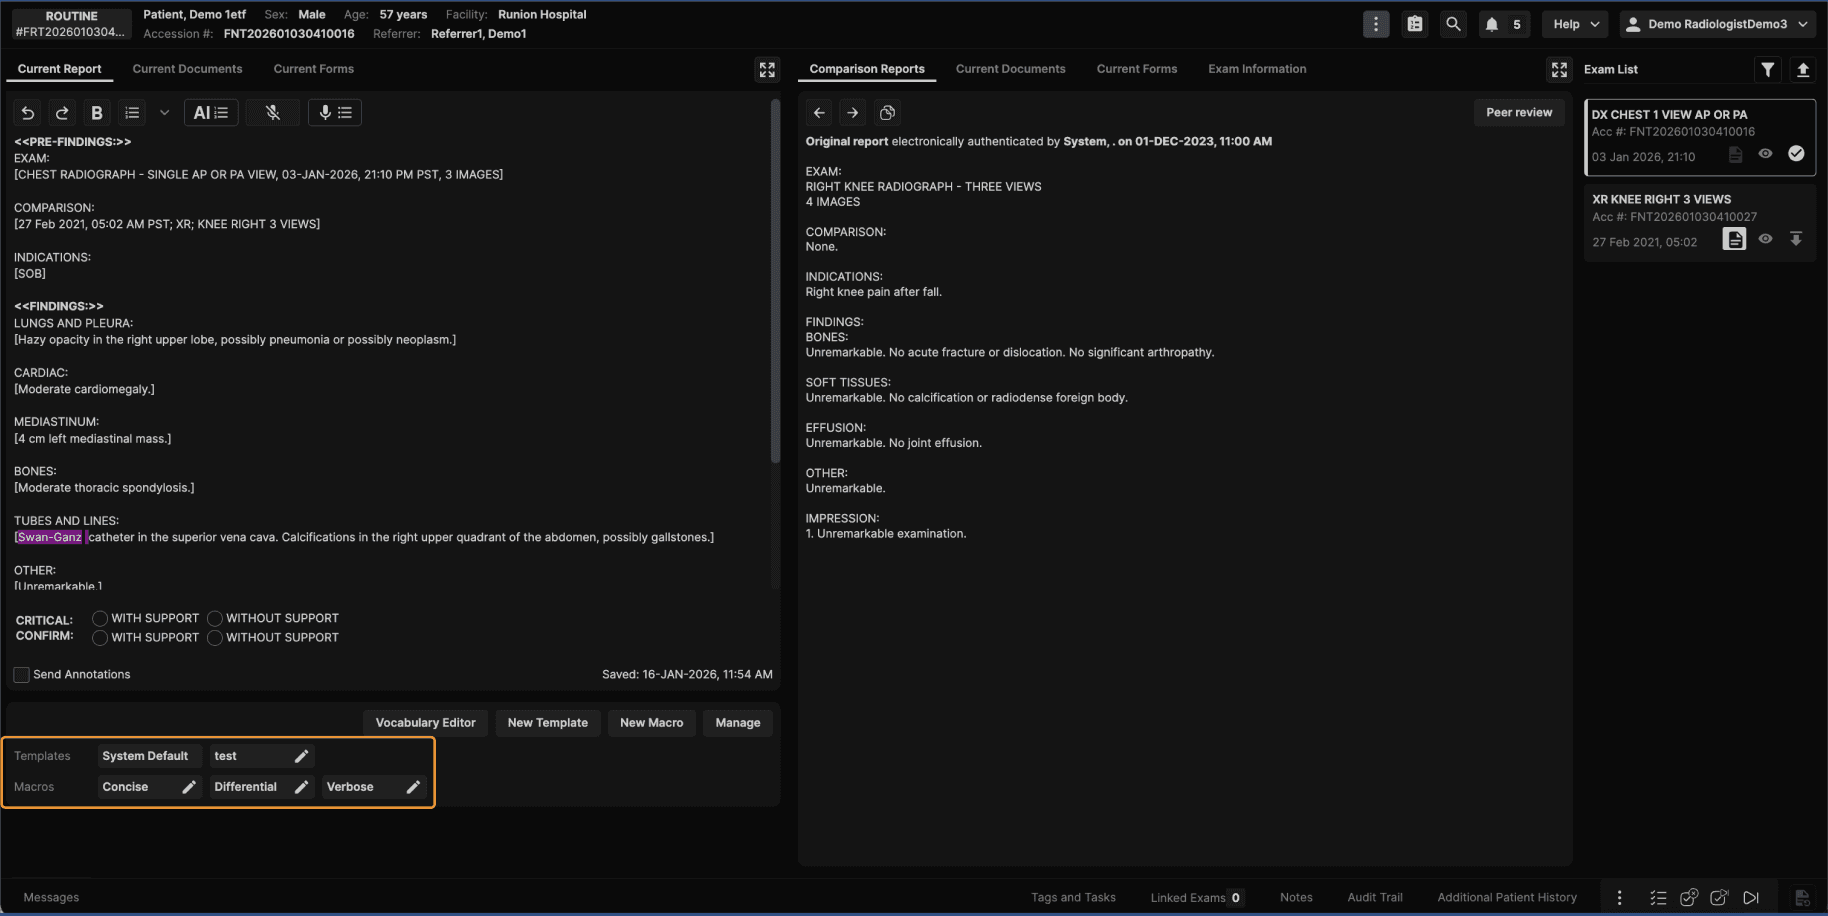
Step 8: How Templates Are Applied When Reporting When you open an exam assigned to you, the system applies templates in the following order:
Even when a default template is applied automatically, you can still manually select:
|
|---|
 |
Step 9: Create a Template Directly From the Reporting Screen Reading physicians can also create templates while actively reporting. While working in the reporting screen:
|
|---|
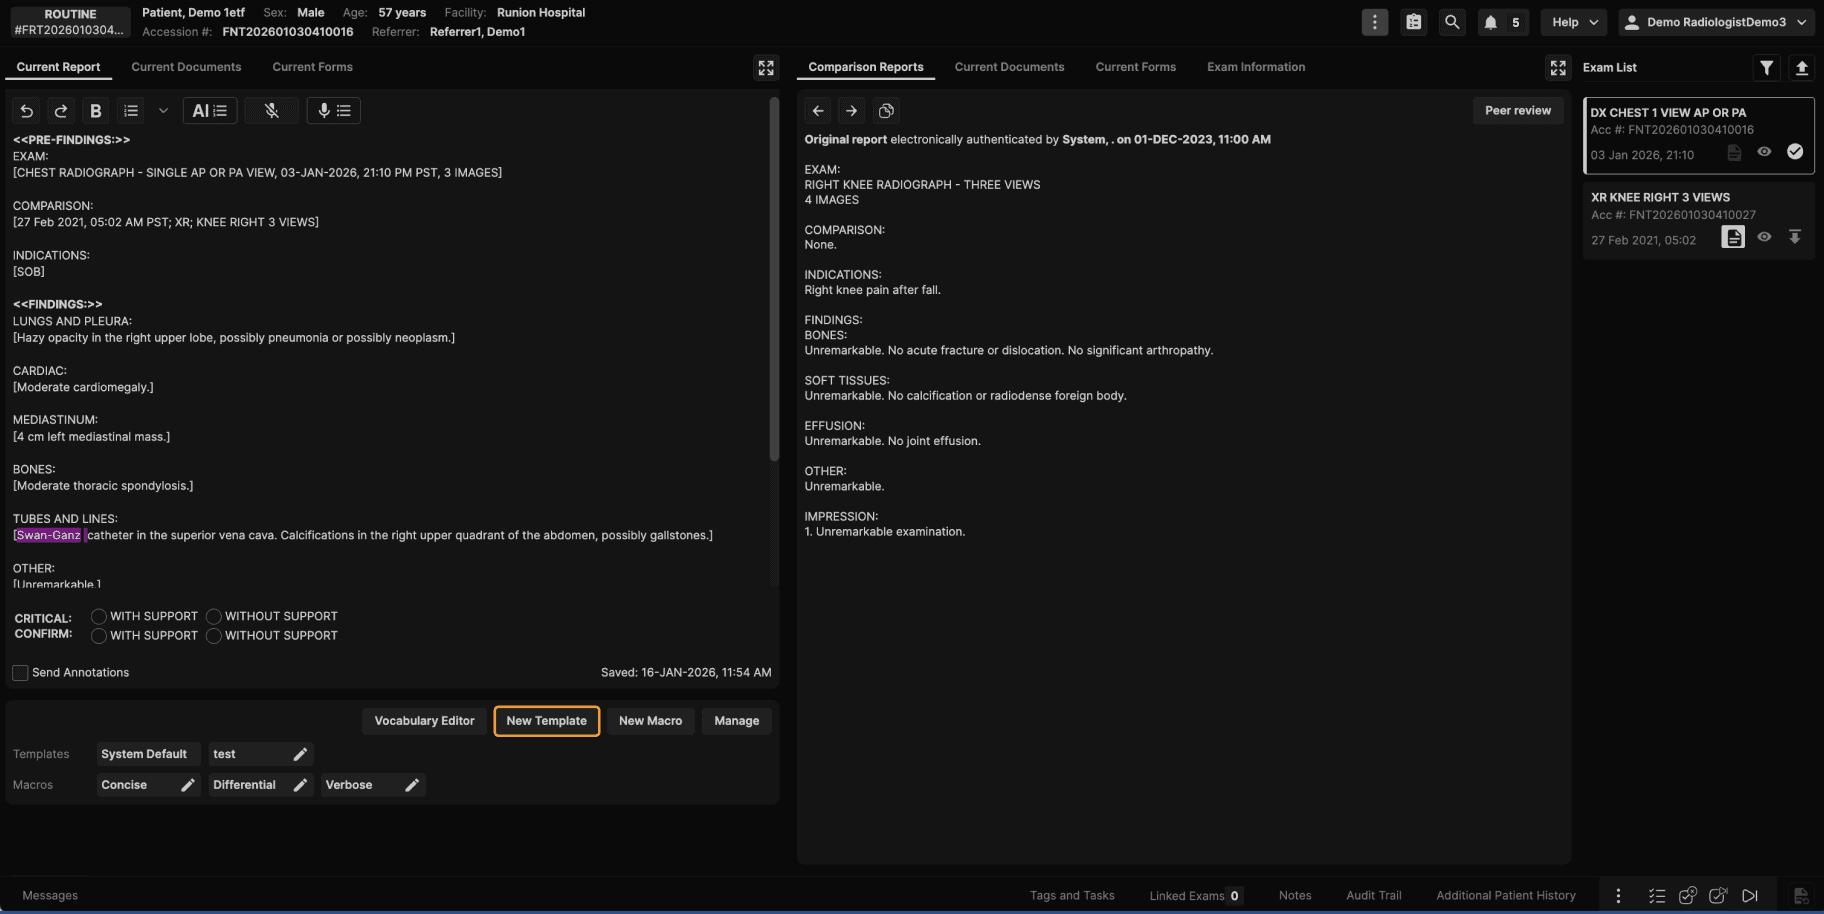 |
The system automatically associates the template with the correct exam code. Once saved, the template becomes available for future exams. |
  |
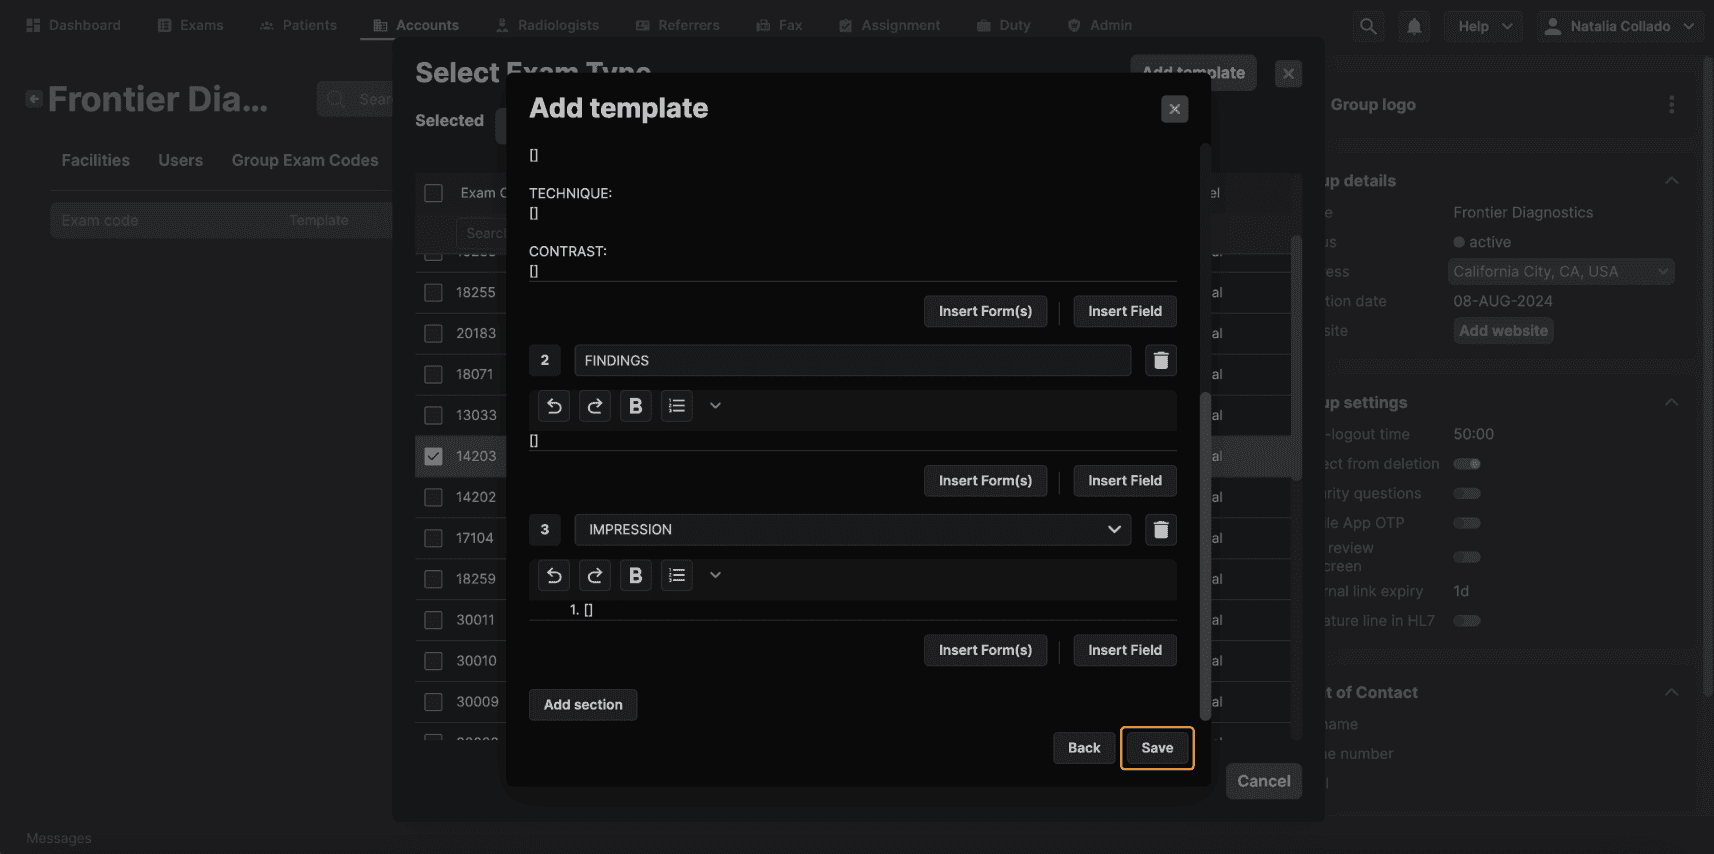
Step 10: Admin-Created Templates for Reading Physicians Administrators can also create templates on behalf of reading physicians. To do this:
| |
|---|---|
 |