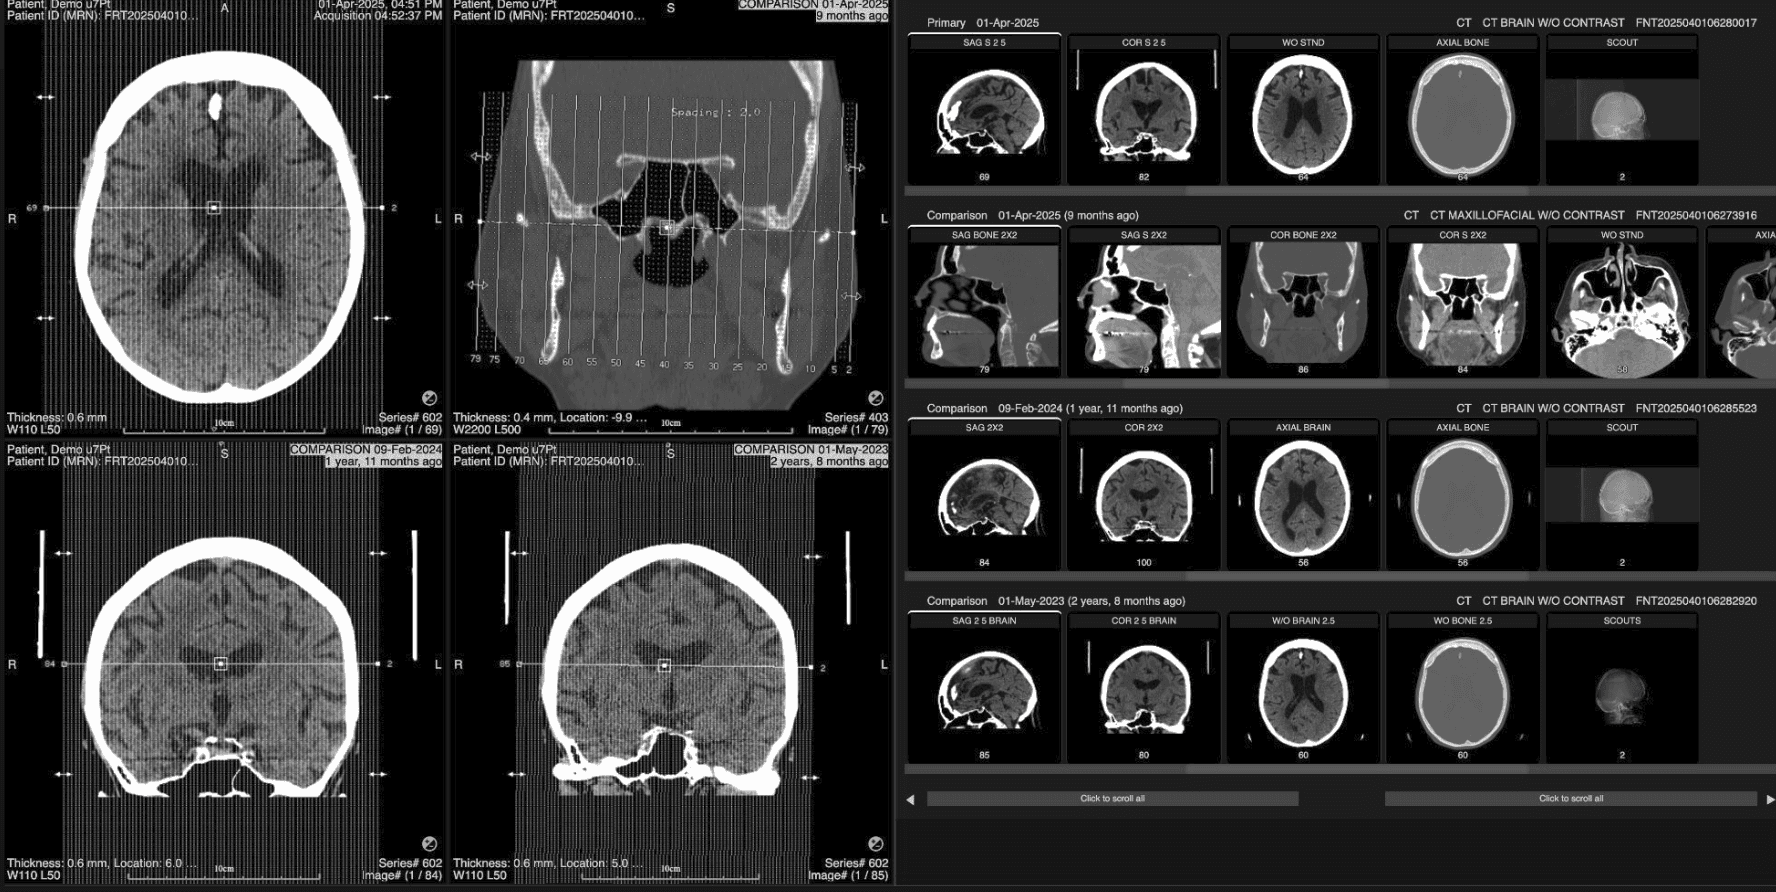
Compare Mode | ||
|---|---|---|
Compare Mode lets you review the current study with up to three prior studies in a single view.
|
How to use Compare Mode | ||
|---|---|---|
Layout
| ||
Accessing the view
| ||
Load and align series
| ||
Note: Compare Mode is available when you open CT, MR, PET, NM, US, or XR and there is at least one prior exam. It is not available for Mammography. | ||
 | ||
 |
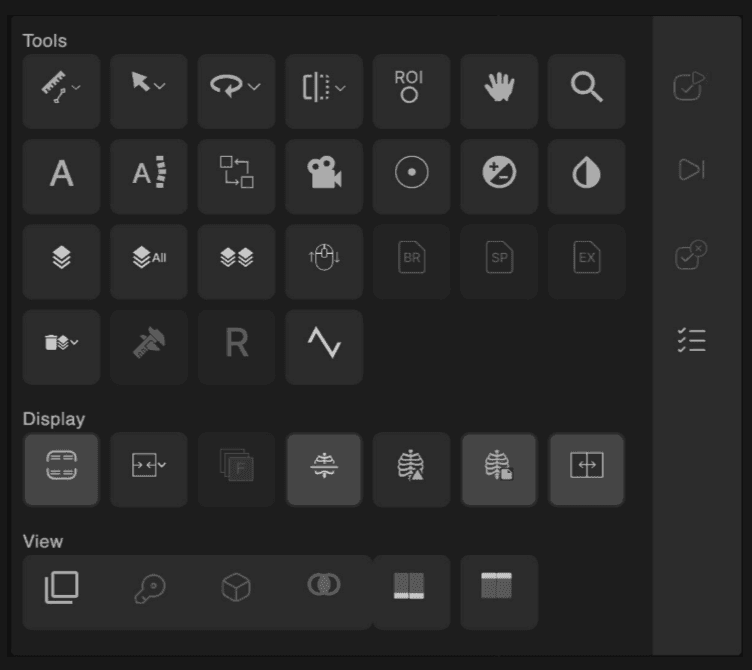
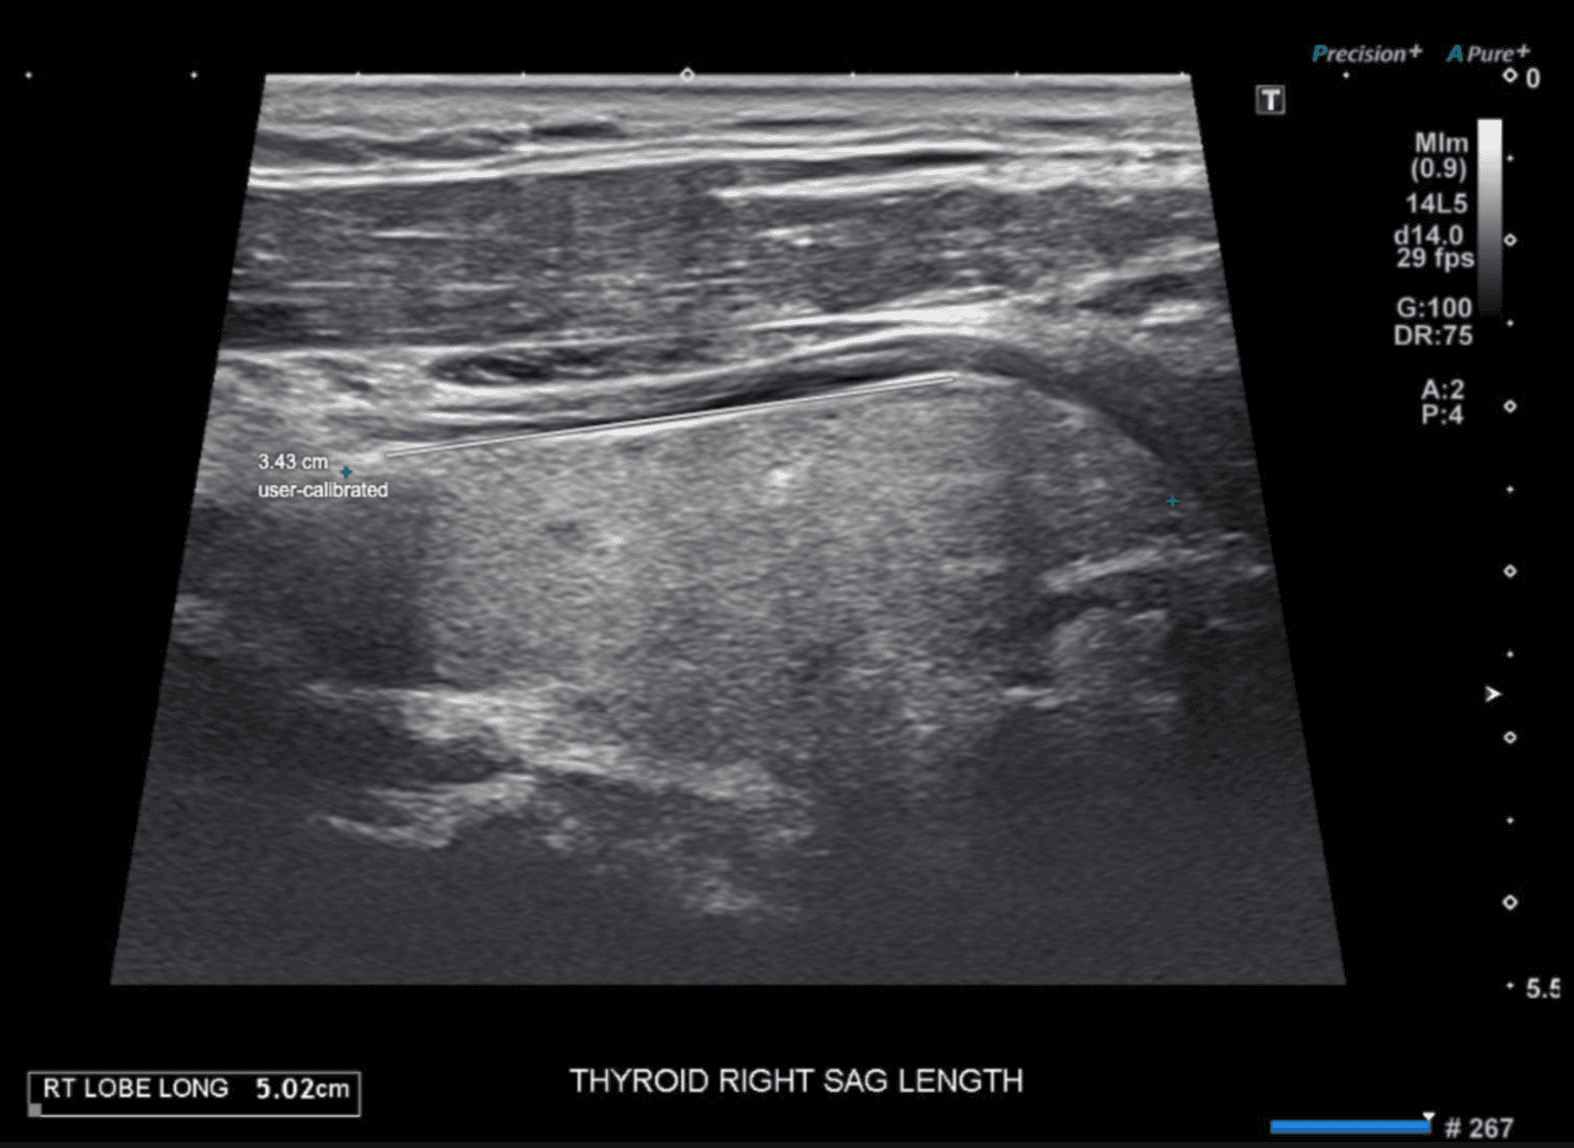
Distance Calibration Tool | ||
|---|---|---|
Calibrate uncalibrated images by drawing a reference line and entering its real length, so distance measurements use cm/mm instead of pixels. | ||
Benefits
| ||
How to use the Distance Calibration Tool
| ||
Note: This tool is disabled for DICOM-calibrated images. Calibration is per image and not saved after you close the exam. Only one calibration is needed per image. | ||
 | ||
 |
Auto Window/Level | ||
|---|---|---|
Auto Window Level (W/L) MR and XR now allows you to optimize image brightness and contrast automatically. | ||
How to use it:
| ||
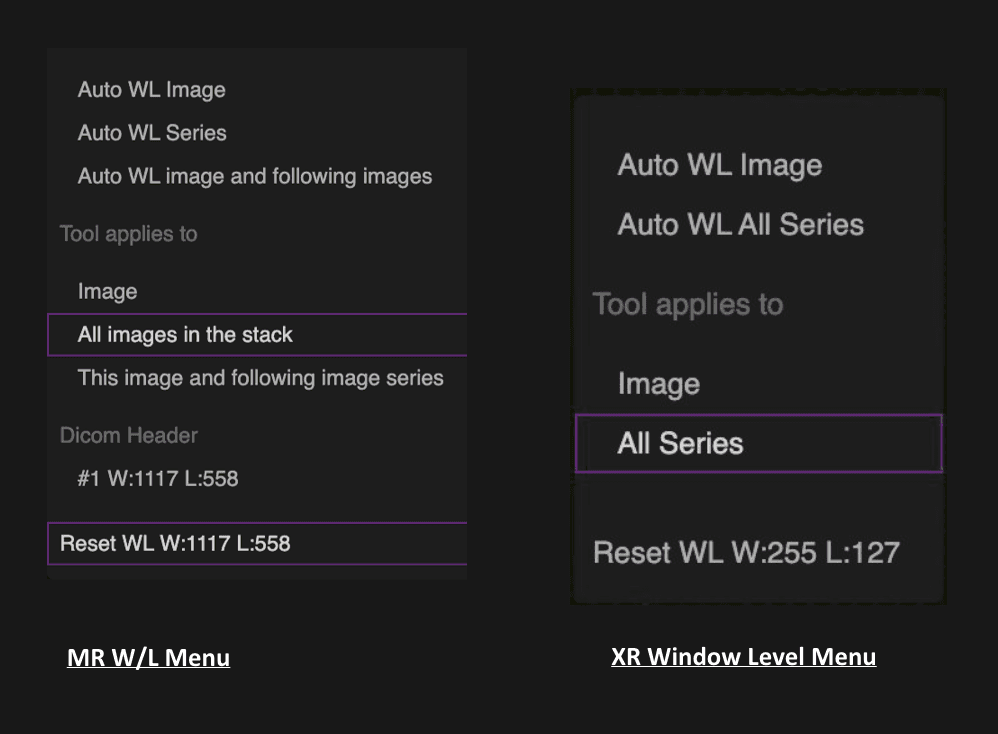 |
Manual Window/Level Additions | ||
|---|---|---|
Manual Window Level (W/L) now allows you to adjust the W/L for a single image or multiple images at once with MR exams. Keyboard shortcuts let you change the window level much faster. | ||
How to use it:
| ||
 |
Overlay and Labelling Improvements | ||
|---|---|---|
MRI DICOM Overlay Additions:
| ||
 | ||
MG View Position Labelling:
| ||
 |